Some children find it difficult to space their letters in words correctly and to show spacing between words. There can be a number of reasons for this:
They may not understand the concept or conventions of spacing words and letters and this needs to be explained.
Other Physical Skills such as poor spatial awareness skills, eye tracking or general eyesight.
Poor Key Strengths and/or Key Abilities elements, required for handwriting, such as sitting position, paper position, pencil grip, hand position and letter formation knowledge may also be hindering them.
‘Tips to support letter and word spacing’ will help you to identify if your child is having difficulty in understanding the spacing conventions and how to support them: https://teachhandwriting.co.uk/spacing-difficulties.html
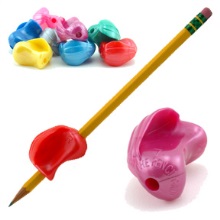
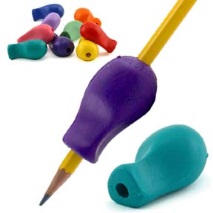
Aids to support good pencil grip can be very useful for some pupils. However, one of the issues with their use is that, when a pupil has not got the pencil grips to hand, they revert back to the original poor grip position.
Pencil grip aids generally do not correct the grip, they just force the hand and fingers into the correct position for writing. To correct the grip permanently the physical factors that have created the incorrect grip need to be addressed.
The use of grips can encourage a pupil to write more fluently, building their self-esteem, whilst you work on correcting the factors that have caused a poor grip to form. The long-term aim must always be to get the pupil to grip the pencil correctly without the use of aids.
Hand Swapping is a normal developmental stage in infants and young children and therefore, at this stage, not a sign that a child is uncertain of their dominant hand. However, this is not ideal for a child who has started school.
Hand swapping throughout a task is not necessarily a sign that a child is uncertain of their dominant hand.
There are two routes to tackling the hand swapping issue, the one to use depends on your answers to the following questions.
1. Does the child usually start with the one hand and then swap when that hand gets tired?
You can usually tell if this is the case because they may shake out or rub the tired hand and once it is rested go back to using it again. This is probably because their fine motor skills are weak. Through focused games and activities (https://teachhandwriting.co.uk/handwriting-muscles.html#hand and https://teachhandwriting.co.uk/warm-ups.html ), the muscle strength and dexterity can be gradually built up in the dominant hand, which in turn will build their stamina so that the hand swapping will reduce until they stop it altogether.
Once you are sure of dominance gently discourage swapping hands by taking a break from the activity and coming back to it a couple of minutes later using the preferred hand.
2. Does the child use their left hand if items are presented on their left-hand side and their right hand if they are presented on the right-hand side?
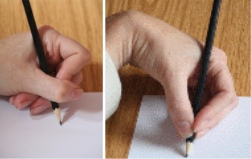
We often talk about the most appropriate grip for handwriting being the tripod grip; but this usually only refers to finger position. It is easy to forget the importance of the actual hand position in relation to the pen and paper for handwriting.
The ideal position is for the hand, wrist and elbow to be below the tip of the pencil and under the writing line for both left and right-handed writers.
Some children will hold the pencil in a tripod grip but develop a hooked hand position or move the elbow too far up the table, causing the forearm and wrist to be nearly horizontal with the table edge, because they feel they can see what they are writing more clearly.
A hooked grip puts unnecessary strain on the hand ligaments and forces the body into a poor sitting position, again putting extra strain on the body. This in turn makes handwriting a tiring and uncomfortable task, impacting on a child’s overall learning experience.
It takes time to correct a poor hand position but it is well worth the perseverance as it will enable a child to write freely and more comfortably.
When writing normally, encourage children to angle the paper appropriately as this will also help to correct a poor hand position. With the correct paper tilt, they will always be able to see what they are writing. If the paper is tilted at the correct angle for them, they will find a hooked hand position, or having their forearm further up the table, more difficult and uncomfortable to maintain.
Some children will find writing on a sloped desk helpful. Not all are comfortable writing or drawing on a flat surface and may benefit from the paper being positioned on an angled or sloped board. If you are not sure, instead of buying a specialist board, you could make one. Try using a ring binder or lever arch file stuffed with magazines and newspaper to make a sloped board. Tape the edges to stop the papers falling out or you could cover it in sticky back plastic to give a smoother finish to the board. The advantage of this is that you can make them to any angle of slope. Try a few to see which, if any, your child prefers. You may find that they only need the sloped board for a short while. It may also help to reduce the angle of the slope over time so that they gradually get used to moving from a sloped to horizontal writing plane.
Hand Swapping is a normal developmental stage in infants and young children and therefore, at this stage, not a sign that a child is uncertain of their dominant hand. However, this is not ideal for a child who has started school.
Hand swapping throughout a task is not necessarily a sign that a child is uncertain of their dominant hand.
There are two routes to tackling the hand swapping issue, the one to use depends on your answers to the following questions.
1. Does the child usually start with the one hand and then swap when that hand gets tired?
You can usually tell if this is the case because they may shake out or rub the tired hand and once it is rested go back to using it again. This is probably because their fine motor skills are weak. Through focused games and activities (https://teachhandwriting.co.uk/handwriting-muscles.html#hand and https://teachhandwriting.co.uk/warm-ups.html ), the muscle strength and dexterity can be gradually built up in the dominant hand, which in turn will build their stamina so that the hand swapping will reduce until they stop it altogether.
Once you are sure of dominance gently discourage swapping hands by taking a break from the activity and coming back to it a couple of minutes later using the preferred hand.
2. Does the child use their left hand if items are presented on their left-hand side and their right hand if they are presented on the right-hand side?
There have been many articles over the last few years reporting the fact that children are struggling to hold pencils correctly for handwriting and drawing. The reasoning for this is more often than not based on our children’s use of technology and the effect this has on their hand strength and finger dexterity (Fine Motor Skills).
Poor fine motor skills and hand strength not only affects a child’s ability to learn and develop a good handwriting style it can make other grip patterns difficult to master as well. Power, precision, stability or a combination of all three are needed by children to compete everyday tasks such as dressing, picking up and carrying objects (especially small items), using a knife & fork, other tools and scissor skills.
Learning to hold a pencil in an appropriate grip is not the only grip style your child needs to develop, especially once they have started school. They will need to develop those which enable them to effectively use scissors as well as a knife and fork. If your child struggles with these activities it may be that they need to be taught how to form the grips correctly (as bad habits develop quickly and are difficult to change) or develop the appropriate hand and finger skills.
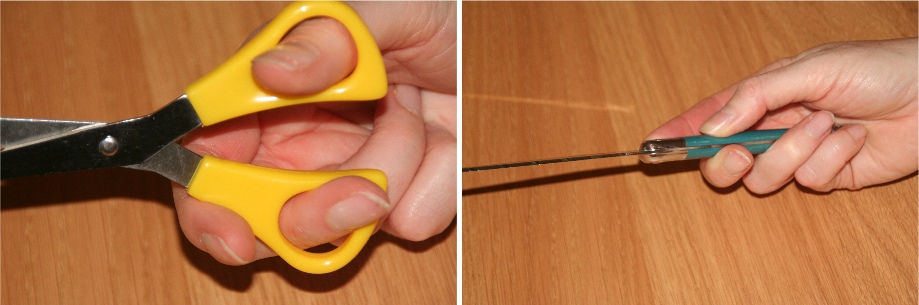
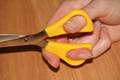
How to Hold Scissors
The tip of the thumb is in the top hole of the scissor handle while the tip of the middle finger is in the bottom hole. The index finger is on the bottom edge of the lower handle supporting and stabilising the scissors. The ring and little finger are curled into the palm (except if you are using large scissors as then they will fit in the bottom hole of the handle with the middle finger, to help create the cutting action).
The non-cutting hand should support the paper or item being cut; the thumb is on top of the paper and the fingers underneath, steadying and moving the paper.
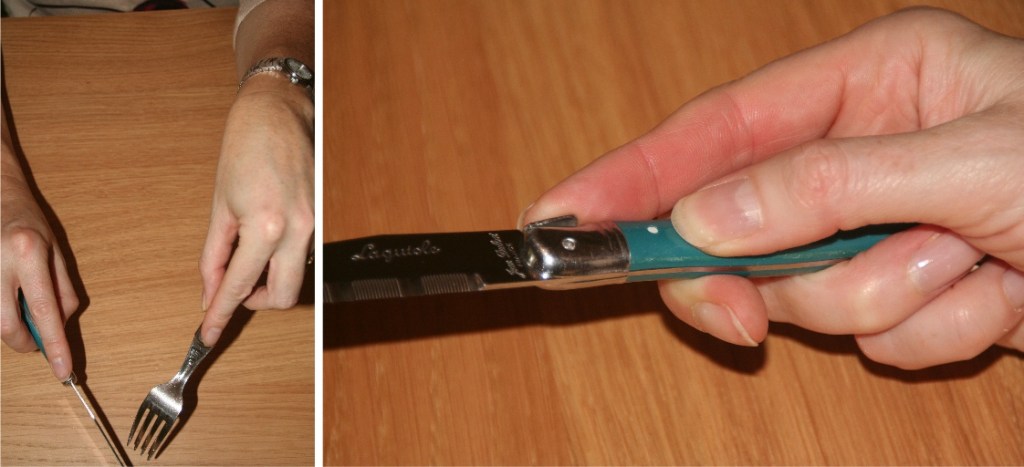
How to Hold a Knife & Fork
The handle of the knife or fork lies diagonally across the top section of the palm. The ring and little finger wrap around the handle, the thumb sits on the side of the handle, while the index finger sits flat and straight on the back of the handle. The middle finger curls slightly around the handle so that when the wrist twists round, so that the knife blade edge or prongs of the fork are facing down towards the plate, the handle rests on the top middle finger joint area.
Well, true to form, the half term holiday weather is a mixed bag, sunny one minute then pouring with rain the next!
So, here are a couple of ideas to help your child burn off some of that pent-up energy. Best of all you can class it as handwriting homework (working on gross and fine motor skills).
An indoor/outdoor circuit training course does not have to take up much space or be messy (but it might be a good idea if indoors to move ornaments a little further out of the way).
Simple activities can be fun if they are done for short periods of time and children do love a time challenge. Make each activity last anything from 30 seconds to 1 minute.
You could record how many they did in the time and see if they have improved when you try it again.
Why not try:
Hopping on one leg and then the other (balance & coordination)
Use the bottom step of the stairs for step ups (bilateral coordination)
Curl ups (Core strength)
With a cushion balanced on their head can they touch their toes without dropping the cushion (balance, coordination, bilateral coordination and core strength)
Star Jumps (balance & coordination)
It is amazing how much fun you can have just hopping, jumping, skipping and dancing on the spot.
If the weather is fine then set out a bike or skateboard track for racing. When out on a bike ride (if safe to do so) have mini time trials on the flat or up hills.
If you are feeling really brave why not try building an obstacle course, a lot of the fun is in the designing and making. It is amazing the communication and language skills required as well.
There have been many articles over the last few years reporting the fact that children are struggling to hold pencils correctly for handwriting and drawing. The reasoning for this is more often than not based on our children’s use of technology and the effect this has on their hand strength and finger dexterity (Fine Motor Skills).
Poor fine motor skills and hand strength not only affects a child’s ability to learn and develop a good handwriting style it can make other grip patterns difficult to master as well. Power, precision, stability or a combination of all three are needed by children to compete everyday tasks such as dressing, picking up and carrying objects (especially small items), using a knife & fork, other tools and scissor skills.
Learning to hold a pencil in an appropriate grip is not the only grip style your child needs to develop, especially once they have started school. They will need to develop those which enable them to effectively use scissors as well as a knife and fork. If your child struggles with these activities it may be that they need to be taught how to form the grips correctly (as bad habits develop quickly and are difficult to change) or develop the appropriate hand and finger skills.
How to Hold Scissors
The tip of the thumb is in the top hole of the scissor handle while the tip of the middle finger is in the bottom hole. The index finger is on the bottom edge of the lower handle supporting and stabilising the scissors. The ring and little finger are curled into the palm (except if you are using large scissors as then they will fit in the bottom hole of the handle with the middle finger, to help create the cutting action).
The non-cutting hand should support the paper or item being cut; the thumb is on top of the paper and the fingers underneath, steadying and moving the paper.
How to Hold a Knife & Fork
The handle of the knife or fork lies diagonally across the top section of the palm. The ring and little finger wrap around the handle, the thumb sits on the side of the handle, while the index finger sits flat and straight on the back of the handle. The middle finger curls slightly around the handle so that when the wrist twists round, so that the knife blade edge or prongs of the fork are facing down towards the plate, the handle rests on the top middle finger joint area.
Handwriting skills don’t start with pencil and paper they begin with earlier play opportunities. Using play-dough type modelling materials is great for developing hand and finger strength, bilateral coordination, sensory perception and for learning and perfecting different grips for using tools.
Salt Dough
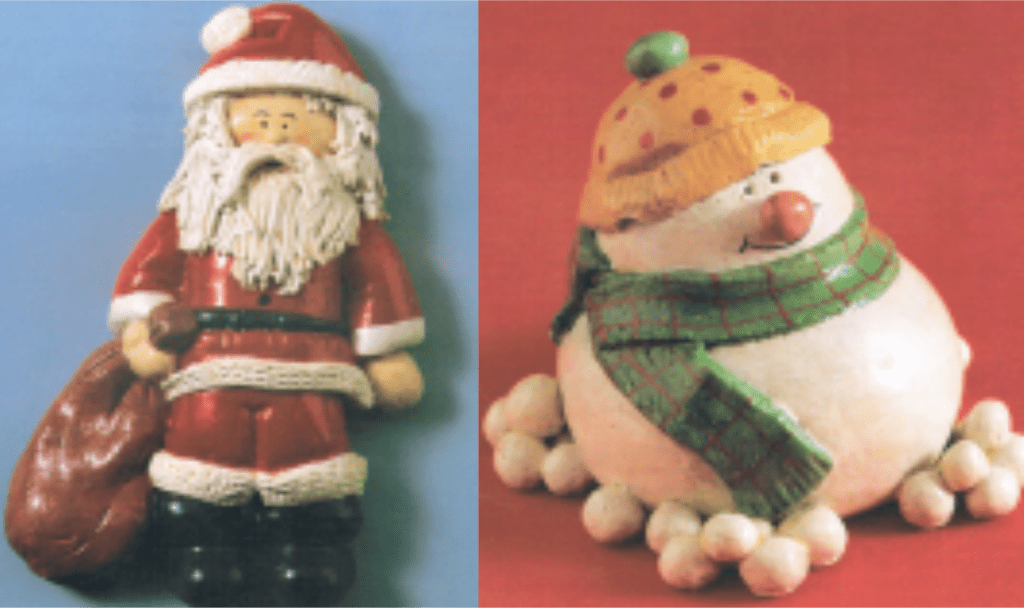
So, why not make some great salt dough Christmas gifts and tree decorations with your child. Not only will they melt the hearts of those who receive them but you will be developing your child’s fine motor skills (needed for good handwriting) while having fun, can’t be bad!
Some fun indoor activities may be the order of the day for this half term as the weather is not so hot.
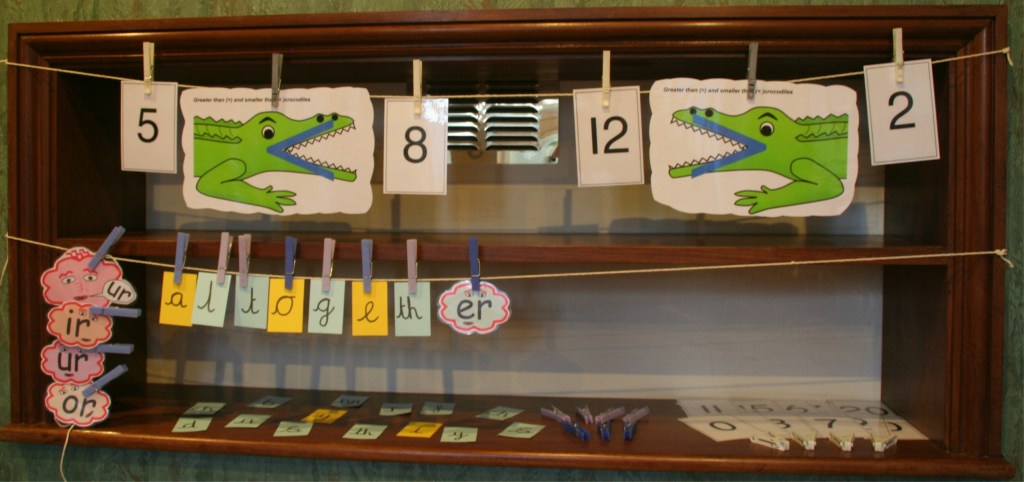
This is a very simple idea which children love because they can take greater ownership of it. The aim of the activity is to help build up hand and finger strength through using the pegs; however, it can have a dual purpose, helping to keep track of the week by using it as a timetable or for learning spellings or maths activities, as well as supporting the development of language skills.
You do not need anything fancy, just some string (for the washing line), clothes pegs and pieces of paper or card to peg onto the washing line. The washing line can be a permanent fixture or you can just pop it up when you need to use it.
The clothes line needs to be at a height suitable for your child to peg things on to (placed against a wall is a safe option so that no-one can walk into it by accident and hurt themselves).
There are a whole range of games that can be played using this simple washing line and pegs concept:
Memory games – Get your child to peg up 5 to 10 different pictures or items on the line. Then give them 1 minute to remember the items. Once the time is up ask them to look away, or close their eyes, and then you remove one or more of the items. Get them to look back at the line. Can they work out what is missing?
You could try just moving one or two of the items around. Can they figure out which ones are in the wrong place and put them back in their correct place?
Try swapping an item for something new, which your child did not hang up on the line. Can they work out which is the new item on the line?
Odd One Out – Hang pictures on the line that belong together. Can they pick out the odd item on the line and explain why it is the odd one out.
They could all be pictures of fruit with a picture of some clothing
They could be shapes with straight sides and one with curves
They could all be animals but all are wild with only one being domestic
Sorting – Ask your child to sort all the pictures or items from a selection and to hang all the identical things on the washing line. They could all be the same;
Colour
Shape
Type
Pattern Work – Using pictures, different colour and shaped paper or items create different patterns. The patterns can be based on colour, size or type of object. You can create a pattern sequence on the washing line and then ask your child to try and copy the sequence. Can they explain the pattern and create their own for you to copy and explain?
Pairing or What is the Same? – Hang a range of pictures or items on the line, making sure that some of the items can be paired together because they are exactly the same. They could match because;
They are exactly the same e.g., a pair of socks
Match numbers to a picture with the same number of items on
Match capital to lower-case letters
Or have items that can be put together because they are both from the same set, for example they are types of fruit or are the same