Teaching Letter Joins – A Systematic Approach

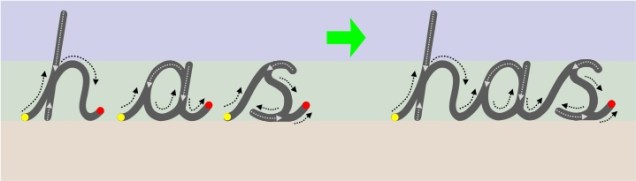
We would recommend teaching joins in join type groups, whether your child has learnt cursive or continuous cursive single letter fonts.

Teaching the join types in their groups helps a child to understand the directional pushes and pulls required to successfully join the different letter combinations.

There are 4 main groups of letter joins; bottom joins, bottom to “c” shape joins, “e” joins (top and bottom join strokes) and top joins.

Moving from Cursive Single Letters to Joining

There are seven join strokes to be taught. Most children will find the bottom joins the easiest to achieve, as it only requires the extension of the exit stroke they already put on the letters. The bottom to “c” shape joins can be tricky at first but soon mastered. The joins that tend to cause the most confusion and difficulty are the “e” joiners and top exit joiners.

I would recommend teaching the bottom joins first, then the ‘e’ joins and finally the top exit letter joins.

Moving from Continuous Cursive Single Letters to Joining

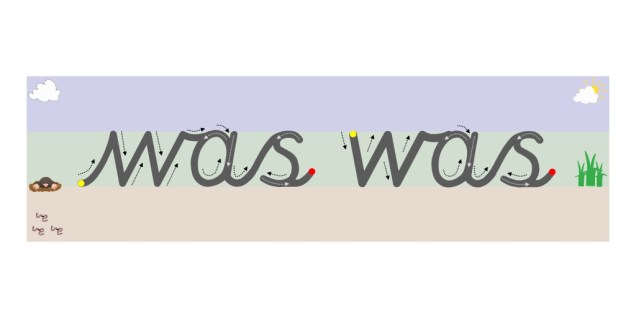
There are three join strokes to be taught. The easiest is the bottom exit letters (the majority of the letters), all a child has to do is write the letters closer together without lifting their pencil off the paper. Only the top to “e” and top joiners need to be taught for continuous cursive, as the nature of the font style means that the lead-in and exit strokes needed to join the majority of letter combinations have already been taught.

I would recommend teaching the bottom joins first, then the top exit to ‘e’ join and finally the top exit letter joins.

The ultimate aim is for a child to develop a good handwriting style; which means;

•     They can produce and maintain a good speed

•     Have a fluid hand movement that is comfortable

•     Letters are of a consistent and appropriate size, positioned correctly

•     Handwriting is legible (so others can read it easily).

It is important to remember that for some children (mainly SEND pupils) this may mean that they will always print or use a single letter form of writing as learning to join is just not appropriate. But that does not mean they will not comply with the bullet points above.

Have you got your Free Join Animations & Worksheets?

For Teachers: https://teachhandwriting.co.uk/key-stage-2-handwriting-routes.html

For Parents: https://teachhandwriting.co.uk/parents.html
Stage 3 to #Handwriting Success – Joining

Here at Teach Children we believe that a child is only ready to start learning to join their handwriting when:

  • They have learnt to form all 26 single lower-case letters correctly.
  • Letters are of a consistent and suitable size (not necessarily the perfect size, remember big is beautiful).
  • Letters are positioned appropriately on the writing line as well as in relation to one another.

The “Department of Education; The writing framework: July 2025; page 33; https://www.gov.uk/government/publications/the-writing-framework , for Year 2 states:

“Joined handwriting should not be taught until pupils can form these unjoined letters (print forms) correctly and consistently.”

This suggests that schools need to ensure children can write all their letters in a print from before moving to a single letter cursive or continuous cursive joining form. This view is further supported on page 34 where it states:

“There is no expectation that schools teach lead-ins for joined handwriting from the start and the national curriculum does not require this, but some schools continue to do this. If they do so, they should also consider teaching unjoined handwriting for specific tasks, such as labelling a diagram or data, writing an email address, or for letters in algebra.”

I don’t believe this is something new, just a reminder of the handwritten convention for labelling and mathematical notation.

Children generally begin to learn how to join letters between the ages of 6 to 7 years old, depending on the handwriting font style being taught. Those taught a continuous cursive font style for instance will tend to join much earlier due to the nature of this font.

Children do not need to be able to remember how to correctly form all their capital letters before they are taught how to join their letters. This is because capital letters never join to the lower-case letters in a word. However, for these children correct capital letter formation needs to be taught alongside the introduction of letter joins.

We would recommend teaching joins in join type groups, whether your child has learnt cursive or continuous cursive single letter fonts.

Teaching the join types in their groups helps a child to understand the directional pushes and pulls required to successfully join the different letter combinations.

Have you got your Free Join Animations & Worksheets?

For Teachers: https://teachhandwriting.co.uk/key-stage-2-handwriting-routes.html

For Parents: https://teachhandwriting.co.uk/parents.html
Why it is Important to Teach Correct Letter Formation!

It can often be assumed children will pick up how to write letters if they see them often enough (by osmosis). This is just not the case.  Correct letter formation has to be taught. Seeing a completed letter or word or watching it being typed up and appear on a screen does not show children how to form the letters.

For children to develop a good handwriting style it is important to learn how to form letters correctly to begin with as this makes the transition from single letter formation to joined letter handwriting much easier. This enables them to develop a speedy, fluid and legible handwriting style.

Department of Education; The writing framework: July 2025; page32 & 33; https://www.gov.uk/government/publications/the-writing-framework now recognizes and highlights the importance of teaching correct letter formation from the very beginning, so, starting in foundation stage:

“It should be:

• daily, until pupils can write legibly and easily

• taught in small steps, with lots of opportunity for practice

• cumulative: teachers should build on what pupils have learned previously 

• consolidated before teaching moves on so that pupils do not practise letters incorrectly

• revisited when further practice is needed

• demonstrated by the teacher

• additional to any handwriting that forms part of teaching phonics”

Letters are created through joining lines and curve shapes in a particular way. They have a designated start point and set directional pushes and pulls of the pencil to reach the designated finish point. This is why from the very start (2012) Teach Handwriting has always taught letter formation in groups/families rather than in alphabetical order (a Year 1 national curriculum statutory requirement in 2015). Certain groups use the same, or similar, shape and directional push and pulls of the pencil to form the letter, for instance the letter c has the same start point and anti-clockwise directional movement shape that is needed to create the letters a, d, g, o and, though a little more complicated, the letters s and e. Teaching letters in groups and families can also help to limit letter reversals such as b and d.

Another interesting and very important useful point included in the “Department of Education; The writing framework: July 2025; page 33; https://www.gov.uk/government/publications/the-writing-framework, for Year 1 is that:

“Wide-lined paper is essential at this stage. Mid-line guides can also help pupils to position letters. Pupils should be introduced to paper with narrower lines once they can write legibly and easily on wide-lined paper.”

Which I believe, acknowledging the fact that children can form their letters correctly if taught correctly but may not be ready for narrow line height paper due to their developmental stage of their fine motor skill.

Also, it explains how in Year 2:

“To join letters easily and legibly, pupils first need to form the shape of each letter correctly, starting and finishing each one at the correct point and ensuring that its size is properly related to other letters in the same family.”

Due to how handwriting has or hasn’t been taught over the generations we all have our own way of handwriting. When supporting and teaching young children we need to develop a consistent approach so that they do not get confused or frustrated by adults giving them conflicting information.

For parents this means finding out from your child’s school which letter font they are teaching so that you can support them more effectively at home. This may mean that you have to learn a new way of writing some letters.

This also applies to teachers and teaching assistants; “Department of Education; The writing framework: July 2025; page 32; https://www.gov.uk/government/publications/the-writing-framework states:

“Teachers’ own handwriting should provide a model of high standards, across the curriculum and not just in handwriting lessons, but particularly when pupils are learning to write.”

As the adults in the situation, we have to accept that it is for us to make the changes. Just because something is different to the way we were taught, or do it, doesn’t mean it is wrong, it is just different! 

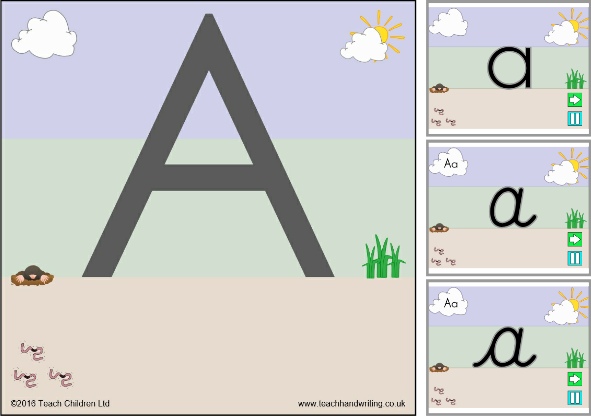
Our free letter animations are not just to support children with their learning but also to provide parents and teachers (all adults really) with the knowledge and support to help children develop a consistent handwriting style.

Parent animation link: https://teachhandwriting.co.uk/parents.html
Teacher animation link – click through on the Key Stage you are teaching: https://teachhandwriting.co.uk/teach-handwriting-teachers.html

Stage 2 to #Handwriting Success – Single Letter Formation (non-pencil activities)

Over the last couple of weeks, we explained that pre-handwriting patterns are the first stage of learning to handwrite. Once a child has mastered these, they are ready to start learning how to form letters.

But where do you start?

Our view is to focus on lower-case letters first and only the capital letters for the first letter in a child’s, examples: Peter Rabbit, Sally Green, George Blue or Mary Shell.

Why?

  • One reason is that about 95% of what children write, and are exposed to, is in a lower-case form and only 5% in capital.
  • Lower-case letters are far less complicated, requiring fewer pencil lifts to complete the letters.
  • As both lower-case and capital letters require a child to form curved lines, a skill which most children have to practice, writing lower-case letters is no more difficult than writing capitals.
  • In a young child’s writing, all the letters are initially the same size, whether they are capitals or lower case; it is part of the normal developmental path of handwriting. So, the view that teaching capitals letters is easier because they are bigger is not true.
  • Young children who have learnt mostly capital letters first find it difficult to stop, as it is so ingrained into the memory, often using them half way through words and sentences. Even when they are older this inappropriate use of capitals creeps back into their work especially if they are tired or concentrating hard on composing their work.

A child’s first major achievement, in their eyes, is to write their name. So, although concentrating on lower-case letters, teach them how to form the capital letter for the first letters of their name to get them excited about handwriting.

As they master the lower-case letters introduce the remainder of the capital letters. It is important that both are taught so that a child can develop a speedy, fluid and legible handwriting style.

As with the pre-handwriting patterns, part one of learning correct letter formation is through non-pencil activities. This is because it supports the storage of the larger gross motor memory movements; the stage of development that EYFS are working at. They can then tap into those gross motor memory movements as their fine motor skills are developing; taking the stored large movement to a smaller and smaller scale.  

Once again ‘The writing framework’ acknowledges that:

“On joining reception, some children may need teaching and practice in using and manoeuvring their thumb, wrist and shoulder muscles in the way they need for handwriting. Initially, handwriting lessons could include learning the movements needed to form letters, practising these movements at a range of sizes…”

Department of Education; The writing framework: July 2025; page 24; https://www.gov.uk/government/publications/the-writing-framework

It is through play that you can really engage a child in learning how to correctly form their letters, and has always been an important foundation stone in our Foundation Stage Teach Handwriting Scheme (https://www.teachhandwriting.co.uk/handwriting-teaching-manuals.html#hs-fs ) and strongly promoted on our website https://www.teachhandwriting.co.uk ) and blog (https://teachhandwriting.blog/ ) since 2012.  

Our non-pencil – ‘Big to Small’ activities are an easy fun way to start developing these skills early on through play: https://teachhandwriting.co.uk/big-to-small.html

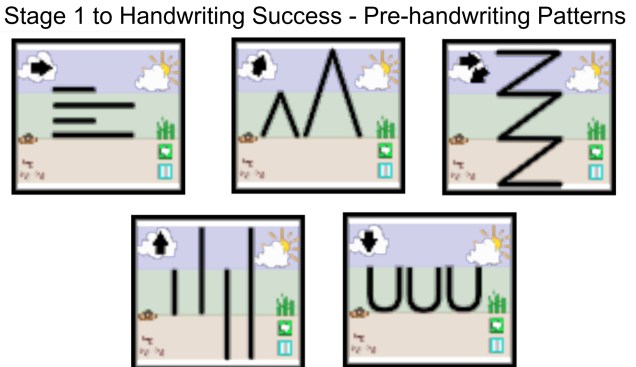
Stage 1 to #Handwriting Success – Pre-handwriting Patterns

Last week we looked at non-pencil pre-handwriting pattern development, working on large scale movements through play activities.

The next stage in the progression is to move to pencil and paper activities.

Again ‘The writing framework’ states that:

“Teaching should then progress to specific handwriting lessons and practice. This might initially include systematic teaching of and practice in moving the pencil to master the horizontal, diagonal, vertical and circular strokes needed for writing.”

Department of Education; The writing framework: July 2025; page 25; https://www.gov.uk/government/publications/the-writing-framework

Here at Teach Children Ltd we always recommend teaching the handwriting patterns in groups, as this helps to further develop the specific movements (pushes and pulls) required to form the patterns and helps commit them to the motor memory. A child can then recall these motor memories to support them as they begin to form letters.

Pre-handwriting patterns that encourage a child to move their pencil from left to right are very important for left-handed writers. They need to be taught this so that they can make the cross motion in the H, T, J, G and I from left to right, as their natural instinct is to go from right to left. If this is not corrected when writing E and F the cross lines will not be “anchored” to the letter.

Once the handwriting patterns have been mastered a child will have the confidence and skills base necessary to start forming letters, numbers and symbols.

Have you got your Free Pre-handwriting Pattern Animations & Worksheets?

For Teachers: https://teachhandwriting.co.uk/pre-handwriting-patterns.html

For Parents: https://teachhandwriting.co.uk/patterns.html

Stage 1 to #Handwriting Success – Non-pencil – Pre-handwriting Patterns

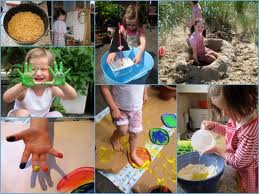
Learning to handwrite does not start with pen and paper but through play (non-pencil activities), as children explore shape and motion (how the body moves) through their senses – touch, sight and body awareness. Play is such an important element of your child’s physical, emotional, social and academic development.

Pre-handwriting patterns are the first stage in supporting a child to handwriting success. They help the child to learn the shapes and directional pushes and pulls required to form letters. All letters are a combination of these shapes and lines.

Young children can start to learn these patterns through their play, long before they are ready to pick up a pencil, moving toys back and forth across the floor or whirling them around in the air. To a child it is just play and fun, but you are doing something far more powerful and constructive by helping them to develop the motor memory patterns and directional movement skills they will need for handwriting.

Later, as their coordination and gross motor skills develop, they make more controlled and varied movement patterns in their play. Changing directions, speed and size are all prerequisite skills needed for learning pre-handwriting patterns.

Once again ‘The writing framework’ acknowledges that:

“On joining reception, some children may need teaching and practice in using and manoeuvring their thumbs, wrist and shoulder muscles in a way they need for handwriting. Initially, handwriting lessons could include learning the movements needed to form letters, practising these movements at a range of sizes…” 

Department of Education; The writing framework: July 2025; page 24; https://www.gov.uk/government/publications/the-writing-framework

It is through play that you can really engage a child in learning how to correctly form these movements or what we refer to as pre-handwriting patterns and have always been an important foundation stone in our ‘Foundation Stage Teach Handwriting Scheme (https://www.teachhandwriting.co.uk/handwriting-teaching-manuals.html#hs-fs ) and strongly promoted on our website https://www.teachhandwriting.co.uk/index.html ) and blog (https://teachhandwriting.blog/ ) since 2012.  

Our non-pencil – ‘Big to Small’ activities are an easy fun way to start developing these skills early on through play: https://teachhandwriting.co.uk/big-to-small.html

Drawing – a Pre-skill for Handwriting

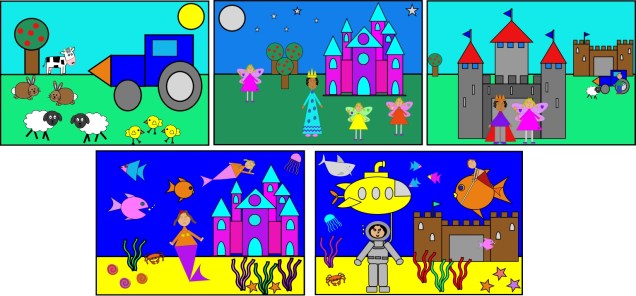
Drawing pictures is a great way to help your child develop their pre-handwriting stokes and shape formation skills. It is amazing how, by using these simple shapes, you and your child can create fantastic pictures.

Try using basic shapes as circles, rectangles and triangles to begin with and then add some swirls, curves and spirals to give extra detail.

Check out our play resources page for more great pre-handwriting picture ideas: https://teachhandwriting.co.uk/more-activities.html

How to get your child interested in drawing and colouring!

Not all children enjoy drawing and colouring and it can be difficult to encourage them. There are a number of reasons why some children seem reluctant to draw, paint or colour. For instance, some will not like the smell of the paint or crayons, while others may find the pencils, brushes or crayons too thin, long or heavy. Others may be reluctant due to past negative experiences. It can be tricky to work out exactly why a child doesn’t want to draw or write.

Here we have some tips and ideas that may help you to get started:

Paper Size– Some children like large pieces of paper to work on while others can be daunted by the prospect. Start off by having a range of paper sizes and colours for your child to choose from, this way you can find out which size of paper they prefer to work on.

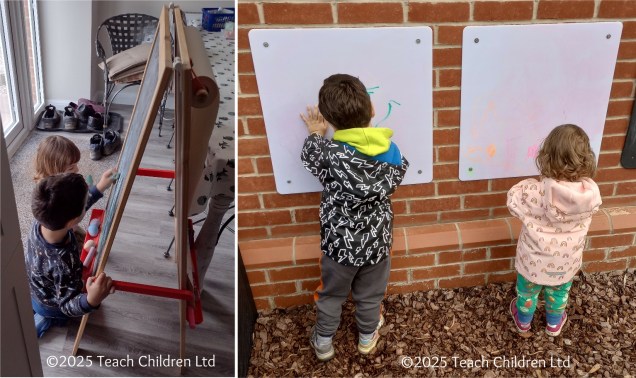
Vertical surface – Having the paper pinned vertically on a drawing board or wall may also help encourage your child to have a go at drawing more than if the paper is laid flat on a table.

Drawing & Writing Tools – Have a range of pencil and crayon thicknesses, lengths and colours so that your child can choose the ones they feel most comfortable using. Try to make sure that the pencils are sharp enough to be used effectively as picking up and using a blunt pencil can be a negative experience which can turn a child off drawing or writing.

You could try using different drawing tools to start with such as chalks or special glass pens (which are great fun and designed to clean off easily).

Draw Together – Before you start drawing think about the kind of things that will interest your child, for instance drawing a train may be ideal for your little boy but not necessarily for your little girl. Use simple shapes to draw the objects so that over time your child will be able to copy so they too can draw successfully the train, cat or car. Practise by yourself so that when you are doing the drawing with your child it comes easily to you so that you can talk through what you are doing.

We have created some new drawings using simple shapes which you may find helps you to get started. Follow this link and scroll down the page a little you will find them under the ‘Activities to help hand development’:  https://teachhandwriting.co.uk/more-activities.html

Tips:

Pick a time and place where you can start to draw in the same room/area as your child is playing. Start off by just sitting and drawing without actively involving your child. It is surprising how often a child will come to checkout and ask you what you are doing. They may just stand and watch for a while and go back to playing, just carry on and complete the picture without them. Leave the picture for them to see, you could let them know you have drawn it for them and have a little chat about it.

It may take a few goes but hopefully you will find that your child will watch for longer, maybe even asking you to draw different things in the picture, use certain colours, or want to help you colour or draw things.

At this stage it can help to explain what you are doing, for instance, if you are drawing a straight line or a wavy line to make a shape or pattern.

Other language you may use:

Straight, short, long, diagonal, up towards …, down towards …, across, curvy, wavey, zig zag, squiggly, swirling, dots, dashes.

A couple of weeks ago we talked about placement (preposition) and directional vocabulary which would also be great to use and help your child to develop as part of drawing activities.

By sharing and showing your child how to draw shapes and make pictures it gives them a positive and successful drawing experience, which encourages and gives them confidence to have ago for themself.

Placement (Preposition) and Directional Vocabulary Games are Important!

Teaching your child the vocabulary related to placement (preposition) and direction is import in supporting them to understand and follow instructions, as well as sharing information themselves, such as; ‘put your cup on the table’ or to say ‘teddy in car’.

We also use this placement (preposition) and directional language to explain how to draw shapes, patterns and write letters and numbers.

With handwriting now having to be taught separately from phonics and starting from the first term in reception, the writing framework recognizes that on joining reception:

“They may also need additional support to ensure they are secure in their understanding of key directional words such as, ‘up’, ‘down’, ‘round’ and ‘back’.”

Department of Education; The writing framework: July 2025; page 24/25; https://www.gov.uk/government/publications/the-writing-framework

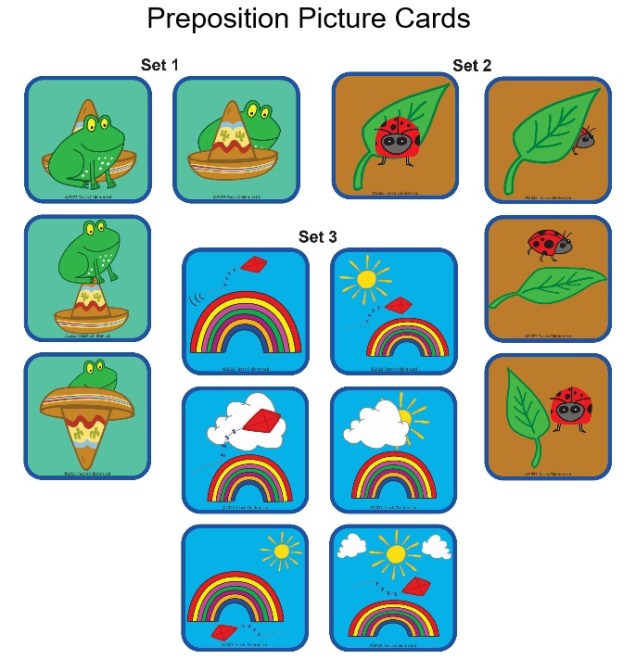
To help support the development of this vocabulary we have created three sets of picture cards and games to help you support your child in developing and using positional (preposition) and directional vocabulary.

You can find these free resources on our Phonics website by following this link: https://www.teachphonics.co.uk/phonics-resources.html

You can find these free resources in the Parent section of the Teach Handwriting website by following this link: https://teachhandwriting.co.uk/more-activities.html

What are prepositions?

“A word used with a noun or pronoun to show place, position, time or means, e.g. at home, in the hall, on Sunday, by train.” Definition from Oxford School Dictionary, third edition 2002.

Here are just some preposition and directional phrases you might like to use:

On the … On top of the … Above the … Over the…

Under the… Below the … Beneath … Underneath …

Behind the …

In front of the…

Next to …Beside the … On the right of … To the right of … On the right-hand side … On the left of … To the left of … On the left-hand side… Before the … After the …

In the…  Inside the …

Out of the … Outside of the …

Between the … In between the … In the middle … In the center … Going up the ….  Going down the … Going towards the… Going away from …

To Play is to Learn!

Different Types of Play and their Importance

We are always being shown how important play is in the development of young animals’ survival and hunting skills. How many times have you thought how cute or lovely when watching kittens, puppies or polar bears playing?

Humans are also animals which thrive and develop through play; in fact, play is so important the United Nations High Commission for Human Rights state it as a right for every child (Ginsburg, 2013).

We often think of play as a frivolous pastime rather than a practical and meaningful one. However, here at Teach Children we see play as a vital part of a child’s physical, emotional, social and intellectual growth and well-being.

There has been considerable research over the years on play, which supports our point of view, with the consensus being that children need to experience five different types of play (Dr.D Whitebread, 2012). These five types of play are roughly based on the developmental opportunities they provide, especially if it is child driven rather than adult lead:

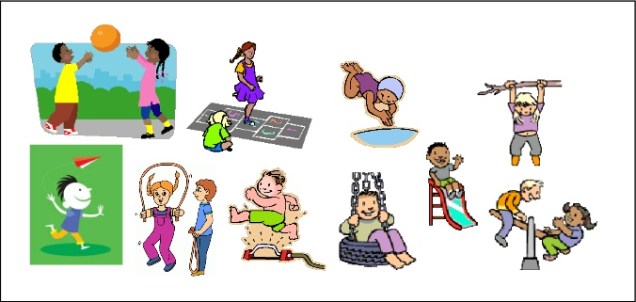
Physical Play – active exercise (running, jumping, skipping etc..), rough & tumble and fine motor skills activities to develop whole body and hand and eye co-ordination strength and endurance. The outdoor element of such play develops independence, resourcefulness and self-regulation while the fine motor skills activities support the development of concentration and perseverance.

Play with Objects – starts as soon as a child can grasp and hold an object; mouthing, biting, turning, stroking, hitting and dropping. It’s how we all learn through the exploration of our senses (sensory-motor play). This type of play develops our abilities to; physically manipulate items, think, reason and problem solve, to set challenges and goals as well as to monitor our own progress.

Symbolic Play – refers to the development of spoken language, visual symbols such as letters and numbers, music, painting, drawing and other media used for communication of thought and ideas. This type of play allows children to develop the abilities to express and reflect on experiences, ideas and emotions. Sound and language play develops phonological awareness required for literacy, while number play that relates to real life situations supports numeracy skills.

Pretence/socio-dramatic Play – Pretend play provides the opportunity to develop cognitive, social, self-regulatory and academic skills. This kind of play means children have to learn and pick up on unspoken rules of interaction, taking on the role of a character and playing within the expected confines of that role.

Games with Rules – physical games such as chase, hide & seek, sport, board and computer games. Develop social skills and the emotional skills of taking turns, winning and losing as well as other people’s perspectives.

                                                             So, to play is to learn!

Bibliography

Kenneth R. Ginsburg, MD, MSEd, 25/07/2013; ‘The Importance of Play in Promoting Healthy Child Development and Maintaining Strong Parent-Child Bonds’: THE AMERICAN ACADEMY OF PEDIATRICS: http://pediatrics.aappublications.org/content/119/1/182.full

Dr.D. Whitebread, April 2012: ‘The Importance of Play’; Commissioned for the Toy Industries of Europe:  http://www.importanceofplay.eu/IMG/pdf/dr_david_whitebread_-_the_importance_of_play.pdf