Summer Fun – Water, water everywhere!

The SUN is meant to be out which makes it time for the water fights and games to begin.

It is August so the weather should be perfect, so why not set up water squirting games in the garden. The kids are waterproof and everything else will dry out, eventually!

How can water fights and games, where you can get wet, be handwriting and phonics homework?

You will be encouraging your child to develop their hand strength, co-ordination and eye tracking skills (all handwriting skills). However, these games are also fantastic for developing sound and word awareness skills.

Try mimicking the sounds that the water makes as it drips on to the floor or hits the targets; use directional language to support your child’s aiming skills; describe how the objects move when hit: bouncing, rolling or flying and talk through the emotions evoked through playing the games.

As well as supporting your child in developing a whole range of physical and language skills you will also increase your cool adult status.

Some fun water games:

  • Try setting up a target wall, using chalk to draw the targets.
    • How many of the targets can you hit with water squirted from a water pistol or squeeze bottle in a set time.
    • How many targets can be washed off.
  • Set up a skittles range.
    • Each skittle hit with water can be worth a certain number of points, or the distance of the skittles may affect their value.
    • A time trial game to hit all the skittles. If you are using plastic bottles as skittles try making some of them a little heavier by putting sand or dirt in them to make it a bit harder to knock them over.
  • Move the object race games.
    • A light toy/ball has to be moved by squirts of water over a distance.
    • A range of objects moved in to target areas to gain points.

The only limitation is you and your child’s imagination and trust me kids never tire of finding new ways to play with water (but then again neither do many adults)!

Homework has never been so much FUN!

Hand Swapping Issues?

Hand Swapping is a normal developmental stage in infants and young children and therefore, at this stage, not a sign that a child is uncertain of their dominant hand. However, this is not ideal for a child who has started school.

Hand swapping throughout a task is not necessarily a sign that a child is uncertain of their dominant hand.

There are two routes to tackling the hand swapping issue, the one to use depends on your answers to the following questions.

1. Does the child usually start with the one hand and then swap when that hand gets tired?

You can usually tell if this is the case because they may shake out or rub the tired hand and once it is rested go back to using it again. This is probably because their fine motor skills are weak. Through focused games and activities (https://teachhandwriting.co.uk/gross-and-fine-motor-skills-games.html#hand-finger), the muscle strength and dexterity can be gradually built up in the dominant hand, which in turn will build their stamina so that the hand swapping will reduce until they stop it altogether.

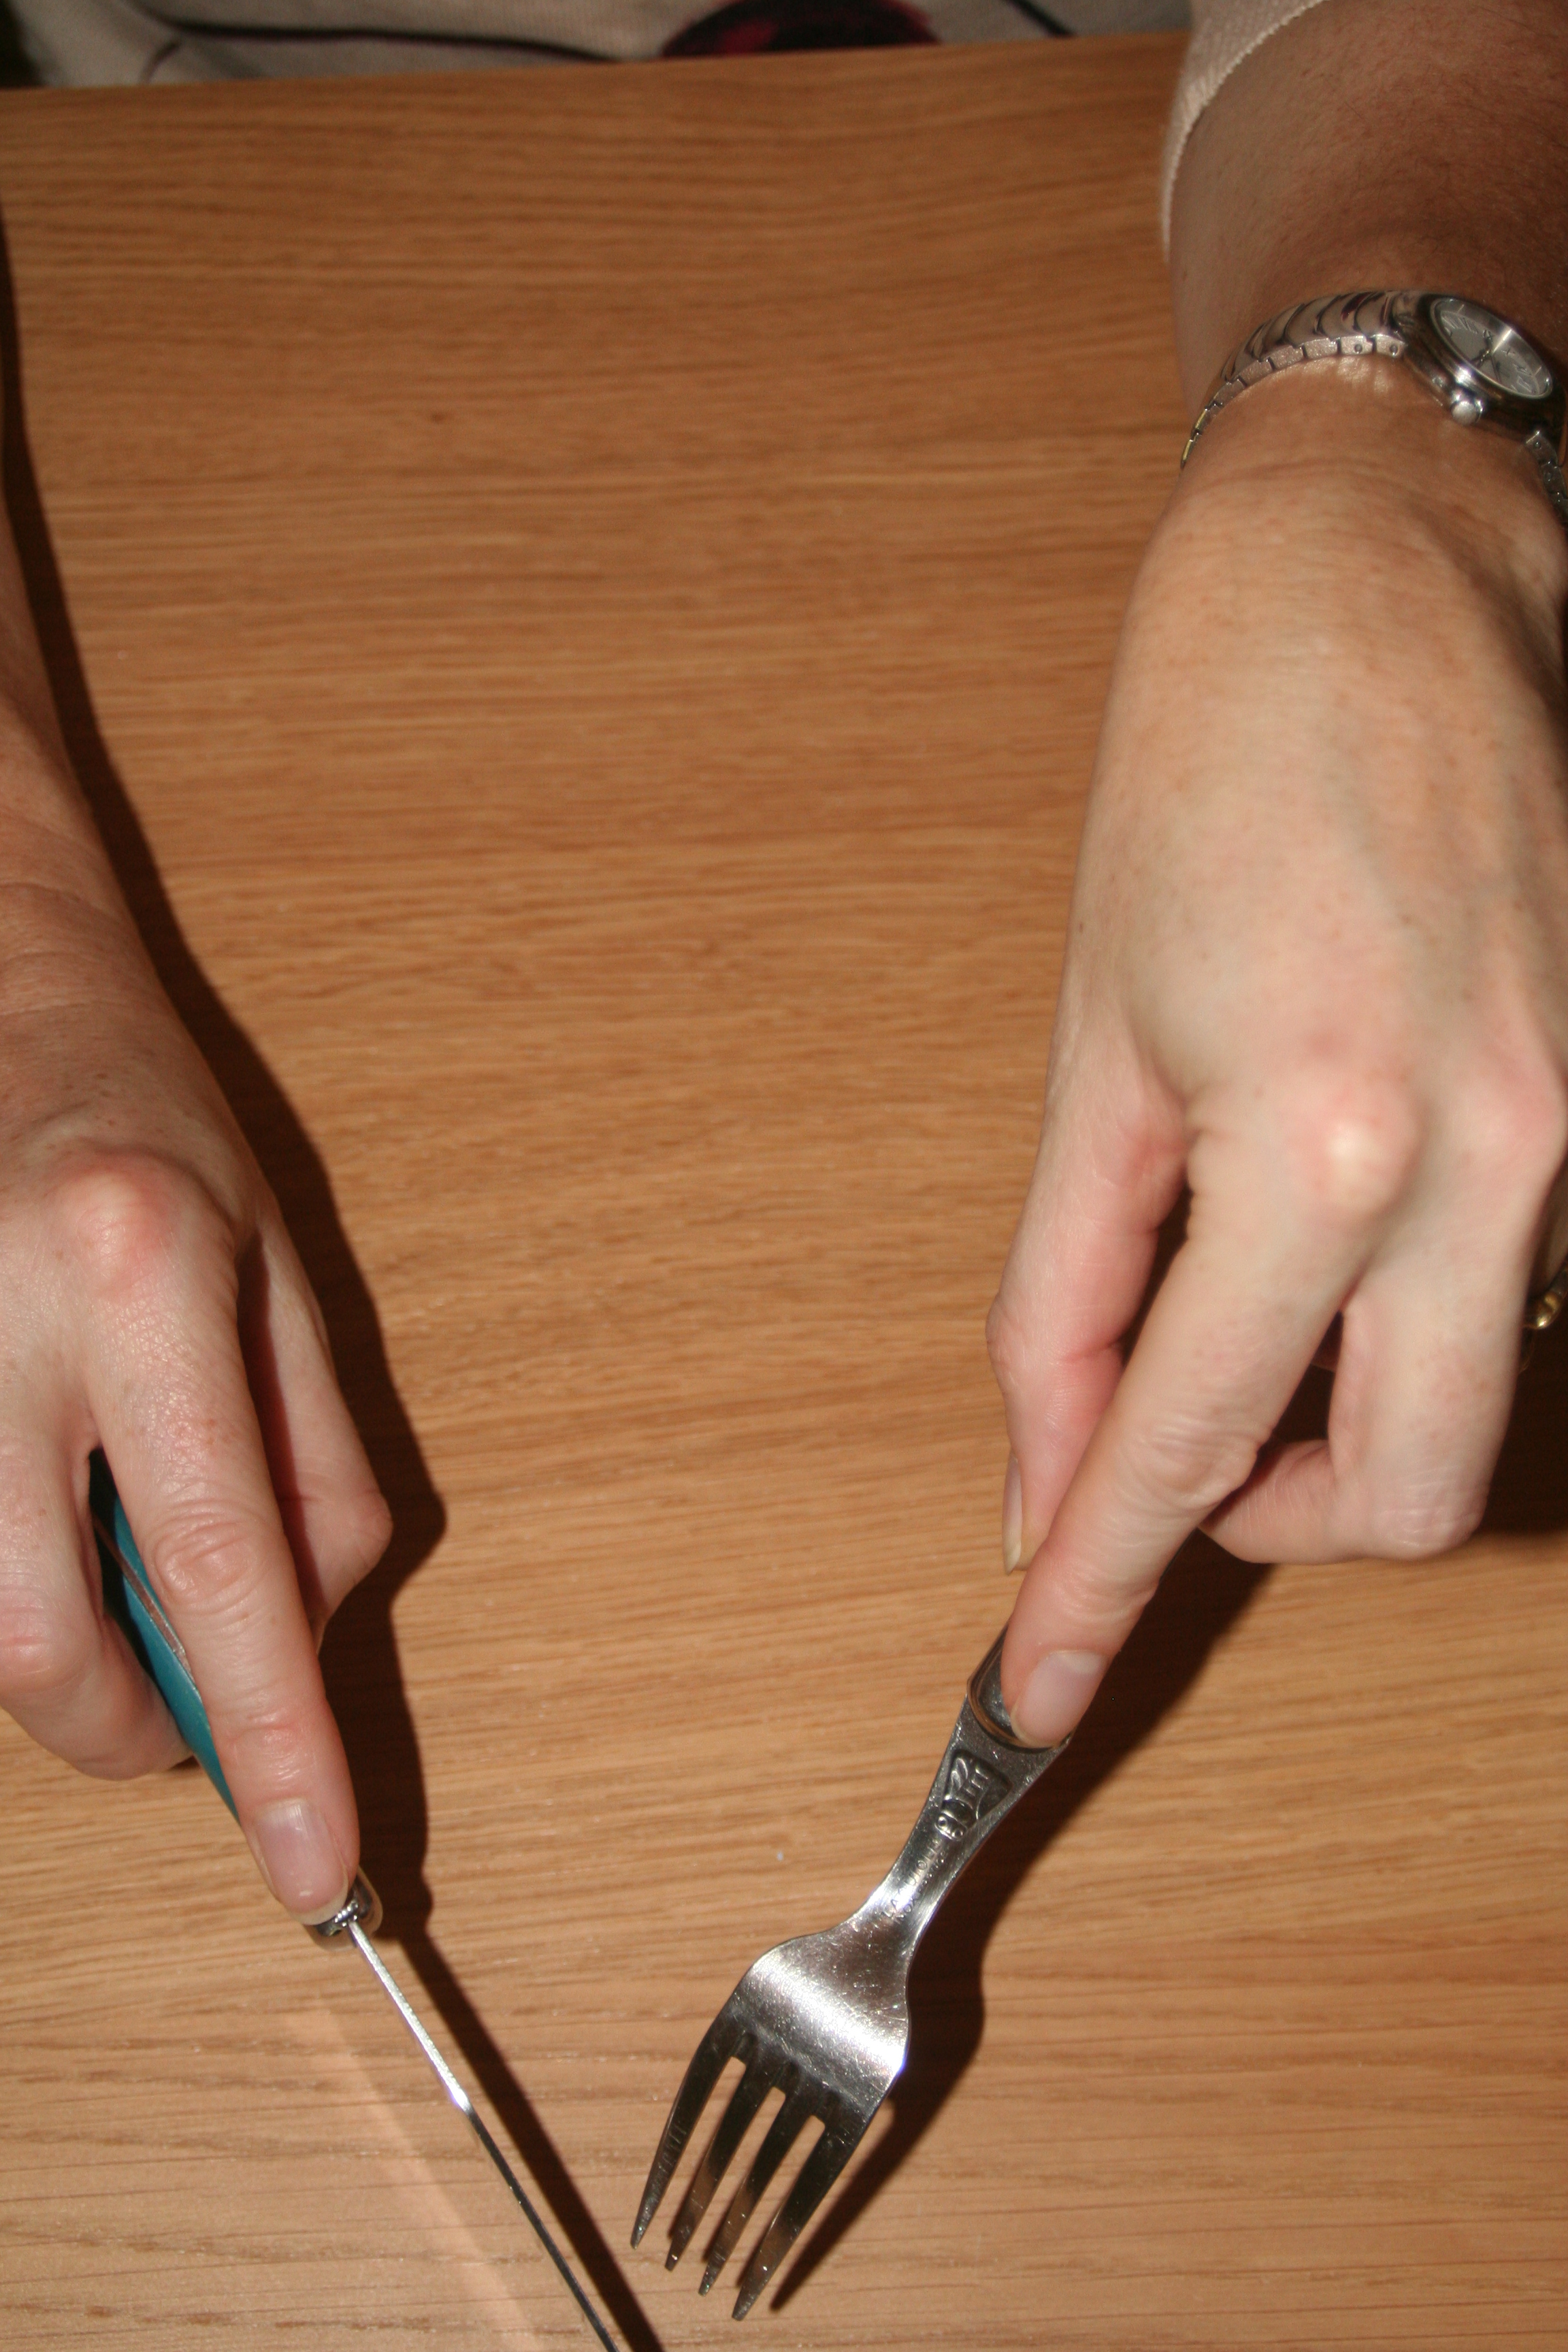
Once you are sure of dominance gently discourage swapping hands by taking a break from the activity and coming back to it a couple of minutes later using the preferred hand.

2. Does the child use their left hand if items are presented on their left-hand side and their right hand if they are presented on the right-hand side?

In toddlers and young children this is expected. In older children however it could mean that they have developed a delay in their skill to cross the mid-line point. This developmental bilateral coordination skill is vital to develop and can be addresses through a range of simple games and activities (https://teachhandwriting.co.uk/gross-and-fine-motor-skills-games.html#bilateral-coordination).

You can check a child’s hand and finger strengths (fine motor skills) and their bilateral coordination (gross motor skills) using our Key Strengths Assessment (https://teachhandwriting.co.uk/the-four-essential-strengths.html).

Back to School – Ways to Support Your Child’s Pencil Grip Development

Eff Grip 2

After such a long break from school it is good to take some time to check your child has not slipped back into some old, poor pencil grip habits.

Here is a recap of the things which may help them if they are still finding it difficult to form and maintain an appropriate pencil grip.

Remember it is important that you do not force a child to use the tripod grip if they are not developmentally ready. Just because they are starting school doesn’t mean they are ready to hold a pencil in the tripod grip for handwriting.

Have they reached the appropriate stage in their pencil grip development?

Every child develops at a different time and pace; find out which stage of development your child is at: http://bit.ly/2YFfqMp

Are they left or right-handed?

If they are of school age and do not have a clear hand dominance this can make it difficult to develop a good pencil grip. Our hand dominance information may help you here: http://bit.ly/2YFfqMp

How do they hold a pencil for writing at the moment?

A poor pencil grip can make forming letters difficult and handwriting slow or uncomfortable. Check out our tips on how to correct a poor pencil grip in our pencil grip difficulties section: http://bit.ly/2T96KwK

Have they been taught, & do they understand, how to form a Tripod pencil grip?

It may have been explained to them, but that does not mean your child has understood. Our ‘Tommy Thumb’ and ‘Drawbridge Flip’ videos may help them to learn more easily how to form a tripod grip for handwriting: http://bit.ly/2XpuI8I

Do they have the physical hand and finger strength to form and maintain a tripod pencil grip?

Not all children have the appropriate hand and finger strength to hold a pencil in the tripod grip and need extra support to help them develop this. To find out if your child need’s extra support to develop their hand and finger strengths check out this section of our Key Strengths assessment page:  http://bit.ly/2C7xYwq

Do they swap hands when writing or drawing?

This is a normal developmental stage for many toddlers and young children, but it is not ideal for school age children. Check out our tips on tackling hand swapping issues: http://bit.ly/2VlGfDH

If you have any queries or questions you would like to ask us about handwriting or pencil grip feel free to contact us at enquires@teachchildren.co.uk or via this blog or Facebook.

Summer Fun – Part 4 – Get Cooking!

Cooking 1

Cooking is a great fun way to practise getting both hands to work together. This helps to develop coordination, hand and finger strength and dexterity skills; all skills required for handwriting. However, it is amazing how much talk can come from this as well; not just at the time with you but when they share the day’s experience with others later on (developing their phonological awareness).

An added benefit at this time of year is that you can do ‘Pick Your Own’. Getting out and about and encouraging your child to pick their own fruit is not only great fun but another sneaky way of working on their hand and finger strength and dexterity.

There are so many recipes, especially online, for making quick easy great tasting food (make a large batch and freeze the rest).

So, if the sun is shining, or it is just not raining, get out there find your local ‘Pick Your Own’ or check out the bargains at your local shops/market and get cooking!

Does Your Child Have Weak Hands?

scissor & knife grip 1There have been many articles over the last few years reporting the fact that children are struggling to hold pencils correctly for handwriting and drawing. The reasoning for this is more often than not based on our children’s use of technology and the effect this has on their hand strength and finger dexterity (Fine Motor Skills).

Poor fine motor skills and hand strength not only affects a child’s ability to learn and develop a good handwriting style it can make other grip patterns difficult to master as well. Power, precision, stability or a combination of all three are needed by children to compete everyday tasks such as dressing, picking up and carrying objects (especially small items), using a knife & fork, other tools and scissor skills.

To assess your child’s hand, finger strength and dexterity check out our assessment page: http://bit.ly/2C7xYwq

To improve their overall hand and finger strength check out our hand and finger strength and dexterity games:  http://bit.ly/2FhFkR7

Learning to hold a pencil in an appropriate grip is not the only grip style your child needs to develop, especially once they have started school. They will need to develop those which enable them to effectively use scissors as well as a knife and fork. If your child struggles with these activities it may be that they need to be taught how to form the grips correctly (as bad habits develop quickly and are difficult to change) or develop the appropriate hand and finger skills.

How to Hold Scissors

IMG_9147
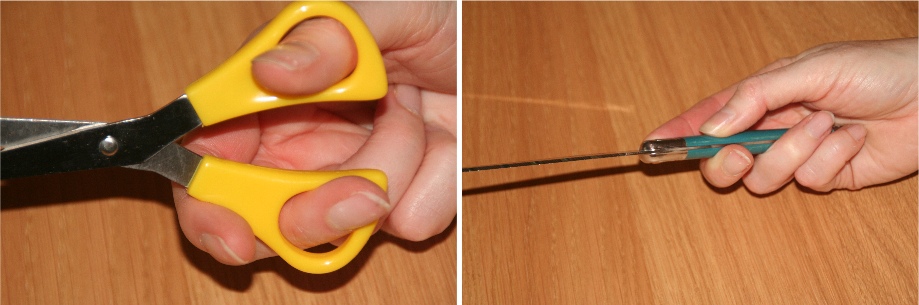
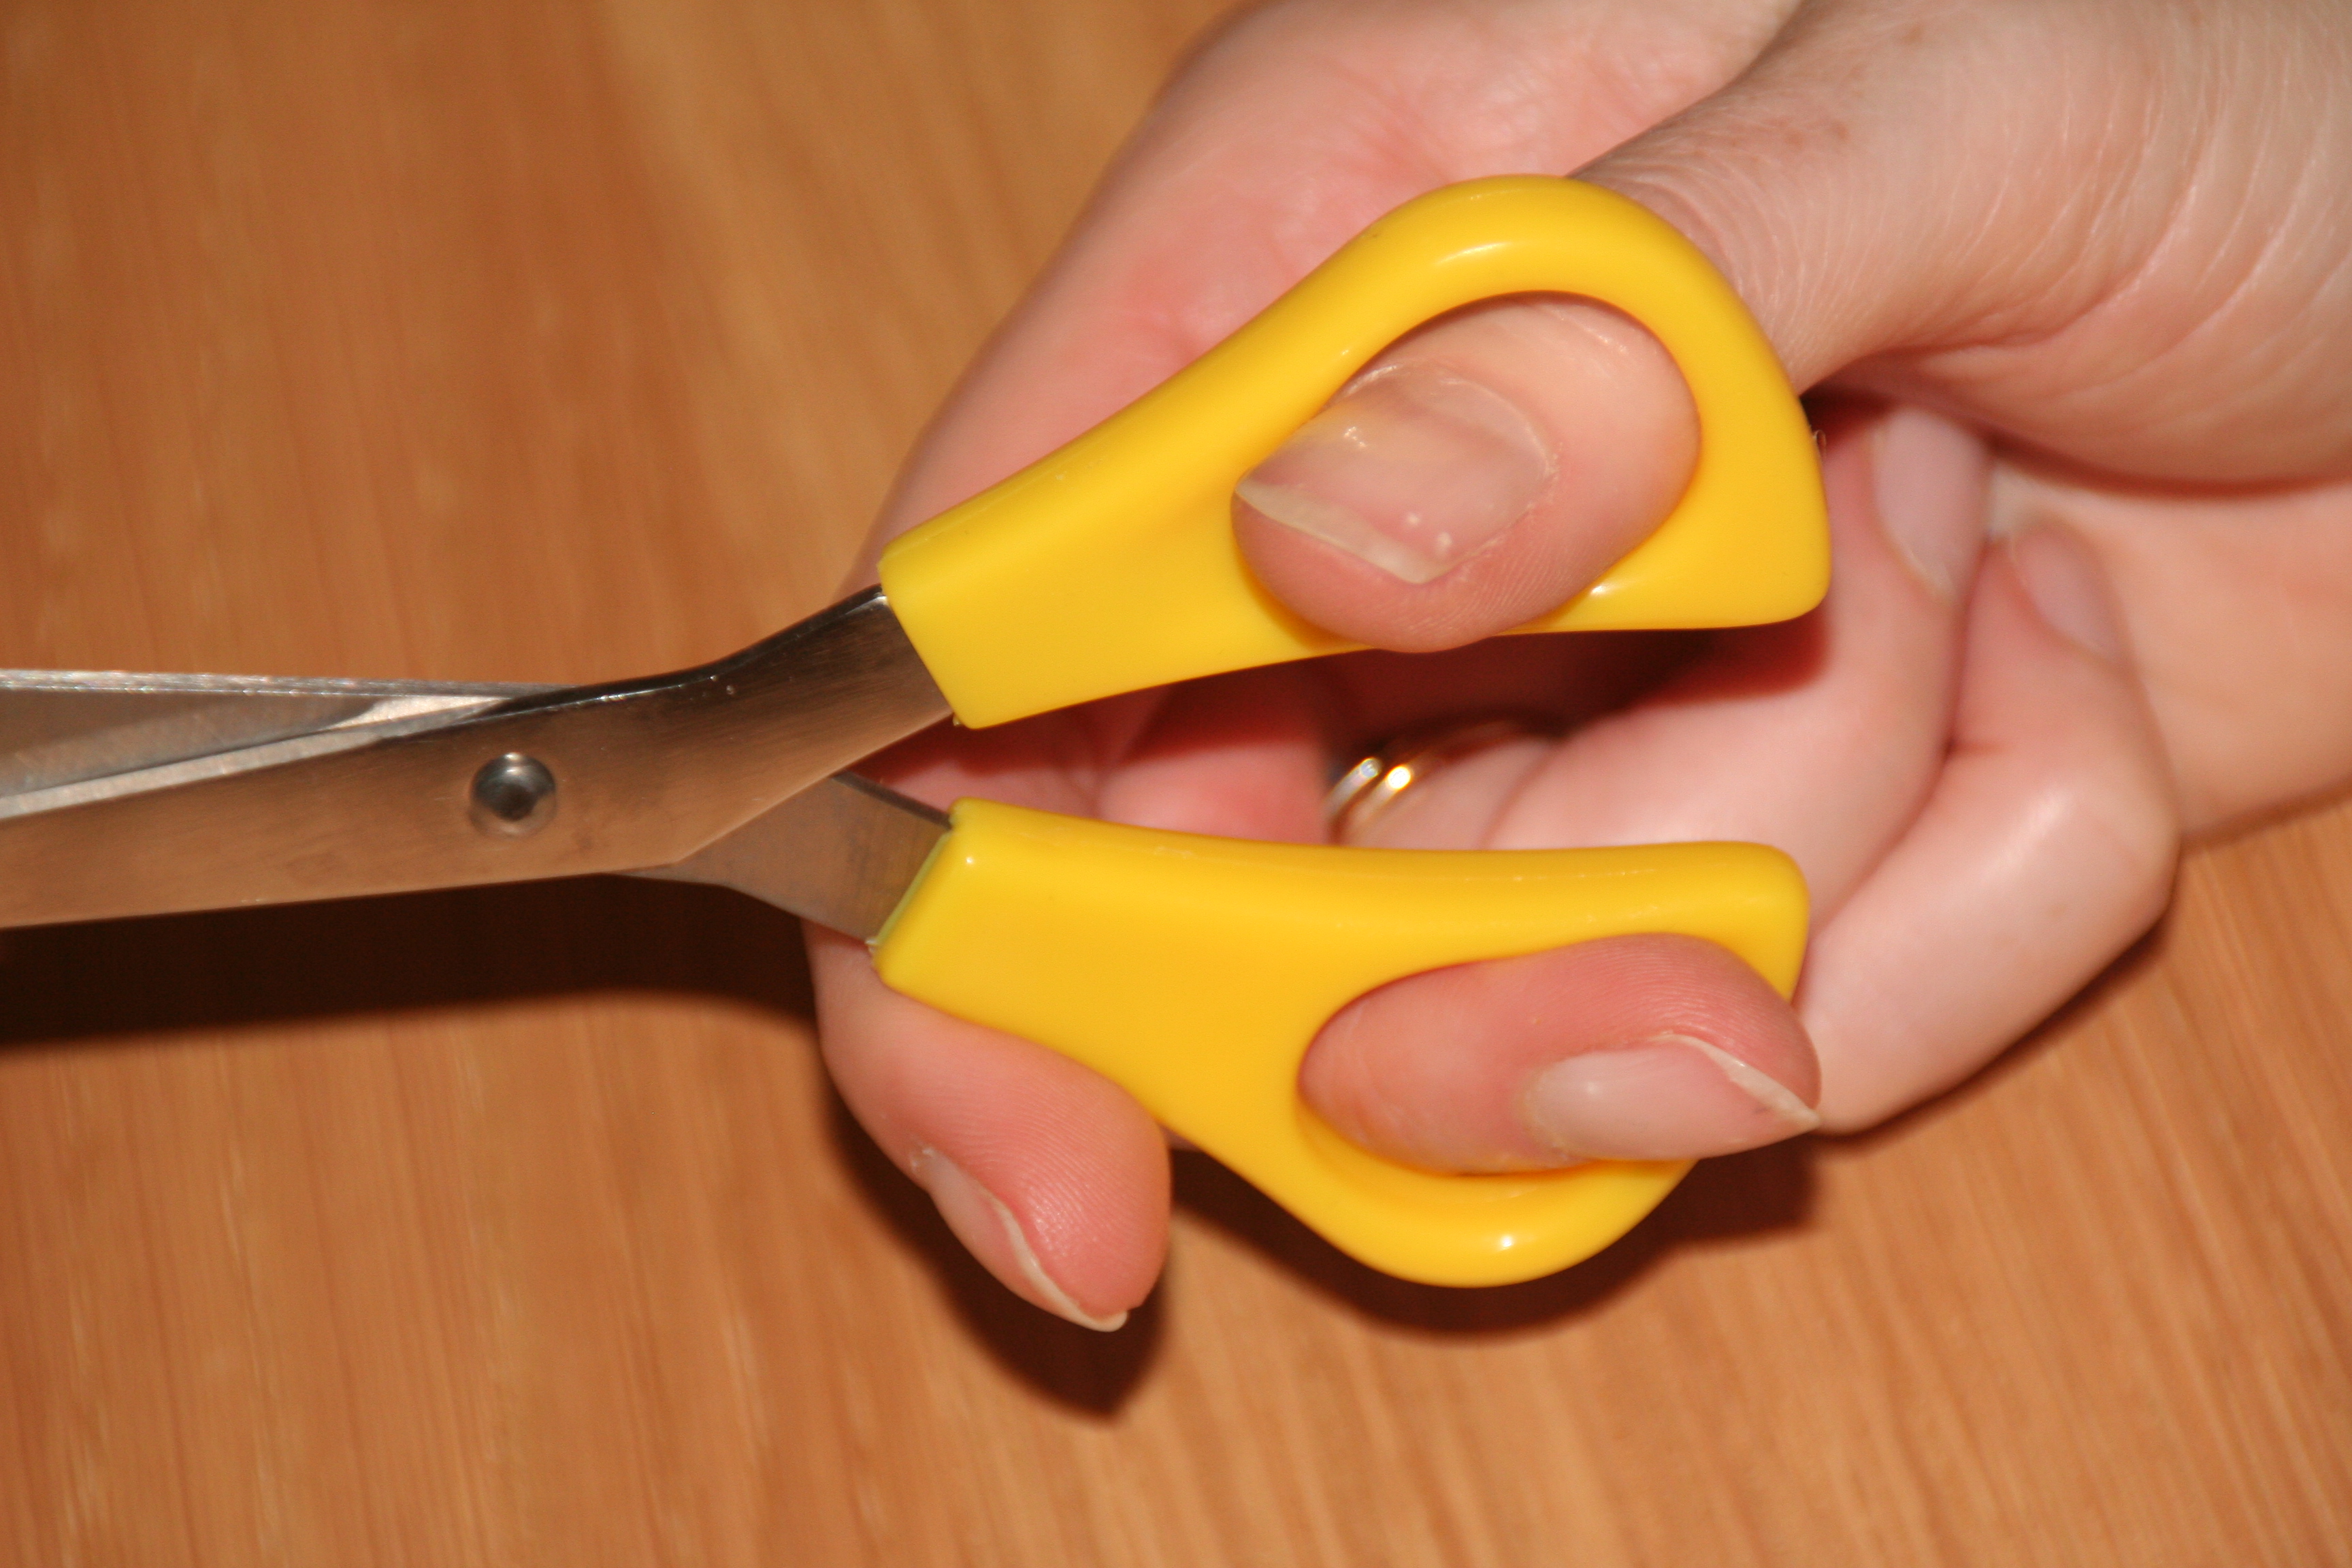
The tip of the thumb is in the top hole of the scissor handle while the tip of the middle finger is in the bottom hole. The index finger is on the bottom edge of the lower handle supporting and stabilising the scissors. The ring and little finger are curled into the palm (except if you are using large scissors as then they will fit in the bottom hole of the handle with the middle finger, to help create the cutting action).

The non-cutting hand should support the paper or item being cut; the thumb is on top of the paper and the fingers underneath, steadying and moving the paper.

How to Hold a Knife & Fork

IMG_9160

The handle of the knife or fork lies diagonally across the top section of the palm. The ring and little finger wrap around the handle, the thumb sits on the side of the handle, while the index finger sits flat and straight on the back of the handle. The middle finger curls slightly around the handle so that when the wrist twists round, so that the knife blade edge or prongs of the fork are facing down towards the plate, the handle rests on the top middle finger joint area.

Poor hand position can cause a poor pen grip

Hooked grips

We often talk about the most appropriate grip for handwriting being the tripod grip; but this usually only refers to finger position. It is easy to forget the importance of the actual hand position in relation to the pen and paper for handwriting.

The ideal position is for the hand, wrist and elbow to be below the tip of the pencil and under the writing line for both left and right-handed writers.

Some children will hold the pencil in a tripod grip but develop a hooked hand position or move the elbow too far up the table, causing the forearm and wrist to be nearly horizontal with the table edge, because they feel they can see what they are writing more clearly.

A hooked grip puts unnecessary strain on the hand ligaments and forces the body into a poor sitting position, again putting extra strain on the body. This in turn makes handwriting a tiring and uncomfortable task, impacting on a child’s overall learning experience.

It takes time to correct a poor hand position but it is well worth the perseverance as it will enable a child to write freely and more comfortably.

When writing normally, encourage children to angle the paper appropriately as this will also help to correct a poor hand position. With the correct paper tilt they will always be able to see what they are writing. If the paper is tilted at the correct angle for them, they will find a hooked hand position, or having their forearm further up the table, more difficult and uncomfortable to maintain.

Some children will find writing on a sloped desk helpful. Not all are comfortable writing or drawing on a flat surface and may benefit from the paper being positioned on an angled or sloped board. If you are not sure, instead of buying a specialist board, you could make one. Try using a ring binder or lever arch file stuffed with magazines and newspaper to make a sloped board. Tape the edges to stop the papers falling out or you could cover it in sticky back plastic to give a smoother finish to the board. The advantage of this is that you can make them to any angle of slope. Try a few to see which, if any, your child prefers. You may find that they only need the sloped board for a short while. It may also help to reduce the angle of the slope over time so that they gradually get used to moving from a sloped to horizontal writing plane.

Half-term Fun – Clothes Peg Games

Clothes peg games 2

Some fun indoor activities may be the order of the day for this half term as the weather is not so hot.

This is a very simple idea which children love because they can take greater ownership of it. The aim of the activity is to help build up hand and finger strength through using the pegs; however it can have a dual purpose, helping to keep track of the week by using it as a timetable or for learning spellings or maths activities, as well as supporting the development of language skills.

You do not need anything fancy, just some string (for the washing line), clothes pegs and pieces of paper or card to peg onto the washing line. The washing line can be a permanent fixture or you can just pop it up when you need to use it.

The clothes line needs to be at a height suitable for your child to peg things on to (placed against a wall is a safe option so that no-one can walk into it by accident and hurt themselves).

There are a whole range of games that can be played using this simple washing line and pegs concept:

  1. Memory games – Get your child to peg up 5 to 10 different pictures or items on the line. Then give them 1 minute to remember the items. Once the time is up ask them to look away, or close their eyes, and then you remove one or more of the items. Get them to look back at the line. Can they work out what is missing?
    • You could try just moving one or two of the items around. Can they figure out which ones are in the wrong place and put them back in their correct place?
    • Try swapping an item for something new, which your child did not hang up on the line. Can they work out which is the new item on the line?
  1. Odd One Out – Hang pictures on the line that belong together. Can they pick out the odd item on the line and explain why it is the odd one out.
    • They could all be pictures of fruit with a picture of some clothing
    • They could be shapes with straight sides and one with curves
    • They could all be animals but all are wild with only one being domestic
  1. Sorting – Ask your child to sort all the pictures or items from a selection and to hang all the identical things on the washing line. They could all be the same;
    • Colour
    • Shape
    • Type
  1. Pattern Work – Using pictures, different colour and shaped paper or items create different patterns. The patterns can be based on colour, size or type of object. You can create a pattern sequence on the washing line and then ask your child to try and copy the sequence. Can they explain the pattern and create their own for you to copy and explain?
  1. Pairing or What is the Same? – Hang a range of pictures or items on the line, making sure that some of the items can be paired together because they are exactly the same. They could match because;
    • They are exactly the same e.g. a pair of socks
    • Match numbers to a picture with the same number of items on
    • Match capital to lower-case letters
    • Or have items that can be put together because they are both from the same set, for example they are types of fruit or are the same colour.

Warm up For Handwriting!

Well the festive holidays are over and we are back at work and school. So it is time to get back into good habits for the New Year!

So, before you try to encourage your little darlings to sit and write, get them to do a few physical handwriting ‘Warm Up Exercises’.  Not only do they help to prepare the hands and fingers for the task ahead, they also help to release any tension that has built up. They are fun to do, which usually brings a smile and often laughter, an added tonic to any learning experience.

The warm up exercises can be accessed through a number of ways:

  • Teachers through the content section for the Key Stage you are teaching by clicking on the Handwriting warm up activities button.
  • Parents through the “Getting the Most from Our Website” section by clicking on the picture under the Taking the tension out of handwriting title.
  • Resources in the “How to Teach Handwriting” section by clicking on the Handwriting warm up activities button.
  • Follow this link: https://www.teachhandwriting.co.uk/handwriting-warm-up-exercises.html

Christmas Finger Printing a Fun Way to Support Handwriting

Christmas printing 2

Hand and finger printing can be a fun way of getting your child used to touching and using different textured mediums. The creative element can help some children to cope with, and learn to overcome, some sensory tactile defence difficulties. Being happy holding objects allows them to hold a pencil comfortably, leading to better handwriting.

Handwriting requires a child to apply the right amount of pressure to get the pencil marks of the letters on to the page. Too little pressure and the writing is often faint and wriggly in appearance (like a spider has walked across the page). Too heavy and the marks are very dark and can tear the paper; often the writing looks big, angular and laboured. Not being able to apply the correct pressure also affects how a child holds the pencil, which can cause the hand and fingers to tire more quickly, making writing tasks challenging.

Printing activities help your child to start to become aware of how to control the amount of pressure they use and the effect that this has on the quality of the work produced. Learning to control the amount of pressure exerted and how it feels can be very difficult for some children and it takes time and a range of experiences to develop these skills.

There are some fabulous printing ideas out on the internet; one of my favourite art resources is The Usborne Art Idea Books. Hand and finger printing can create some amazing artwork which can be used to make wonderful personalised Christmas cards, tags and paper.

Who could not be charmed by these fun thumb and fingertip snowmen or robins or delighted by a hand print angel?

For other useful tips on printing and setting up a printing work station (http://bit.ly/35Z7pWQ ), check out our ‘More fun handwriting activities’ in our Resources section: http://bit.ly/2kyeo3w


Christmas Fun That Develops Handwriting Skills and No Pencil!

Salt Dough 1

Handwriting skills don’t start with pencil and paper they begin with earlier play opportunities. Using play-dough type modelling materials is great for developing hand and finger strength, bilateral coordination, sensory perception and for learning and perfecting different grips for using tools.

Salt Dough

So, why not make some great salt dough Christmas gifts and tree decorations with your child. Not only will they melt the hearts of those who receive them but you will be developing your child’s fine motor skills (needed for good handwriting) while having fun, can’t be bad!

Go to our ‘More fun handwriting activities’ page (http://bit.ly/2kyeo3w ) in our Resources section for a salt dough recipe, that I have found good to use with children, and just download the ‘Salt Dough Modelling’ pdf (http://bit.ly/2Y9pVcn ).