Games to support Alphabet Letter Knowledge

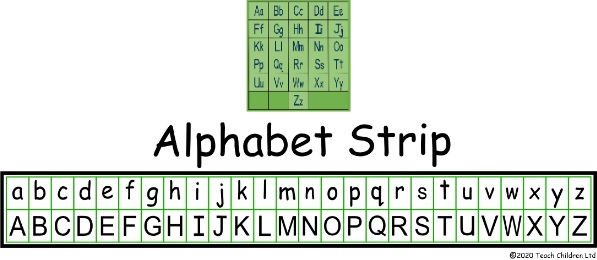
Learning the correct letter names helps to reinforce that when talking about the letter ‘a’ (ay) for example it has a set shape regardless of the sound that it will be representing in the word. This further supports children’s handwriting development as the communication of your requirements is unambiguous.

Learning the unique letter names of the alphabet is a pre-phonics skill; as well as an early learning goal. It has to be remembered that a letter is a shape which only represents a sound when it is placed within a word or sentence (has a context). Also, a letter or combination of letters can represent more than one sound and so the only unique way of identifying alphabet letters when we talk about them is to use their names.

It is important to remember that just because a child can correctly recite the ‘Alphabet’ song it does not mean they know the letters of the alphabet. It is surprising how many children can do this but when shown letters from the alphabet cannot name them at all. They may be able to tell you the sound the letter makes but have no idea of the letters name.

Snap

Number of players: 2 – 4

How to Play

You will need a set of flash cards. Anyone can deal. The cards are shuffled and dealt out as equally as possible between the players. Keeping their pile of cards face down in front, so they cannot see what they have got, each player takes it in turn to turn over the top card of their pile and place it face up into the middle of the table to make one stack of cards.

When two consecutive cards are placed on the stack that match, any player can call “Snap”, whoever says it first wins the stack of cards and places them face down at the bottom of the pile of cards they already have. They then lay down the next card into the middle of the table.

If a player says “Snap” incorrectly they have to give the player wrongly ‘snapped’ a card from the top of their own pile, given face down.

When two players say “Snap” at the same time the pile in the middle is moved to one side and called the ‘Snap Pool’. The game continues as before with a new central stack, if the top card placed down on the new central stack is the same as the top card on the ‘Snap Pool’ then the player who say “Snap Pool” first, wins the ‘Snap Pool’ pile. However, the central pile game just continues as before until ‘snap; happens again.

A player who runs out of cards has to drop out of the game.

The winner is the last player with cards.

Pelmanism (Memory Game)

Number of players: 2 – 6

How to Play

You will need a set of flash cards. The cards are thoroughly mixed and spread face down on to the table or floor. They can be arranged in a regular pattern or randomly, but they must not overlap.

One player turns over a card, leaving it in the same place, they say what it is and then turn over another saying what it is. If the two cards match then the player keeps them and has another go. If the cards do not match then the cards are turned back over in the same location as before and it is the next players turn.

The game is finished when all the cards have been matched and the winner is the one with the most pairs.

Detective Game

Number of players: 2 upwards

How to Play

  • Spot the Letter ‘?’ – Look for letters or words in everyday places such as street names, posters, in the home or shops, signs or menus etc…
  • Letter of the Day! – Pick a particular letter or word to be the search letter or word for the day, choose one that your child will be able to find in everyday places such as street names, posters, in the home or shops, signs or menus etc…

Give us a Clue – To find a particular letter or word through directional clues of where to look, using phrases such as it is next to…, below or above…, in font of…, the last…. etc.

Jumping games

Leap Frog 

Number of players: 2-6

How to Play

You will need something to mark the beginning of an imaginary start line and finish line (the imaginary pond edges). The aim of the game is to get from one side to the other using the lily pads (cushion, cones, anything that can mark a spot).

Place about 10 lily pads, marked with the target words/letters/sounds (could be paper with them written on or flash cards), randomly between the start and finish lines, making sure your child can jump between them safely and that the lilies will not slip. Explain that only by jumping on to the correct lily pad are they safe from falling into the water.

There is a caller and a jumper (the frog), the caller says a letter/word or sound that the frog has to jump to.

As they jump from one lily pad to the next, they have to say the letter/word/ sound correctly if they do not want the lily pad to sink. If they make completely the wrong choice they sink into the water and have to start again. The aim is to get across the pond without getting wet.

For every correct jump the frog earns 2 points, if they land on the right lily pad but do not say, or incorrectly say, the word/letter/sound (so get wet feet) they earn 1 point. If they make a completely wrong jump, they do not earn any points from that go and have to start again. The winner is the player with the most points.

You may need to show and model the game to your child to start with, but once they have the hang of it there will be no stopping them.

Children enjoy it when you play the game as well, they just love being able to catch you out so sometimes making mistakes on purpose can really help to focus them in on the game.

Skittles & Throwing games

Skittle Alley

Number of players: 2 – 6

How to play

You will need: up to 10 skittles (can be plastic bottles with a little sand/water/gravel in to make them stable, but not too heavy that they cannot be knocked over) and a range of balls (different sizes), flash or picture cards and some tape or blue-tac. This game is best played on a smooth surface.

The aim of the game is to knock over the skittles that match the criteria set. It could be the letter named or matching capital letter to given lower case letter. This game can be used for all sorts of letter and sound work.

Tape flash/picture cards to the skittle (bottles). Think about distance between the thrower and skittles to take into account the ability of your child’s rolling or throwing skills. Also make sure the skittles are a sensible distance apart so that particular skittles can be targeted and that the ball used is not too big (will knock over too many skittles in one throw).

(Skittle Ally Cont…)

Scoring – 2 points for every correct skittle knocked down, 1 point for correctly aiming at, but not knocking down the correct skittle. Your turn is over if you completely miss the skittles or knock over the wrong one.  The winner is the one with the most points after each player has had 6 turns. One turn is 3 throws.

Drawing – a Pre-skill for Handwriting

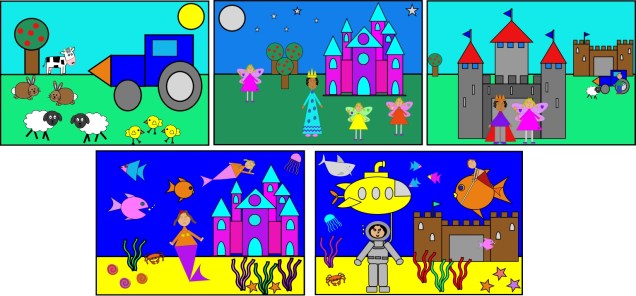
Drawing pictures is a great way to help your child develop their pre-handwriting stokes and shape formation skills. It is amazing how, by using these simple shapes, you and your child can create fantastic pictures.

Try using basic shapes as circles, rectangles and triangles to begin with and then add some swirls, curves and spirals to give extra detail.

Check out our play resources page for more great pre-handwriting picture ideas: https://teachhandwriting.co.uk/more-activities.html

How to get your child interested in drawing and colouring!

Not all children enjoy drawing and colouring and it can be difficult to encourage them. There are a number of reasons why some children seem reluctant to draw, paint or colour. For instance, some will not like the smell of the paint or crayons, while others may find the pencils, brushes or crayons too thin, long or heavy. Others may be reluctant due to past negative experiences. It can be tricky to work out exactly why a child doesn’t want to draw or write.

Here we have some tips and ideas that may help you to get started:

Paper Size– Some children like large pieces of paper to work on while others can be daunted by the prospect. Start off by having a range of paper sizes and colours for your child to choose from, this way you can find out which size of paper they prefer to work on.

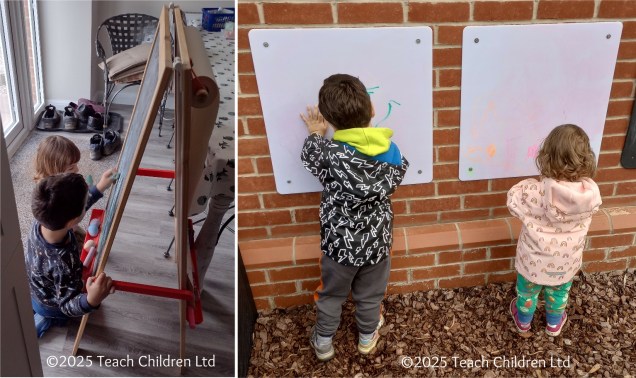
Vertical surface – Having the paper pinned vertically on a drawing board or wall may also help encourage your child to have a go at drawing more than if the paper is laid flat on a table.

Drawing & Writing Tools – Have a range of pencil and crayon thicknesses, lengths and colours so that your child can choose the ones they feel most comfortable using. Try to make sure that the pencils are sharp enough to be used effectively as picking up and using a blunt pencil can be a negative experience which can turn a child off drawing or writing.

You could try using different drawing tools to start with such as chalks or special glass pens (which are great fun and designed to clean off easily).

Draw Together – Before you start drawing think about the kind of things that will interest your child, for instance drawing a train may be ideal for your little boy but not necessarily for your little girl. Use simple shapes to draw the objects so that over time your child will be able to copy so they too can draw successfully the train, cat or car. Practise by yourself so that when you are doing the drawing with your child it comes easily to you so that you can talk through what you are doing.

We have created some new drawings using simple shapes which you may find helps you to get started. Follow this link and scroll down the page a little you will find them under the ‘Activities to help hand development’:  https://teachhandwriting.co.uk/more-activities.html

Tips:

Pick a time and place where you can start to draw in the same room/area as your child is playing. Start off by just sitting and drawing without actively involving your child. It is surprising how often a child will come to checkout and ask you what you are doing. They may just stand and watch for a while and go back to playing, just carry on and complete the picture without them. Leave the picture for them to see, you could let them know you have drawn it for them and have a little chat about it.

It may take a few goes but hopefully you will find that your child will watch for longer, maybe even asking you to draw different things in the picture, use certain colours, or want to help you colour or draw things.

At this stage it can help to explain what you are doing, for instance, if you are drawing a straight line or a wavy line to make a shape or pattern.

Other language you may use:

Straight, short, long, diagonal, up towards …, down towards …, across, curvy, wavey, zig zag, squiggly, swirling, dots, dashes.

A couple of weeks ago we talked about placement (preposition) and directional vocabulary which would also be great to use and help your child to develop as part of drawing activities.

By sharing and showing your child how to draw shapes and make pictures it gives them a positive and successful drawing experience, which encourages and gives them confidence to have ago for themself.

Placement (Preposition) and Directional Vocabulary Games are Important!

Teaching your child the vocabulary related to placement (preposition) and direction is import in supporting them to understand and follow instructions, as well as sharing information themselves, such as; ‘put your cup on the table’ or to say ‘teddy in car’.

We also use this placement (preposition) and directional language to explain how to draw shapes, patterns and write letters and numbers.

With handwriting now having to be taught separately from phonics and starting from the first term in reception, the writing framework recognizes that on joining reception:

“They may also need additional support to ensure they are secure in their understanding of key directional words such as, ‘up’, ‘down’, ‘round’ and ‘back’.”

Department of Education; The writing framework: July 2025; page 24/25; https://www.gov.uk/government/publications/the-writing-framework

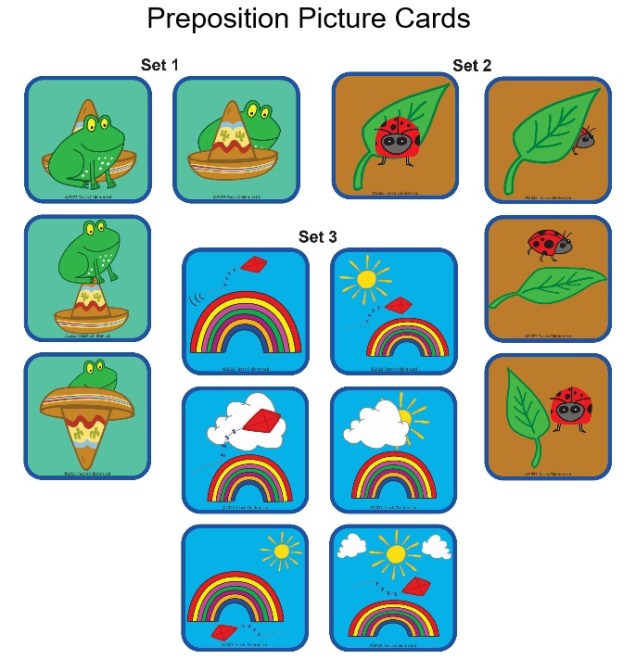
To help support the development of this vocabulary we have created three sets of picture cards and games to help you support your child in developing and using positional (preposition) and directional vocabulary.

You can find these free resources on our Phonics website by following this link: https://www.teachphonics.co.uk/phonics-resources.html

You can find these free resources in the Parent section of the Teach Handwriting website by following this link: https://teachhandwriting.co.uk/more-activities.html

What are prepositions?

A word used with a noun or pronoun to show place, position, time or means, e.g. at home, in the hall, on Sunday, by train.” Definition from Oxford School Dictionary, third edition 2002.

Here are just some preposition and directional phrases you might like to use:

On the … On top of the … Above the … Over the…

Under the… Below the … Beneath … Underneath …

Behind the …

In front of the…

Next to …Beside the … On the right of … To the right of … On the right-hand side … On the left of … To the left of … On the left-hand side… Before the … After the …

In the…  Inside the …

Out of the … Outside of the …

Between the … In between the … In the middle … In the center … Going up the ….  Going down the … Going towards the… Going away from …

Handwriting Really Starts with Play!

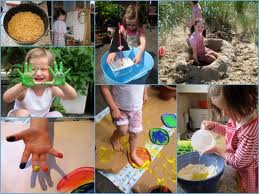
Learning to handwrite does not start with pen and paper but through play, as children explore shape and motion (how the body moves) through their senses – touch, sight and body awareness. Play is such an important element of your child’s physical, emotional, social and academic development.

Young children learn many of the directional pushes, pulls and changes in direction, required for handwriting, on a much larger scale, long before they pick up a pencil, through playing with cars or pretending to cook. These movements become the drawings/scribbles which young children form once they start mark-making, initially as big uncontrolled movements then becoming more controlled and smaller as their gross and fine motor skills develop.

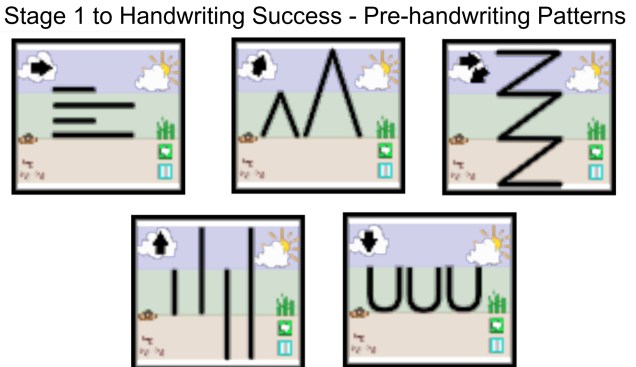
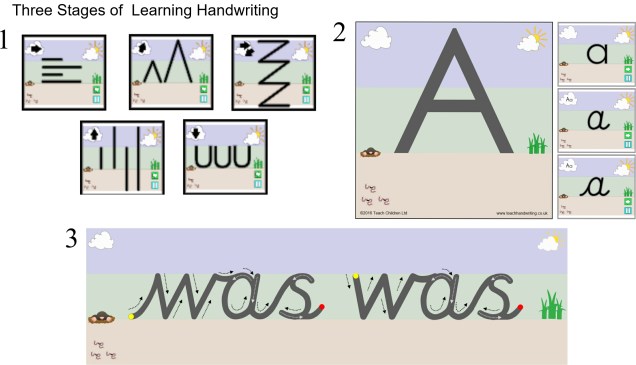
It is through play that you can really engage your child in learning how to correctly form pre-handwriting patterns and letters (the start points, orientation, directional movements and finish points).

Our non-pencil – ‘Big to Small’ activities are an easy fun way to start developing these skills early on through play: https://teachhandwriting.co.uk/big-to-small.html   

Young children love seeing their name so it is a great way to introduce letter formation; here are some other fun ideas:

  • This activity can be done indoors on large sheets of paper or using chalk on a path or patio (the beach is also a great place to do this). Write your child’s name very big and make a mark on each letter that represents a start point (an arrow showing the direction of travel can also help). Remember to use a capital letter for the first letter of their name and we would suggest lower case letters for the remaining letters. Use the letters as a track for racing cars or toys. If you make the letters big enough your child could walk, hop, jump or skip around the letters. To help them remember the letters, once they have finished a letter, encourage them to say that letter‘s alphabet name (NOT a sound the letter can make).
  • Collect stones, twigs, leaves, etc…  Use them to make the letters of your child’s name. They may only make one or two of the letters, before making a hedgehog house, nest or den for their toys becomes more interesting, but this does not matter, it is all part of the adventure.
  • Feely bag games are a fun way to explore shape and form. Try placing the letters of your child’s name into a bag or box they cannot see into. It is useful to talk through the letter shapes beforehand so they can see them as they move them about in their hands; then place them in the bag. Ask them to put their hands in (both hands, if possible, but if not, then use the dominant hand) the bag, picks up a letter, feels it, identifies it and pulls it out to check only AFTER identifying it. If correct, they get to “keep” it, if wrong, you get to “keep” it. The winner is the one with the most letters at the end. For some children it can help to have another set of the letters outside the bag to help them identify the shape they are handling in the bag. Again, encourage them to use the alphabet name of the letter.
  • Play-dough, clay and Plasticine activities are great for developing hand strength for handwriting and learning how to form letter shapes.

Your child will love these sort of activities as they see it as just playing and they get your undivided attention. You will enjoy it as you are sharing quality time with your child helping them to develop more than just their letter formation ability but also their communication and social skills.

Learning through play is a powerful way of supporting your child’s development. So have fun and play!

To Play is to Learn!

Different Types of Play and their Importance

We are always being shown how important play is in the development of young animals’ survival and hunting skills. How many times have you thought how cute or lovely when watching kittens, puppies or polar bears playing?

Humans are also animals which thrive and develop through play; in fact, play is so important the United Nations High Commission for Human Rights state it as a right for every child (Ginsburg, 2013).

We often think of play as a frivolous pastime rather than a practical and meaningful one. However, here at Teach Children we see play as a vital part of a child’s physical, emotional, social and intellectual growth and well-being.

There has been considerable research over the years on play, which supports our point of view, with the consensus being that children need to experience five different types of play (Dr.D Whitebread, 2012). These five types of play are roughly based on the developmental opportunities they provide, especially if it is child driven rather than adult lead:

Physical Play – active exercise (running, jumping, skipping etc..), rough & tumble and fine motor skills activities to develop whole body and hand and eye co-ordination strength and endurance. The outdoor element of such play develops independence, resourcefulness and self-regulation while the fine motor skills activities support the development of concentration and perseverance.

Play with Objects – starts as soon as a child can grasp and hold an object; mouthing, biting, turning, stroking, hitting and dropping. It’s how we all learn through the exploration of our senses (sensory-motor play). This type of play develops our abilities to; physically manipulate items, think, reason and problem solve, to set challenges and goals as well as to monitor our own progress.

Symbolic Play – refers to the development of spoken language, visual symbols such as letters and numbers, music, painting, drawing and other media used for communication of thought and ideas. This type of play allows children to develop the abilities to express and reflect on experiences, ideas and emotions. Sound and language play develops phonological awareness required for literacy, while number play that relates to real life situations supports numeracy skills.

Pretence/socio-dramatic Play – Pretend play provides the opportunity to develop cognitive, social, self-regulatory and academic skills. This kind of play means children have to learn and pick up on unspoken rules of interaction, taking on the role of a character and playing within the expected confines of that role.

Games with Rules – physical games such as chase, hide & seek, sport, board and computer games. Develop social skills and the emotional skills of taking turns, winning and losing as well as other people’s perspectives.

                                                             So, to play is to learn!

Bibliography

Kenneth R. Ginsburg, MD, MSEd, 25/07/2013; ‘The Importance of Play in Promoting Healthy Child Development and Maintaining Strong Parent-Child Bonds’: THE AMERICAN ACADEMY OF PEDIATRICS: http://pediatrics.aappublications.org/content/119/1/182.full

Dr.D. Whitebread, April 2012: ‘The Importance of Play’; Commissioned for the Toy Industries of Europe:  http://www.importanceofplay.eu/IMG/pdf/dr_david_whitebread_-_the_importance_of_play.pdf      

The Right Handwriting Tool for the Job!

As with learning any new skill the right tool at the right time can make a real difference to the whole learning experience as well as the outcome. Learning to handwrite is no different.

Young children due to their gross and fine motor skills ability require chunky shafted tools so that they can grip them effectively. This means they have a greater control over the tool and can achieve a more satisfactory outcome. If they are using a tool that is too thin, they will find gripping it difficult and have to keep changing their grip. They will have less control of the tool making the experience disappointing at best and discouraging at worst.

To help young children to store patterns and letter shapes formation into their motor memory it is important that the tools used provide a resistance rather than one that flows effortlessly over the writing/drawing surface. The greater the resistance the more the body can neurologically acknowledge (feel) the movement and help to send appropriate information to the brain.

Some of the best tools for young children to begin learning to draw patterns, shapes and correctly write letters:

  • Chalk on boards, walls or paths
  • Flip chart pens or large felt tips on course paper such as sugar paper
  • Using appropriately sized paint brushes on course paper or surfaces
  • Finger painting or finger drawing in sand, paint or cornflour mix
  • Finger tracing and then trying to draw the pattern, shape or letter straight afterwards.
  • Try chalking the shape or letter onto a blackboard and have the child use a damp sponge to wipe it off again (make sure the child starts in the correct place and moves correctly around the shape or letter to the correct finish point).
  • Appropriately sized crayons and pencils on course paper or card (non-shiny side of cereal boxes and corrugated card can be good fun and different to use).

As children begin a more formal approach to learning to form their letters correctly then appropriately sized and lead grade pencils are the best tool for the job. Pencil come in all widths, lengths and shapes. The key is to find the style of pencil which best suits the child and their stage of pencil grip development. Remember one size doesn’t fit all!

When a child has learnt to join their letters and has a good and consistent letter size and places all their letters on the writing line correctly in relation to each other, then it maybe they are ready to be moved to pen. It is important before moving a child to pen that they are writing with speed (appropriate for their age) and fluidity (comfortable writing all the letters of the alphabet lower and upper-case correctly). A child whose handwriting is slow and laboured may need additional support and time before being moved on to pen.

The Move from Pencil to Pen

A while ago we looked at why pencils, rather than pens, are a good first tool for learning to handwrite.

Children can’t wait however for that magic day when the teacher moves them from pencil to pen. It really is a big moment and means more than just “I can write neatly”, for them it is an acknowledgement of their maturity (growing up) and a status symbol of intellect and ability in their eyes and those of their peers.

Moving from pencil to pen can have a dramatic effect on a child’s confidence and self-esteem.  I have seen how moving a child from pencil to pen can give them a new found confidence and self-belief in their own ability, because I showed my belief in them by making that gesture. They may not have had the perfect font style in pencil but moving to pen did improve their ability to form letters more freely and become more consistent in their formation.

It is difficult to put an age on when a child should move from pencil to pen because every child is different. Schools have different policies on when this should happen, with most tending to make the move at around the age of 8/9 years old. It should really depend on the child’s ability rather than their age, as well as the potential benefits the move may have to confidence and self-esteem.

It does not make sense to keep a child working with pencil until they have a perfect handwriting style because that may never happen. For many a neat, beautiful handwriting style may never be a reality.

Advantages of pens:

  • A good quality pen will give an even ink flow.
  • A more consistent hand pressure is required, helping to develop and maintain a fluid handwriting style (reducing hand strain).
  • Fibre tip and roller pens can give the same look and writing experience as a good quality fountain pen, but are far less messy (especially for left-handed people).
  • With the right pen everyone’s handwriting can look good, (I love my fountain pen for that reason).

Limitations:

  • Cheap biro pens require a lot of hand pressure and give an inconsistent ink flow (so not very different from pencils).
  • Cheap fountain pens can be scratchy and messy
  • Some schools will insist on using a particular type of pen which is not always good for all.

My tip would be to test a few pen types and weights to find out which ones your child finds the most comfortable and enjoyable to use. I realise this can be an issue if your child’s school insist on one type of pen. But if you can prove your child’s handwriting ability is great with a different style, I think it is worth talking to them about it.

Moving from pencil to pen is an important point in a child’s education, affecting their confidence and self-esteem, and like any transition stage it should be approached with thought and care.

How to improve your child’s handwriting

School Reports – Handwriting Improvements Needed!

So, the school report has been received and you have been told that your child needs to improve their handwriting.

This is all well and good, but what exactly needs improving?

What are they finding difficult and how on earth do you write a continuous cursive z? 

So, you eventually get some handwriting practice sheets home or off the web. But no amount of time spent doing them seems to make much difference. It seemed to take longer to get them started than they spent practising handwriting. In fact they seemed worse because they were unhappy and frustrated with their own progress, so the more you try to push them the more resistant they become. Eventually you think there has to be a better way than this?

Doing more of what you are already struggling with is not always the answer. Handwriting is a complex skill to learn and there are a number of reasons why a child may be struggling.

There is a lot of information and free resources on our ‘Parent’ page which has been designed to help you: https://teachhandwriting.co.uk/parents.html

Try not to get over whelm, take things slowly and keep it simple.

Some things you might want to check and work on first before thinking about your child’s letter or join formation:

  • How are they sitting, is it a good position, it makes a difference;
  • Paper position and tilt can have a real impact especially if they are left-handed writers;
  • Are they using an efficient pencil grip for their age.

If your child is finding some or all of these elements difficult it might be that you need to work on their physical strength as well. Again, you will find information and games to help build this at the same time. And with the summer holidays coming up it is a great time for you to play games and do activities which then help them to develop the strengths and skills which may be holding them back and making handwriting a difficult task to master.

It is important to check and know which letter formations are being taught in school and that this is what you teach at home. Otherwise, you will only be causing more frustration and stress for your child.

Please note that if the letter formation being shown in the @Parent@ section is not the one being taught in school, check our @Teacher@ section of the website as you may find it there: https://teachhandwriting.co.uk/key-stage-1-handwriting-routes.html

Is your child reluctant to handwrite or has a poor writing speed?

There are a number of possible reasons why a child may reluctant to write or have a poor writing speed. Over the last few months, we have looked at a number of these:

  • Having the right writing tool
  • Hand swapping
  • Letter and word spacing
  • Too much or not enough pressure
  • Visual and Motor Memory issues
  • Spatial Awareness and eye tracking issues
  • Copying from the board

Other key areas to look at we have also cover are:

  • Sitting correctly and why they may find this difficult.
  • The importance of learning to position and tilt the paper appropriately.
  • Pencil grip – is the grip appropriate for their age and ability and when to support them.
  • Having the writing hand under the writing line.
  • Learning to write their letter correctly.

Tips for a Child who Actively Avoids, or is Reluctant, to do Writing or Drawing Activities

  • Best tip – Don’t force them, the more you push the more reluctant they will become.
  • Assess their physical ability.
  • If weaknesses are found play the games that will build the appropriate muscles groups.
  • Develop directional skills and shape formation through activities that don’t require a pencil so that they are still developing their motor memory skills which will help them later on when they do start to draw and write.
  • When ready, try timed drawing and writing activities after your child has had a good run around or physical activity (but not when they are tired).
  • Set up a good writing environment where they are sitting comfortably and without distractions, such as the TV.
  • Correct poor posture and keep the activity short. One minute of happy drawing is better than no minutes.
  • Try a ‘Playtime Drawing /Writing Session’ (see below).
  • End the sessions with a fun activity or treat.
  • This will take time, patience and encouragement, each improvement, no matter how small, needs to be recognised and positively praised.
  • Remember as your child’s skills develop so does their confidence to try, and their self-esteem, as they succeed where once they felt they failed.

How to Organise a Playtime Drawing/Writing Session

  • When ready, try timed drawing or writing activities after your child has had a good run around or other physical activity (but not when they are tired).
  • Set up a good writing environment where they are sitting comfortably and without distraction, such as having the TV on.
  • Correct poor posture and keep the activity short – up to 5 minutes initially. However, one minute of happy drawing/writing is better than no minutes.
  • After the drawing/writing play a non-drawing activity or game with your child. Make this break between 3 and 5 minutes long, ensuring your child knows when it will end (use a timer so they can see when they will need to stop)
  • Return to the original drawing/writing activity for up to another 5 minutes.
  • End the sessions with a fun activity or treat.

Tips on Running the Session

  • Start with 2 drawing/writing activities and then slowly increase the drawing/writing time and/or the number of activities and reduce the playtime slot times.
  • You could try to do a couple of these kind of sessions at different times during the day.
  • It may take time for your child to be comfortable with the sessions. You need to show a lot of patience and encouragement, each improvement no matter how small needs to be recognised and positively praised.
  • Remember as your child’s skills develop so does their confidence to try and their self-esteem grows as they succeed where once they felt they failed.