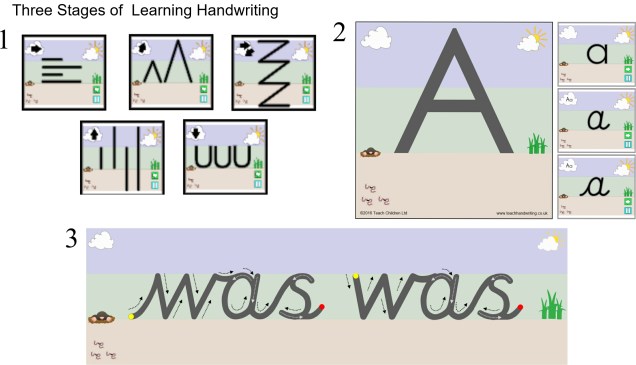
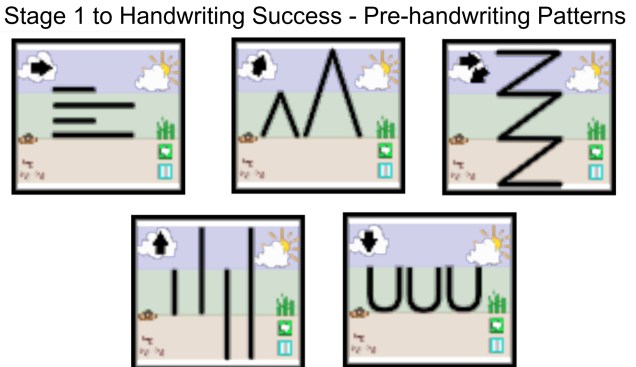
Stage 1 to #Handwriting Success – Non-pencil – Pre-handwriting Patterns

Learning to handwrite does not start with pen and paper but through play (non-pencil activities), as children explore shape and motion (how the body moves) through their senses – touch, sight and body awareness. Play is such an important element of your child’s physical, emotional, social and academic development.

Pre-handwriting patterns are the first stage in supporting a child to handwriting success. They help the child to learn the shapes and directional pushes and pulls required to form letters. All letters are a combination of these shapes and lines.

Young children can start to learn these patterns through their play, long before they are ready to pick up a pencil, moving toys back and forth across the floor or whirling them around in the air. To a child it is just play and fun, but you are doing something far more powerful and constructive by helping them to develop the motor memory patterns and directional movement skills they will need for handwriting.

Later, as their coordination and gross motor skills develop, they make more controlled and varied movement patterns in their play. Changing directions, speed and size are all prerequisite skills needed for learning pre-handwriting patterns.

Once again ‘The writing framework’ acknowledges that:

“On joining reception, some children may need teaching and practice in using and manoeuvring their thumbs, wrist and shoulder muscles in a way they need for handwriting. Initially, handwriting lessons could include learning the movements needed to form letters, practising these movements at a range of sizes…” 

Department of Education; The writing framework: July 2025; page 24; https://www.gov.uk/government/publications/the-writing-framework

It is through play that you can really engage a child in learning how to correctly form these movements or what we refer to as pre-handwriting patterns and have always been an important foundation stone in our ‘Foundation Stage Teach Handwriting Scheme (https://www.teachhandwriting.co.uk/handwriting-teaching-manuals.html#hs-fs ) and strongly promoted on our website https://www.teachhandwriting.co.uk/index.html ) and blog (https://teachhandwriting.blog/ ) since 2012.  

Our non-pencil – ‘Big to Small’ activities are an easy fun way to start developing these skills early on through play: https://teachhandwriting.co.uk/big-to-small.html

The Three Stages to Learning Handwriting

There are three distinct stages for children to progress through to develop a good handwriting style:

Stage 1 – Pre-handwriting Patterns

Pre-handwriting patterns support a child towards handwriting success. They help the them to learn the shapes and directional pushes and pulls required to form letters. All letters are a combination of these shapes and lines.

Stage 2 – Single Letter Formation

For children to develop a good handwriting style it is important to learn how to form the letters correctly.

Beginning with lower-case letters and only the capital letters for the first letter in a child’s name, examples: Peter Rabbit, Sally Green, George Blue or Mary Shell.

Learning the correct lower-case letter formation also makes the transition from single letter formation to joined letter handwriting much easier.

Stage 3 – Joined Handwriting

Learning to join letters for handwriting enables children to develop a speedy, fluid and legible handwriting style.

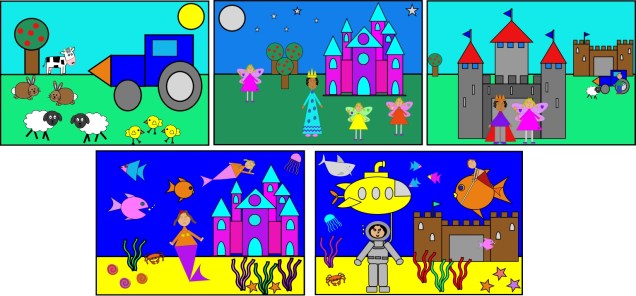
Drawing – a Pre-skill for Handwriting

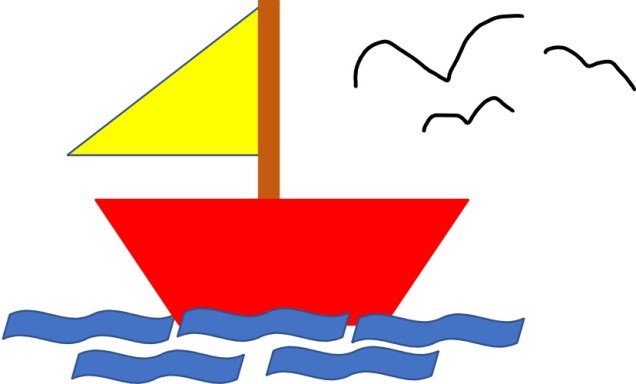
Drawing pictures is a great way to help your child develop their pre-handwriting stokes and shape formation skills. It is amazing how, by using these simple shapes, you and your child can create fantastic pictures.

Try using basic shapes as circles, rectangles and triangles to begin with and then add some swirls, curves and spirals to give extra detail.

Check out our play resources page for more great pre-handwriting picture ideas: https://teachhandwriting.co.uk/more-activities.html

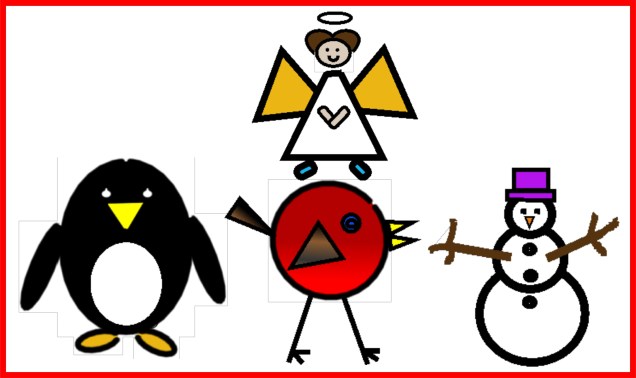
Pre-handwriting Patterns – Christmas Card Drawing Ideas

Drawing pictures is a great way to help your child develop their pre-handwriting strokes and shape forming skills. It is amazing how using simple shapes can help you and your child create fantastic Christmas cards, pictures or gift tags.

We have put together some quick step by step Christmas drawing ideas for you to try using basic shapes such as circles, rectangles and triangles. 

We hope you find them useful: https://www.teachhandwriting.co.uk/assets/pdfs/Xmas%20card%20pre-handwriting%20drawing%20ideas.pdf

Stage 1 to #Handwriting Success – Pre-handwriting Patterns

Last week we looked at non-pencil pre-handwriting pattern development, working on large scale movements through play activities.

The next stage in the progression is to move to pencil and paper activities.

Again ‘The writing framework’ states that:

“Teaching should then progress to specific handwriting lessons and practice. This might initially include systematic teaching of and practice in moving the pencil to master the horizontal, diagonal, vertical and circular strokes needed for writing.”

Department of Education; The writing framework: July 2025; page 25; https://www.gov.uk/government/publications/the-writing-framework

Here at Teach Children Ltd we always recommend teaching the handwriting patterns in groups, as this helps to further develop the specific movements (pushes and pulls) required to form the patterns and helps commit them to the motor memory. A child can then recall these motor memories to support them as they begin to form letters.

Pre-handwriting patterns that encourage a child to move their pencil from left to right are very important for left-handed writers. They need to be taught this so that they can make the cross motion in the H, T, J, G and I from left to right, as their natural instinct is to go from right to left. If this is not corrected when writing E and F the cross lines will not be “anchored” to the letter.

Once the handwriting patterns have been mastered a child will have the confidence and skills base necessary to start forming letters, numbers and symbols.

Have you got your Free Pre-handwriting Pattern Animations & Worksheets?

For Teachers: https://teachhandwriting.co.uk/pre-handwriting-patterns.html

For Parents: https://teachhandwriting.co.uk/patterns.html

Stage 1 to #Handwriting Success – Non-pencil – Pre-handwriting Patterns

Learning to handwrite does not start with pen and paper but through play (non-pencil activities), as children explore shape and motion (how the body moves) through their senses – touch, sight and body awareness. Play is such an important element of your child’s physical, emotional, social and academic development.

Pre-handwriting patterns are the first stage in supporting a child to handwriting success. They help the child to learn the shapes and directional pushes and pulls required to form letters. All letters are a combination of these shapes and lines.

Young children can start to learn these patterns through their play, long before they are ready to pick up a pencil, moving toys back and forth across the floor or whirling them around in the air. To a child it is just play and fun, but you are doing something far more powerful and constructive by helping them to develop the motor memory patterns and directional movement skills they will need for handwriting.

Later, as their coordination and gross motor skills develop, they make more controlled and varied movement patterns in their play. Changing directions, speed and size are all prerequisite skills needed for learning pre-handwriting patterns.

Once again ‘The writing framework’ acknowledges that:

“On joining reception, some children may need teaching and practice in using and manoeuvring their thumb, wrist and shoulder muscles in the way they need for handwriting. Initially, handwriting lessons could include learning the movements needed to form letters, practising these movements at a range of sizes…”

Department of Education; The writing framework: July 2025; page 24; https://www.gov.uk/government/publications/the-writing-framework

It is through play that you can really engage a child in learning how to correctly form these movements, or what we refer to as Pre-handwriting Patterns, that have always been an important foundation stone in our Foundation Stage Teach Handwriting Scheme (https://www.teachhandwriting.co.uk/handwriting-teaching-manuals.html#hs-fs ) and strongly promoted on our website 😦 https://www.teachhandwriting.co.uk/index.html ) and blog (https://teachhandwriting.blog/ ) since 2012.  

Our non-pencil – ‘Big to Small’ activities are an easy fun way to start developing these skills early on through play: https://teachhandwriting.co.uk/big-to-small.html

The Three Stages to Learning #Handwriting

There are three distinct stages for children to progress through to develop a good handwriting style:

Stage 1 – Pre-handwriting Patterns

Pre-handwriting patterns support a child towards handwriting success. They help the them to learn the shapes and directional pushes and pulls required to form letters. All letters are a combination of these shapes and lines.

Stage 2 – Single Letter Formation

For children to develop a good handwriting style it is important to learn how to form the letters correctly.

Beginning with lower-case letters and only the capital letters for the first letter in a child’s name, examples: Peter Rabbit, Sally Green, George Blue or Mary Shell.

Learning the correct lower-case letter formation also makes the transition from single letter formation to joined letter handwriting much easier.

Stage 3 – Joined Handwriting

Learning to join letters for handwriting enables children to develop a speedy, fluid and legible handwriting style.

Drawing – a Pre-skill for Handwriting

Drawing pictures is a great way to help your child develop their pre-handwriting strokes and shape forming skills. It is amazing how, by using these simple shapes, you and your child can create fantastic picture.

Try using basic shapes such as circles, rectangles and triangles to begin with and then add some swirls, curves and spiral to give extra detail.

Check out our play resources page for more great pre-handwriting picture ides: https://teachhandwriting.co.uk/more-activities.html

The Appropriate Equipment at the Right Time!

As with learning any new skill the right equipment at the right time can make a real difference to the whole learning experience as well as the outcome. Learning to handwrite is no different.

Young children, due to their gross and fine motor skills ability, require chunky shafted tools so that they can grip them effectively. This means they have a greater control over the tool and can achieve a more satisfactory outcome. If they are using a tool that is too thin, they will find gripping it difficult and have to keep changing their grip. They will have less control of the tool making the experience disappointing at best and off-putting at worst.

As children begin a more formal approach to learning to form their letters correctly then appropriately sized and lead grade pencils are the best tool for the job. Pencils come in all widths, lengths and shapes. The key is to find the style of pencil which best suits the child and their stage of pencil grip development. Remember one size doesn’t fit all!

When a child has learnt to join their letters and has a good and consistent letter size, places all their letters on the writing line correctly and in relation to each other, then it maybe they are ready to be moved to pen. It is important before moving a child to pen that they are writing with speed (appropriate for their age) and fluidity (comfortable writing all the letters of the alphabet lower and upper case correctly). A child whose handwriting is slow and laboured may need additional support and time before being moved on to pen.

Vertical to Horizontal Surfaces for Handwriting

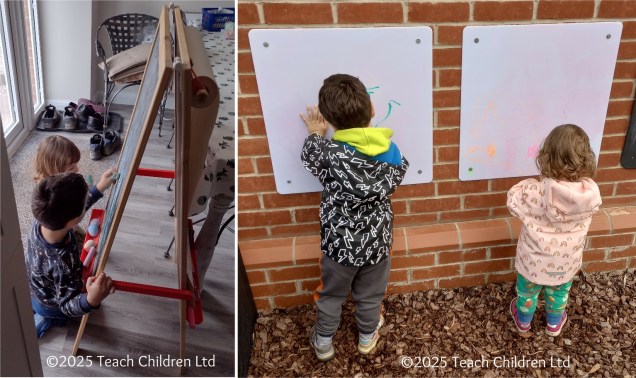
Young children, due to the stage of their physical development, draw from the shoulder rather than the elbow and wrist using large arm movements. At this stage they often prefer vertical drawing and painting surfaces as it allows a free range of movements. This is often why young children will write on walls, not because they are being naughty but because it just feels comfortable and so more enjoyable.

Drawing and writing on a vertical surface is important at this stage; as it helps young children develop the wrist strength and flexibility they will need later on to hold a pencil correctly for handwriting.

The jump from a vertical to a horizontal writing surface can seem too great for some children; due to their stage of development. These children may benefit from the paper being positioned on a sloped board.

If you are not sure whether a child needs a sloped board for handwriting, instead of buying a specialist board, you could make one. Try using a ring binder or lever arch file stuffed with magazines and newspaper to make a sloped board. Tape the edges to stop the papers falling out; you could cover it in sticky back plastic to give a smoother finish to the board. The advantage of this is that you can make them to any angle of slope. Try a few to see which, if any, the child prefers.

A homemade sloped board is just as effective as a bought one. Often a child only requires one for a short amount of time and quickly moves to writing on a horizontal surface. For a few children a sloped surface may be required for a few years, or indefinitely, in which case a purpose bought sloped writing board is a sounder investment.

Using Different Types of Textured Surfaces and Paper

To help young children to store pattern and letter shape formations into their motor memory it is important that the tools used provide a resistance rather than one that flows effortlessly over the writing/drawing surface. The greater the resistance the more the body can neurologically acknowledge (feel) the movement and help to send appropriate information to the brain.

Some of the best surfaces/papers and tools for young children to begin learning to draw patterns, shapes and correctly write letters:

  • Chalk on boards, walls or paths
  • Flip chart pens or large felt tips on course paper such as sugar paper
  • Using appropriately sized paint brushes on course paper (such as sand paper) or surfaces
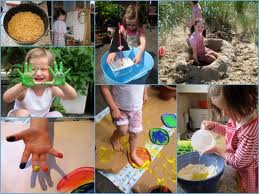
  • Finger painting or finger drawing in sand, paint or cornflour mix
  • Finger tracing and then trying to draw the pattern, shape or letter straight afterwards.
  • Try chalking the shape or letter onto a blackboard and have the child use a damp sponge to wipe it off again (make sure the child starts in the correct place and moves correctly around the shape or letter to the correct finish point).
  • Appropriately sized crayons and pencils on course paper or card (non-shiny side of cereal boxes and corrugated card can be good fun and different to use).
Transferring handwriting skills from worksheets to paper 

At Teach Children our aim is to move children off of worksheets as soon as possible. To achieve this, it is important to encourage them to transfer their skills to plain or lined paper whichever is most appropriate to their ability level. We realise that it is not always possible to buy paper with the appropriate line height in all cases, so would recommend creating your own on the computer.

  • Use a combination of worksheets and lined paper in each handwriting session with your child:
  • Use the colour worksheet, or a grey scale version, and complete one or two rows.
  • Then encourage the child to try the same patterns or letters on appropriately lined paper, again try one or two rows only.

Hopefully the worksheet will last over a couple of handwriting sessions and you and the child will see an improvement over the time. The sooner they learn to transfer their skills to paper the better.

We realise that printing off our worksheets and coloured lined paper can become costly so, to help reduce the costs:

  • Use a colour version of the appropriate worksheet initially and then try printing in grey scale. Children usually make the adjustment to grey scale well once they are used to how the picture clues and colours work.
  • You could also use the grey scale worksheets and colour the start of each row with the appropriate colour.