When to Introduce Joined Handwriting

Cursive igh join tall  CC sat join tall

Here at Teach Handwriting we believe that a child is only ready to start learning to join their handwriting when:

  • They have learnt to form all 26 lower case letters correctly
  • Letters are of a consistent and suitable size (not necessarily the perfect size, remember big is beautiful)
  • Letters are positioned appropriately on the writing line as well as in relation to one another.

Children generally begin to join letters between the ages of 6 to 7 years old, depending on the handwriting font style being taught. Those taught a continuous cursive font style from the beginning tend to join much earlier due to the nature of this font (for some by the end of their Reception Year).

Children do not need to be able to remember how to correctly form all their capital letters before they are taught how to join their letters. This is because capital letters never join to the lower case letters in a word. However, for these children correct capital letter formation needs to be taught alongside the introduction of letter joins.

The ultimate aim is for a child to develop a good handwriting style; which means;

  • They can produce and maintain a good speed
  • Have a fluid hand movement that is comfortable
  • Letters are of a consistent and appropriate size, positioned correctly
  • Handwriting is legible (so others can read it easily).

For some children (mainly SEND pupils) this may mean that they will always print or use a single letter form of writing as learning to join is just not appropriate. But that does not mean they will not comply with the bullet points above.
Tips for Teaching Left Handed Writers

Left hand tips

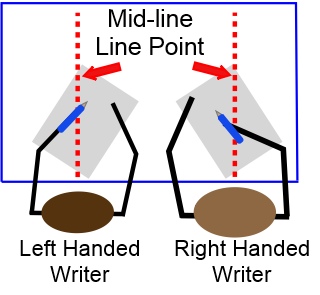
Surprisingly there are few differences when teaching left and right handed children to handwrite. A left handed child needs a slightly different pencil grip, and needs to hold the pencil slightly higher up the shaft, as well as a different paper position and tilt. Some left handed children do find handwriting challenging to start with because they naturally want to draw straight lines right to left rather than left to right.

If you find your left handed writers are struggling with learning to handwriting I would recommend you try the following:

You may also find our ‘Teaching Handwriting to a Left Handed Child: Tips for Right Handed People’ useful: https://www.teachhandwriting.co.uk/handwriting-teachers-tips.html

What’s The Difference between Cursive and Continuous Cursive Handwriting Fonts?

Cursive a Cloud   CC a Cloud

Many people think that Cursive is just short for Continuous Cursive. In fact they are two different handwriting fonts.

Cursive:

  • The letters start at different points.
  • The finishing points for all the letters is the writing line; except for, o, r, v and w, which have a top exit stroke.
  • The single letter formations are taught with just the exit strokes.

Continuous Cursive

  • The starting point for all the letters is the same; on the writing line.
  • The finishing points for all the letters is also at the writing line; except for, o, r, v and w, which have a top exit stroke.
  • The single letter formations are taught with the entry and exit strokes, this makes the transition from single letter formation to joined handwriting very straightforward and allows it to occur sooner.

Get free animations and worksheets for all our fonts letters and numbers by clicking through to the Letters page on our website:  http://bit.ly/2yJf27x

Firework Chalk Pre-handwriting Pattern Pictures

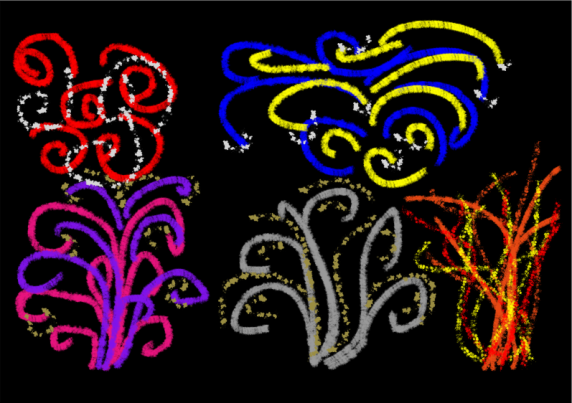
Firework drawing on black

The swirls, curves and spiral movements of fireworks are a great way to practise the curve shapes and patterns needed for forming letters.

Try using black paper and chalks to create vivid firework pictures and, to give them extra sparkle, add a little glitter.

Chalk provides a little more resistance than pencil or pen, giving your child slightly more control over their movements. This is because it can slow down the drawing and so help them focus more intently on the movements needed to create the shape and pattern. The benefit of the greater resistance and a slower pace is that it helps to commit the shape formation to memory, making it easier to form the same shapes again at a later stage, such as when handwriting.

Look at pictures, photos and video clips of fireworks to help inspire the drawing, talk through how the fireworks sound and move through the sky.

For a list of words to help describe the sounds of Bonfire Night check out this week’s Teach Phonics Blog.

Have fun and enjoy!