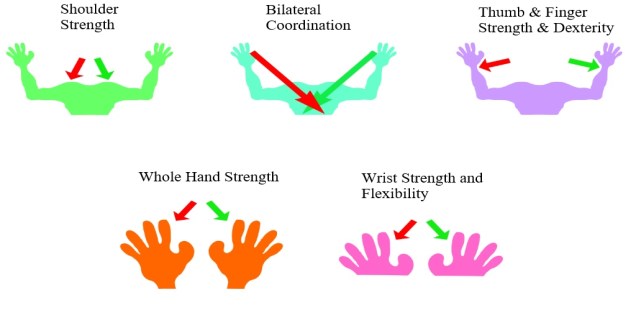
Before starting to work on letter formation, joins or even the pre-handwriting patterns it is a good idea to help focus your child’s body on the activity that it is about to be performed in a fun and relaxed way.
The exercises only take a couple of minutes to do. Not only can they be done at the beginning of the session but throughout and at the end to help relax muscles and release tension that may build up over the session. Tense muscles can make handwriting activities difficult and tiring for your child.
They are fun to do, which usually brings a smile and often laughter, an added tonic to any learning experience.
Five areas to support the body with handwriting are covered in the warm up exercises:
Copying accurately and quickly from a board at the front of a classroom can be a challenge at the best of times. For young children and those with specific learning difficulties it can be near on impossible. It is amazing how many children lose some, if not all, of a break time because they could not complete the copying task quickly enough in the lesson time.
The practise of taking information off the board has its uses and there are times when there is just no other alternative but it can be made more manageable, here are a few ideas which may help.
Make sure the child is sitting facing the board.
That they can see the board clearly.
That light is not reflecting off the board so that the writing disappears.
Try using a different colour marker pen for each line of writing (this way a child will be able to quickly locate the line they were copying from).
Or try numbering the lines so the child can more effectively find their way around the text.
Leave more of a gap between each line of writing so that each line is clearly visible from the back of the room.
Ask those children, who struggle copying, to start the first line of writing as you transfer the text to a smaller board which can then be placed at a more appropriate distance and level for them to continue copying from.
If you know the information that will need to be transferred to the child’s book then pre-prepare a text that can be given to the child to copy from. It may be in a different order or layout to that on the board; but it is the information and the child’s ability to access it, that is important.
Is a full sentence explanation always required or could the information be presented in another way such as a mind map or diagram which would be equally, or even more, useful to the child.
It can be surprising how frustrating and upsetting being asked to copy from the board can be for many children. So, anything that can help to alleviate these emotions and difficulties has got to be worth a try!
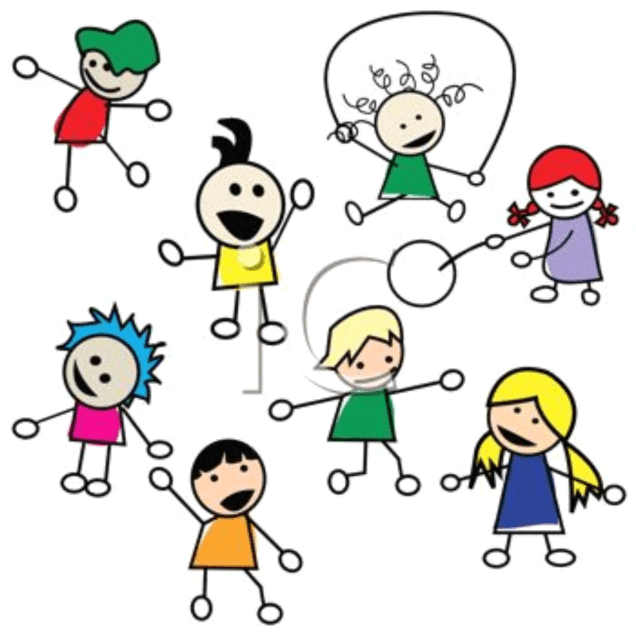
Some fun indoor activities may be the order of the day for this half term as the weather is not so hot.
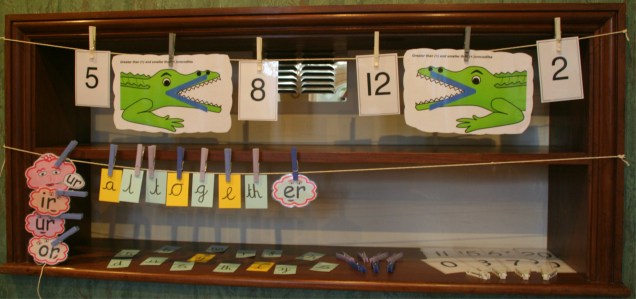
This is a very simple idea which children love because they can take greater ownership of it. The aim of the activity is to help build up hand and finger strength through using the pegs; however, it can have a dual purpose, helping to keep track of the week by using it as a timetable or for learning spellings or maths activities, as well as supporting the development of language skills.
You do not need anything fancy, just some string (for the washing line), clothes pegs and pieces of paper or card to peg onto the washing line. The washing line can be a permanent fixture or you can just pop it up when you need to use it.
The clothes line needs to be at a height suitable for your child to peg things on to (placed against a wall is a safe option so that no-one can walk into it by accident and hurt themselves).
There are a whole range of games that can be played using this simple washing line and pegs concept:
Memory games – Get your child to peg up 5 to 10 different pictures or items on the line. Then give them 1 minute to remember the items. Once the time is up ask them to look away, or close their eyes, and then you remove one or more of the items. Get them to look back at the line. Can they work out what is missing?
You could try just moving one or two of the items around. Can they figure out which ones are in the wrong place and put them back in their correct place?
Try swapping an item for something new, which your child did not hang up on the line. Can they work out which is the new item on the line?
Odd One Out – Hang pictures on the line that belong together. Can they pick out the odd item on the line and explain why it is the odd one out.
They could all be pictures of fruit with a picture of some clothing
They could be shapes with straight sides and one with curves
They could all be animals but all are wild with only one being domestic
Sorting – Ask your child to sort all the pictures or items from a selection and to hang all the identical things on the washing line. They could all be the same;
Colour
Shape
Type
Pattern Work – Using pictures, different colour and shaped paper or items create different patterns. The patterns can be based on colour, size or type of object. You can create a pattern sequence on the washing line and then ask your child to try and copy the sequence. Can they explain the pattern and create their own for you to copy and explain?
Pairing or What is the Same? – Hang a range of pictures or items on the line, making sure that some of the items can be paired together because they are exactly the same. They could match because;
They are exactly the same e.g., a pair of socks
Match numbers to a picture with the same number of items on
Match capital to lower-case letters
Or have items that can be put together because they are both from the same set, for example they are types of fruit or are the same colour.
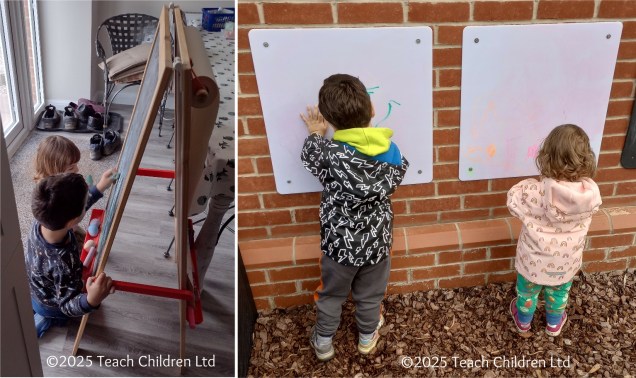
Young children, due to the stage of their physical development, draw from the shoulder rather than the elbow and wrist using large arm movements. At this stage they often prefer vertical drawing and painting surfaces as it allows a free range of movements. This is often why young children will write on walls, not because they are being naughty but because it just feels comfortable and so more enjoyable.
Drawing and writing on a vertical surface is important at this stage; as it helps young children develop the wrist strength and flexibility, they will need later on to hold a pencil correctly for handwriting.
The jump from a vertical to a horizontal writing surface can seem too great for some children; due to their stage of development. These children may benefit from the paper being positioned on a sloped board.
If you are not sure whether a child needs a sloped board for handwriting, instead of buying a specialist board, you could make one. Try using a ring binder or lever arch file stuffed with magazines and newspaper to make a sloped board. Tape the edges to stop the papers falling out; you could cover it in sticky back plastic to give a smoother finish to the board. The advantage of this is that you can make them to any angle of slope. Try a few to see which, if any, the child prefers.
A homemade sloped board is just as effective as a bought one. Often a child only requires one for a short amount of time and quickly moves to writing on a horizontal surface. For a few children a sloped surface may be required for a few years, or indefinitely, in which case a purpose bought sloped writing board is a sounder investment.
As with learning any new skill the right tool at the right time can make a real difference to the whole learning experience as well as the outcome. Learning to handwrite is no different.
Young children due to their gross and fine motor skills ability require chunky shafted tools so that they can grip them effectively. This means they have a greater control over the tool and can achieve a more satisfactory outcome. If they are using a tool that is too thin, they will find gripping it difficult and have to keep changing their grip. They will have less control of the tool making the experience disappointing at best and discouraging at worst.
To help young children to store patterns and letter shapes formation into their motor memory it is important that the tools used provide a resistance rather than one that flows effortlessly over the writing/drawing surface. The greater the resistance the more the body can neurologically acknowledge (feel) the movement and help to send appropriate information to the brain.
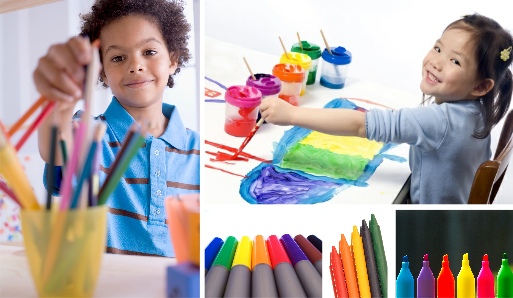
Some of the best tools for young children to begin learning to draw patterns, shapes and correctly write letters:
Chalk on boards, walls or paths
Flip chart pens or large felt tips on course paper such as sugar paper
Using appropriately sized paint brushes on course paper or surfaces
Finger painting or finger drawing in sand, paint or cornflour mix
Finger tracing and then trying to draw the pattern, shape or letter straight afterwards.
Try chalking the shape or letter onto a blackboard and have the child use a damp sponge to wipe it off again (make sure the child starts in the correct place and moves correctly around the shape or letter to the correct finish point).
Appropriately sized crayons and pencils on course paper or card (non-shiny side of cereal boxes and corrugated card can be good fun and different to use).
As children begin a more formal approach to learning to form their letters correctly then appropriately sized and lead grade pencils are the best tool for the job. Pencil come in all widths, lengths and shapes. The key is to find the style of pencil which best suits the child and their stage of pencil grip development. Remember one size doesn’t fit all!
When a child has learnt to join their letters and has a good and consistent letter size and places all their letters on the writing line correctly in relation to each other, then it maybe they are ready to be moved to pen. It is important before moving a child to pen that they are writing with speed (appropriate for their age) and fluidity (comfortable writing all the letters of the alphabet lower and upper-case correctly). A child whose handwriting is slow and laboured may need additional support and time before being moved on to pen.
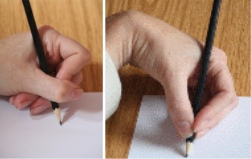
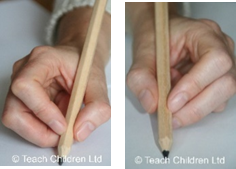
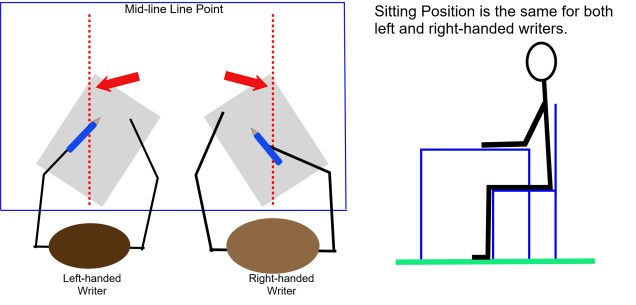
We often talk about the most appropriate grip for handwriting being the tripod grip; but this usually only refers to finger position. It is easy to forget the importance of the actual hand position in relation to the pen and paper for handwriting.
The ideal position is for the hand, wrist and elbow to be below the tip of the pencil and under the writing line for both left and right-handed writers.
Some children will hold the pencil in a tripod grip but develop a hooked hand position or move the elbow too far up the table, causing the forearm and wrist to be nearly horizontal with the table edge, because they feel they can see what they are writing more clearly.
A hooked grip puts unnecessary strain on the hand ligaments and forces the body into a poor sitting position, again putting extra strain on the body. This in turn makes handwriting a tiring and uncomfortable task, impacting on a child’s overall learning experience.
It takes time to correct a poor hand position but it is well worth the perseverance as it will enable a child to write freely and more comfortably.
When writing normally, encourage children to angle the paper appropriately as this will also help to correct a poor hand position. With the correct paper tilt, they will always be able to see what they are writing. If the paper is tilted at the correct angle for them, they will find a hooked hand position, or having their forearm further up the table, more difficult and uncomfortable to maintain.
Some children will find writing on a sloped desk helpful. Not all are comfortable writing or drawing on a flat surface and may benefit from the paper being positioned on an angled or sloped board. If you are not sure, instead of buying a specialist board, you could make one. Try using a ring binder or lever arch file stuffed with magazines and newspaper to make a sloped board. Tape the edges to stop the papers falling out or you could cover it in sticky back plastic to give a smoother finish to the board. The advantage of this is that you can make them to any angle of slope. Try a few to see which, if any, your child prefers. You may find that they only need the sloped board for a short while. It may also help to reduce the angle of the slope over time so that they gradually get used to moving from a sloped to horizontal writing plane.
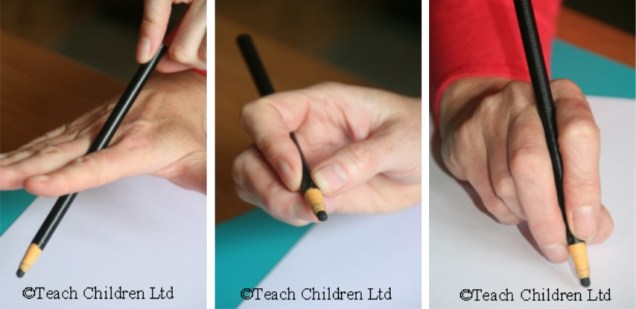
Here at Teach Children Ltd we feel this a good definition of an efficient pencil grip for handwriting:
“A pencil hold that provides speed, legibility is comfortable and will not cause harm to the joints of the hand over time. If a hold satisfies these criteria there is no need to change it”
(Benrow 2002, cited: Foundation of Paediatric Practice for the Occupational Therapy Assistant, 2005)
The above publication, and those listed at the end of the articles, explain that there are three efficient pencil grips for handwriting:
1. The Dynamic Tripod Grip (https://teachhandwriting.co.uk/teaching-tripod-pencil-grip.html), is still the most appropriate grip for handwriting (‘Drawbridge Flip’ method), for those with good fine motor skills, as it allows the fingers to move freely; so, the writer can form the letters more smoothly.
However, if the child is complaining that their hand or fingers hurt or ache when they use the Quadrupod Grip, or that it is hindering their handwriting fluidity and speed, then we do need to support them in changing their grip. For some it may be more appropriate to introduce them to the Adaptive Tripod Grip rather than trying to force them to use the Dynamic Tripod Grip.
3. The Adaptive Tripod Grip (https://teachhandwriting.co.uk/adaptive-tripod-grip.html) , developed by the Belgian Neurologist Callewaert in 1963 (cited, Ann-Sofie Selin 2003) is a functional though not conventional grip for handwriting. This grip is often more appropriate to use with children who have low muscle tone or hyper mobility of the finger joints. It can also benefit older children who continue to hold a pencil too tightly, or who hold the pencil lightly using just their fingertips (often writing using whole arm movements), as well as those children who hold a pencil with their thumb wrapped around and across the pencil and index finger.
Changing to the Adaptive Tripod grip is not a quick fix for children who have poor hand and finger strength. These strengths still need to be developed to make handwriting more comfortable.
Bibliography
Ann-Sofie Selin, 2003: Pencil Grip A Descriptive Model and Four Empirical Studies; Abo Akademi University Press
A Wagenteld, J Kaldenberg (co-editors), 2005: Foundation of Paediatric Practice for the Occupational Therapy Assistant; Pub: Slack Incorporated, ISBN-10:1-55642-629-1
Handwriting with fluidity, speed, accuracy and over longer periods of time requires a complex range of whole body and hand strengths and skills. So, it is not surprising that many children find handwriting challenging.
For a good handwriting style children need to develop their:
Gross Motor Skills – so they can sit correctly for periods of time.
Fine Motor Skills – so that they can hold and control the pencil and move the paper up the table as they write.
Motor Memory Skills – so they can recall how to form the letters.
Visual Memory Skills – so they recall what a particular letter looks like.
Spatial Awareness Skills– so they can place the letters correctly on the paper and in relation to one another.
Eye Tracking Skills– scanning from left to right so that the letters are formed and placed correctly.
If a child is struggling with handwriting it is important to take a closer look at their physical abilities. If they do not have all the appropriate key physical strengths to support their handwriting development getting them to do more of the paper and pencil activities is not the answer.
Our assessments are simple to complete and do not need any specialist equipment. The important elements are; your knowledge of the child and your observations of them at play and while they are engaged in normal day to day task.
A better understanding of a child’s key skills abilities enables you to focus more effectively, through targeted physical games and activities, to help them build and develop their skills.
Handwriting is such an important skill as it engages the neurological pathways and working memory in a way that pressing a keyboard just doesn’t; so once mastered it helps to open up the doorways to other literacy skills such as phonics, reading, spelling and composition.
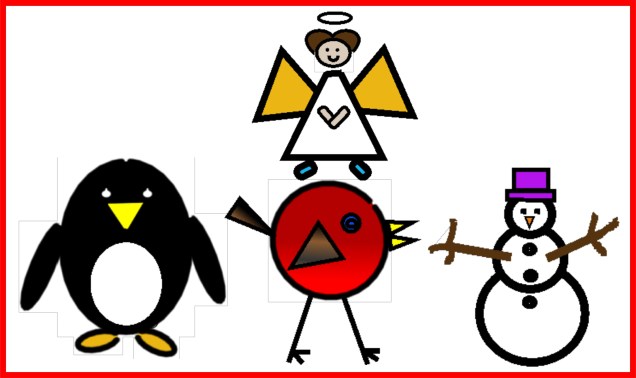
Drawing pictures is a great way to help your child develop their pre-handwriting strokes and shape forming skills. It is amazing how using simple shapes can help you and your child create fantastic Christmas cards, pictures or gift tags.
We have put together some quick step by step Christmas drawing ideas for you to try using basic shapes such as circles, rectangles and triangles.
Surprisingly there are few differences when teaching left and right-handed children to handwrite. A left-handed child needs a slightly different pencil grip, and needs to hold the pencil slightly higher up the shaft, as well as a different paper position and tilt. Some left-handed children do find handwriting challenging to start with because they naturally want to draw straight lines right to left rather than left to right.