Why it is Important to Teach Correct #Letter Formation!

https://www.teachhandwriting.co.uk/letter-animations-worksheets.html

It can often be assumed children will pick up how to write letters if they see them often enough (by osmosis). This is just not the case.  Correct letter formation has to be taught. Seeing a completed letter or word or watching it being typed up and appear on a screen does not show children how to form the letters.

For children to develop a good handwriting style it is important to learn how to form letters correctly to begin with as this makes the transition from single letter formation to joined letter handwriting much easier. This enables them to develop a speedy, fluid and legible handwriting style.

Letters are created through joining lines and curve shapes in a particular way. They have a designated start point and set directional pushes and pulls of the pencil to reach the designated finish point. This is why at Teach Handwriting we teach letter formation in groups/families rather than in alphabetical order. Certain groups use the same, or similar, shape and directional push and pulls of the pencil to form the letter, for instance the letter c has the same start point and anti-clockwise directional movement shape that is needed to create the letters a, d, g, o and, though a little more complicated, the letters s and e. Teaching letters in groups and families can also help to limit letter reversals such as b and d.

Due to how handwriting has or hasn’t been taught over the generations we all have our own way of handwriting. When supporting and teaching young children we need to develop a consistent approach so that they do not get confused or frustrated by adults giving them conflicting information.

For parents this means finding out from your child’s school which letter font they are teaching so that you can support them more effectively at home. This may mean that you have to learn a new way of writing some letters. This also applies to teachers and teaching assistants. As the adults in the situation we have to accept that it is for us to make the changes. Just because something is different from the way we were taught, or do it, doesn’t mean it is wrong, it is just different! 

Our free letter animations are not just to support children with their learning but also to provide parents and teachers (all adults really) with the knowledge and support to help children develop a consistent handwriting style.

The Second Stage to #Handwriting Success – Single Letter Formation

https://teachhandwriting.co.uk/letter-animations-worksheets.html

Last week we explained that pre-handwriting patterns are the first stage of learning to handwrite. Once a child has mastered theses, they are ready to start learning how to form letters.

But where do you start?

Our view is to focus on lower-case letters first and only the capital letters for the first letter in a child’s, examples: Peter Rabbit, Sally Green, George Blue or Mary Shell.

Why?

  • One reason is that about 95% of what children write, and are exposed to, is in a lower-case form and only 5% in capital.
  • Lower-case letters are far less complicated, requiring fewer pencil lifts to complete the letters.
  • As both lower-case and capital letters require a child to form curved lines, a skill which most children have to practise, writing lower-case letters is no more difficult than writing capitals.
  • In a young child’s writing all the letters are initially the same size, whether they are capitals or lower case; it is part of the normal developmental path of handwriting. So, the view that teaching capitals letters is easier because they are bigger is not true.
  • Young children who have learnt mostly capital letters first find it difficult to stop, as it is so ingrained into the memory, often using them half way through words and sentences. Even when they are older this inappropriate use of capitals creeps back into their work especially if they are tired or concentrating hard on composing their work.

A child’s first major achievement, in their eyes, is to write their name. So, although concentrating on lower-case letters, teach them how to form the capital letter for the first letters of their name to get them excited about handwriting.

As they master the lower-case letters introduce the remainder of the capital letters. It is important that both are taught so that a child can develop a speedy, fluid and legible handwriting style.

Free Letter Formation Animations & Worksheets: http://bit.ly/2F9P7cI

Week 5 of Our 5 Week Handwriting Lesson Program

Week 5 Handwriting 2

The fifth week of our handwriting program is ready for you to download. Today it introduces the ‘Hooks, Loops & Lines Letters’.

The free weekly set of worksheets can be downloaded, printed off and used alongside our letter formation animations.

Click on this link and it will take you to the correct page of our website:

https://www.teachhandwriting.co.uk/covid-19-handwriting-lessons.html

5 Week Handwriting Lesson Program

Each week a new letter family will be introduced:

  1. Straight lines (Finished).
  2. Curves to start (Finished).
  3. Top exit (available until Sunday 17th May 2020)
  4. Tunnel
  5. Hooks, loops and lines

There is a separate worksheet for each day:

Monday – Have a go worksheet

Today you can check if your child knows how to write the letters and if they are writing them correctly. If you know your child cannot form the letters in the letter family then show them the letter animations and then let them have a go.

Tuesday & Wednesday – Specific letter practise days

Each day focuses on different sets of letters from the letter family.

Thursday & Friday – Letter practise days

On these days letters from the letter family being taught and some letters from letter families already introduced are practised.

There are also “Rainbow” worksheets where your child can share with others what they have learnt and achieved over the week as well as appropriately sized practise paper for them.

We hope you find these useful. If you have any questions about this 5 week handwriting program please feel free to contact us through the contact us page and we will do our best to help.

Take care Lucy & Chris from Teach Children Ltd

Week 4 of Our 5 Week Handwriting Lesson Program

Week 4 handwriting 1

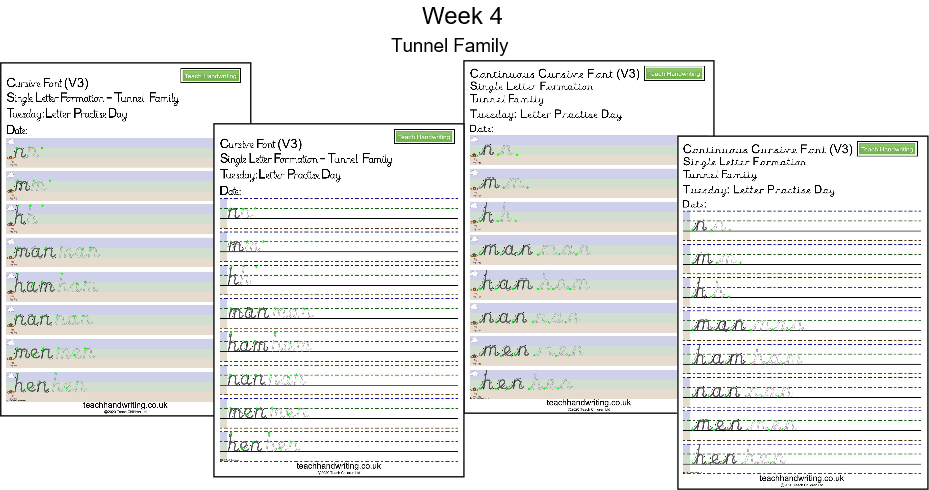
The fourth week of our handwriting program is ready for you to download. Today it introduces the ‘Tunnel Letters’.

The free weekly set of worksheets can be downloaded, printed off and used alongside our letter formation animations.

Click on this link and it will take you to the correct page of our website:

https://www.teachhandwriting.co.uk/covid-19-handwriting-lessons.html

5 Week Handwriting Lesson Program

Each week a new letter family will be introduced:

  1. Straight lines (Finished).
  2. Curves to start (available until Sunday 10th May 2020).
  3. Top exit
  4. Tunnel
  5. Hooks, loops and lines

There is a separate worksheet for each day:

Monday – Have a go worksheet

Today you can check if your child knows how to write the letters and if they are writing them correctly. If you know your child cannot form the letters in the letter family then show them the letter animations and then let them have a go.

Tuesday & Wednesday – Specific letter practise days

Each day focuses on different sets of letters from the letter family.

Thursday & Friday – Letter practise days

On these days letters from the letter family being taught and some letters from letter families already introduced are practised.

There are also “Rainbow” worksheets where your child can share with others what they have learnt and achieved over the week as well as appropriately sized practise paper for them.

We hope you find these useful. If you have any questions about this 5 week handwriting program please feel free to contact us through the contact us page and we will do our best to help.

Take care Lucy & Chris from Teach Children Ltd

Week 3 of Our 5 Week Handwriting Lesson Program

Week 3 1

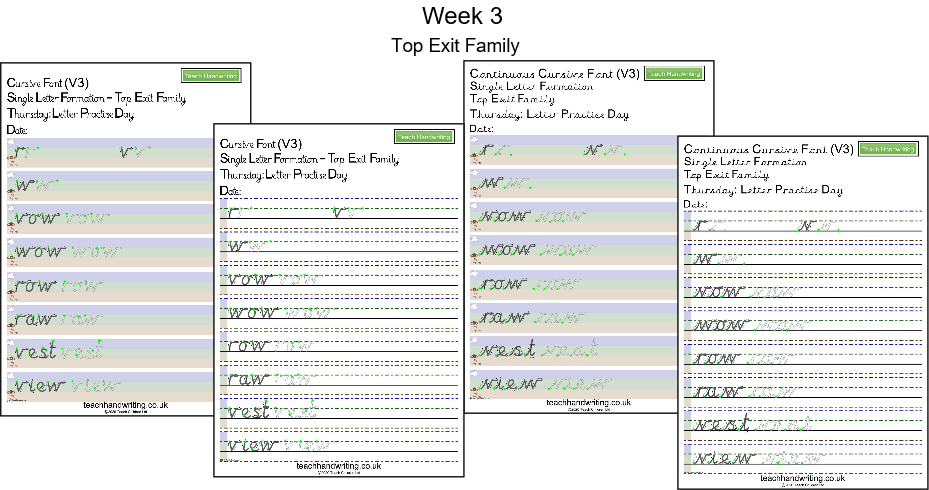
The third week of our handwriting program is ready for you to download. Today it introduces the ‘Top Exit Letters’ and revisits letters from the letter families already taught in week 1 – ‘Straight lines family’ and Week 2 – ‘Curves to start family’.

The free weekly set of worksheets can be downloaded, printed off and used alongside our letter formation animations.

Click on this link and it will take you to correct page of our website:

https://www.teachhandwriting.co.uk/covid-19-handwriting-lessons.html

5 Week Handwriting Lesson Program

Each week a new letter family will be introduced:

  1. Straight lines (available until Sunday 3rd May 2020).
  2. Curves to start
  3. Top exit
  4. Tunnel
  5. Hooks, loops and lines

There is a separate worksheet for each day:

Monday – Have a go worksheet

Today you can check if your child knows how to write the letters and if they are writing them correctly. If you know your child cannot form the letters in the letter family then show them the letter animations and then let them have a go.

Tuesday & Wednesday – Specific letter practise days

Each day focuses on different sets of letters from the letter family.

Thursday & Friday – Letter practise days

On these days letters from the letter family being taught and some letters from letter families already introduced are practised.

There are also “Rainbow” worksheets where your child can share with others what they have learnt and achieved over the week as well as appropriately sized practise paper for them.

We hope you find these useful. If you have any questions about this 5 week handwriting program please feel free to contact us through the contact us page and we will do our best to help.

Take care Lucy & Chris from Teach Children Ltd

Week 2 of Handwriting Lesson Program

Week 2 Handwriting 1

We posted the first week of our 5 Week Handwriting Lesson Program on 19th April 2020 which introduced the ‘straight lines family’. It is free 5 week, easy to use, handwriting program for you.

The second week of this handwriting program will be ready for you to download on Friday 24/04/20 and introduces the ‘curves to start family’.

The free weekly set of worksheets can be downloaded, printed off and used alongside our letter formation animations.

Click on this link and it will take you to correct page of our website:

https://www.teachhandwriting.co.uk/covid-19-handwriting-lessons.html

5 Week Handwriting Lesson Program

Each week a new letter family will be introduced:

  1. Straight lines
  2. Curves to start
  3. Top exit
  4. Tunnel
  5. Hooks, loops and lines

There is a separate worksheet for each day:

Monday – Have a go worksheet

Today you can check if your child knows how to write the letters and if they are writing them correctly. If you know your child cannot form the letters in the letter family then show them the letter animations and then let them have a go.

Tuesday & Wednesday – Specific letter practise days

Each day focuses on different sets of letters from the letter family.

Thursday & Friday – Letter practise days

On these days letters from the letter family being taught and some letters from letter families already introduced are practised.

There are also “Rainbow” worksheets where your child can share with others what they have learnt and achieved over the week as well as appropriately sized practise paper for them.

We hope you find these useful. If you have any questions about this 5 week handwriting program please feel free to contact us through the contact us page and we will do our best to help.

Take care Lucy & Chris from Teach Children Ltd

5 Week Handwriting Lesson Program

Due to the unusual times we find ourselves in, we have created an easy to use free 5 weeks handwriting program for you.

Starting from Monday 20th April 2020 and over the next 5 weeks we will provide you with a free weekly set of worksheets which can be downloaded, printed off and used alongside our letter formation animations.

Click on this link and it will take you to correct page of our website:

https://www.teachhandwriting.co.uk/covid-19-handwriting-lessons.html

5 Week Handwriting Lesson Program

Each week a new letter family will be introduced:

  1. Straight lines
  2. Curves to start
  3. Top exit
  4. Tunnel
  5. Hooks, loops and lines

Using Letter Families to Teach Letter Formation

Letter Family 1

Here at Teach Children we recommend teaching letter formation in family groups rather than in alphabetical order.

The letters of the alphabet have been sorted by shape, start points, directional push and pulls of the pencil and finish point to create the different family groups. It makes it easier for children to develop and remember the correct letter formation, this is because they do not have to constantly remember a whole range of start points or directional movement at one time. For instance, the letter c has the same start point and anti-clockwise directional movement shape that is needed to create the letters a, d, g, o and, although a little more complicated, the letters s and e,

Teaching letters in groups or families can also help to limit letter reversals such as b and d.

Also, by teaching letter groups in the order shown on the website children are able to write whole words, which have meaning to them, and this in turn encourages them to write more.

Click here to see our Letter Family animations and supporting worksheets: http://bit.ly/2F9P7cI

Why it is Important to Teach Correct Letter Formation!

It can often be assumed children will pick up how to write letters if they see them often enough (by osmosis). This is just not the case.  Correct letter formation has to be taught. Seeing a completed letter or word or watching it being typed up and appear on a screen does not show children how to form the letters.

For children to develop a good handwriting style it is important to learn how to form letters correctly to begin with as this makes the transition from single letter formation to joined letter handwriting much easier. This enables them to develop a speedy, fluid and legible handwriting style.

Letters are created through joining lines and curve shapes in a particular way. They have a designated start point and set directional pushes and pulls of the pencil to reach the designated finish point. This is why at Teach Handwriting we teach letter formation in groups/families rather than in alphabetical order. Certain groups use the same, or similar, shape and directional push and pulls of the pencil to form the letter, for instance the letter c has the same start point and anti-clockwise directional movement shape that is needed to create the letters a, d, g, o and, though a little more complicated, the letters s and e. Teaching letters in groups and families can also help to limit letter reversals such as b and d.

Due to how handwriting has or hasn’t been taught over the generations we all have our own way of handwriting. When supporting and teaching young children we need to develop a consistent approach so that they do not get confused or frustrated by adults giving them conflicting information.

For parents this means finding out from your child’s school which letter font they are teaching so that you can support them more effectively at home. This may mean that you have to learn a new way of writing some letters. This also applies to teachers and teaching assistants. As the adults in the situation we have to accept that it is for us to make the changes. Just because something is different from the way we were taught, or do it, doesn’t mean it is wrong, it is just different!

Our free letter animations are not just to support children with their learning but also to provide parents and teachers (all adults really) with the knowledge and support to help children develop a consistent handwriting style.

The Best Type of Paper for Teaching Handwriting

paper types 1

Just as the writing tool used by your child changes as they develop, so does the paper they write on.

Informal Pre-handwriting Pattern and Initial Letter Development

If your child is just starting out on the handwriting adventure then any type of plain paper (no ruled lines) is considered the best option, as many children find it less restrictive.

Young children, due to the stage of their physical development, use large movements to draw (from the shoulder rather than the wrist) which often creates larger shapes and lines; you don’t want to restrict this movement as it can cause handwriting difficulties later. As their gross and fine motor skills develop so does their pencil grip and ability to draw and write at a smaller scale, moving more from the shoulder to elbow and wrist.

Formal Pre-handwriting Pattern and Letter Development

When your child is ready to refine their pre-handwriting pattern skills, or move on to forming letters, it is a good idea to use plain paper. The aim at this stage is to learn how to form the letters correctly, not size or neatness as that comes later.

Before moving to lined paper, to help your child begin to appreciate letter proportions and positioning, paper with picture clues can be used.

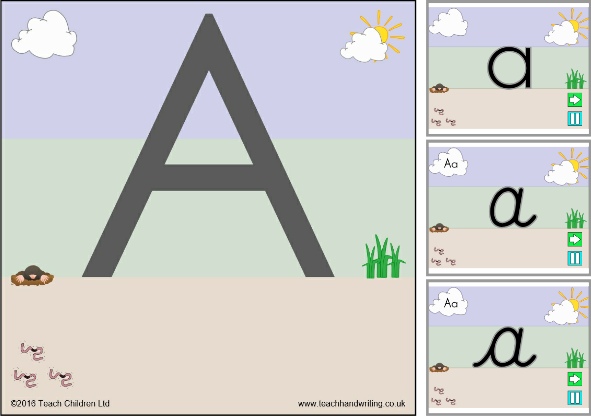
On our website the free writing paper and animations reinforce the idea of letter proportions and positioning by splitting the backgrounds into three colour zones to represent the sky, grass and earth. There are a number of reasons why this can be beneficial:

  • It can create a sub-conscious memory in your child’s mind of where particular letters sit in relation to others without the constraints of lines or obvious boundaries, especially as the picture can be any size. Children remember where to place the sun, grass or worms in their drawings; so why not letters?
  • It can be easier to talk through the formation of how a shape or letter is formed with pictorial and colour clues to guide and inform the direction of the movements required.
  • As your child’s fine motor skills develop so the size of the picture/colour clues can be reduced to match their progress.

As your child’s fine motor skills develop it enables them to form smaller more refined versions of the letters and this is when it is more appropriate to use lined paper.

Joins A & W 2

To download different line heights of our picture and coloured coded paper, scroll to the bottom of our ‘Handwriting Animations and Worksheets Page’: http://bit.ly/2F9P7cI