Week 2 of Handwriting Lesson Program

Week 2 Handwriting 1

We posted the first week of our 5 Week Handwriting Lesson Program on 19th April 2020 which introduced the ‘straight lines family’. It is free 5 week, easy to use, handwriting program for you.

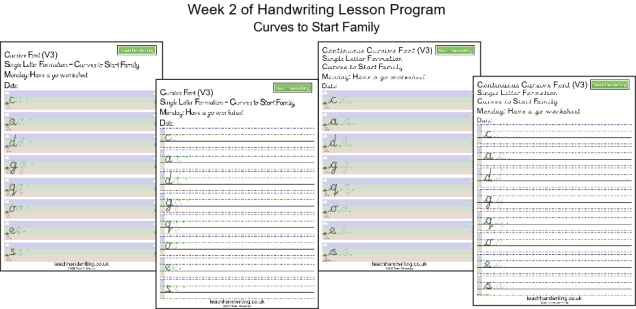
The second week of this handwriting program will be ready for you to download on Friday 24/04/20 and introduces the ‘curves to start family’.

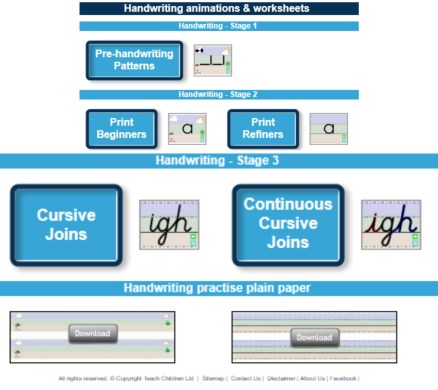
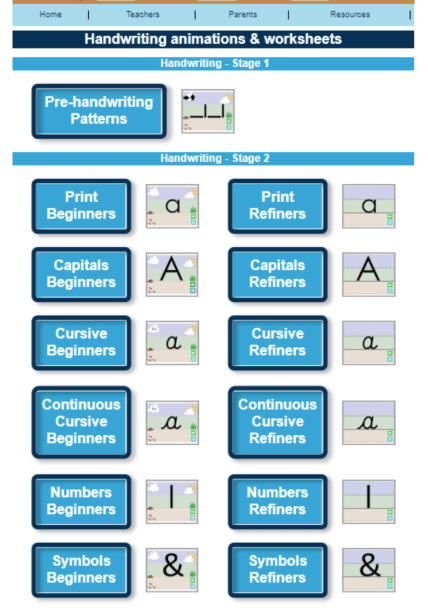
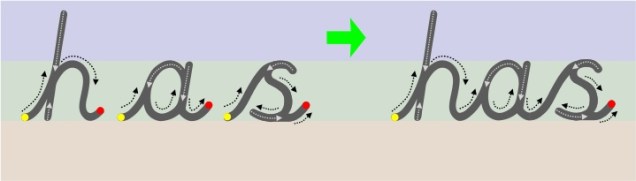
The free weekly set of worksheets can be downloaded, printed off and used alongside our letter formation animations.

Click on this link and it will take you to correct page of our website:

https://www.teachhandwriting.co.uk/covid-19-handwriting-lessons.html

5 Week Handwriting Lesson Program

Each week a new letter family will be introduced:

  1. Straight lines
  2. Curves to start
  3. Top exit
  4. Tunnel
  5. Hooks, loops and lines

There is a separate worksheet for each day:

Monday – Have a go worksheet

Today you can check if your child knows how to write the letters and if they are writing them correctly. If you know your child cannot form the letters in the letter family then show them the letter animations and then let them have a go.

Tuesday & Wednesday – Specific letter practise days

Each day focuses on different sets of letters from the letter family.

Thursday & Friday – Letter practise days

On these days letters from the letter family being taught and some letters from letter families already introduced are practised.

There are also “Rainbow” worksheets where your child can share with others what they have learnt and achieved over the week as well as appropriately sized practise paper for them.

We hope you find these useful. If you have any questions about this 5 week handwriting program please feel free to contact us through the contact us page and we will do our best to help.

Take care Lucy & Chris from Teach Children Ltd

5 Week Handwriting Lesson Program

Due to the unusual times we find ourselves in, we have created an easy to use free 5 weeks handwriting program for you.

Starting from Monday 20th April 2020 and over the next 5 weeks we will provide you with a free weekly set of worksheets which can be downloaded, printed off and used alongside our letter formation animations.

Click on this link and it will take you to correct page of our website:

https://www.teachhandwriting.co.uk/covid-19-handwriting-lessons.html

5 Week Handwriting Lesson Program

Each week a new letter family will be introduced:

  1. Straight lines
  2. Curves to start
  3. Top exit
  4. Tunnel
  5. Hooks, loops and lines

The Third Stage to Handwriting Success – Joining

Joins A & W 2

Here at Teach Handwriting we believe that a child is only ready to start learning to join their handwriting when:

  • They have learnt to form all 26 lower case letters correctly
  • Letters are of a consistent and suitable size (not necessarily the perfect size, remember big is beautiful)
  • Letters are positioned appropriately on the writing line as well as in relation to one another.

Children generally begin to join letters between the ages of 6 to 7 years old, depending on the handwriting font style being taught. Those taught a continuous cursive font style from the beginning tend to join much earlier due to the nature of this font (for some by the end of their Reception Year).

Children do not need to be able to remember how to correctly form all their capital letters before they are taught how to join their letters. This is because capital letters never join to the lower case letters in a word. However, for these children correct capital letter formation needs to be taught alongside the introduction of letter joins.

We would recommend teaching joins in join type groups, whether your child has learnt cursive or continuous cursive single letter fonts.

Teaching the join types in their groups helps a child to understand the directional pushes and pulls required to successfully join the different letter combinations.

We would recommend teaching the bottom joins first, then the top exit to ‘e’ join and finally the top exit letter joins.

For our free join animations and worksheets: http://bit.ly/2F9P7cI

For tips to support the teaching of joins check out our Teaching Tips section:  http://bit.ly/2AaX8sk

The Second Stage to Handwriting Success – Single Letter Formation

Letter Formation 2

Last week we explained that pre-handwriting patterns are the first stage of learning to handwrite. Once a child has mastered theses, they are ready to start learning how to form letters.

But where do you start?

Our view is to focus on lower-case letters first and only the capital letters for the first letter in a child’s, examples: Peter Rabbit, Sally Green, George Blue or Mary Shell.

Why?

  • One reason is that about 95% of what children write, and are exposed to, is in a lower-case form and only 5% in capital.
  • Lower-case letters are far less complicated, requiring fewer pencil lifts to complete the letters.
  • As both lower-case and capital letters require a child to form curved lines, a skill which most children have to practise, writing lower-case letters is no more difficult than writing capitals.
  • In a young child’s writing all the letters are initially the same size, whether they are capitals or lower case; it is part of the normal developmental path of handwriting. So, the view that teaching capitals letters is easier because they are bigger is not true.
  • Young children who have learnt mostly capital letters first find it difficult to stop, as it is so ingrained into the memory, often using them half way through words and sentences. Even when they are older this inappropriate use of capitals creeps back into their work especially if they are tired or concentrating hard on composing their work.

A child’s first major achievement, in their eyes, is to write their name. So, although concentrating on lower-case letters, teach them how to form the capital letter for the first letters of their name to get them excited about handwriting.

As they master the lower-case letters introduce the remainder of the capital letters. It is important that both are taught so that a child can develop a speedy, fluid and legible handwriting style.

Free Letter Formation Animations & Worksheets: http://bit.ly/2F9P7cI

When to Introduce Joined Handwriting

single to joined

Here at Teach Handwriting we believe that a child is only ready to start learning to join their handwriting when:

  • They have learnt to form all 26 lower case letters correctly
  • Letters are of a consistent and suitable size (not necessarily the perfect size, remember big is beautiful)
  • Letters are positioned appropriately on the writing line as well as in relation to one another.

Children generally begin to join letters between the ages of 6 to 7 years old, depending on the handwriting font style being taught. Those taught a continuous cursive font style from the beginning tend to join much earlier due to the nature of this font (for some by the end of their Reception Year).

Children do not need to be able to remember how to correctly form all their capital letters before they are taught how to join their letters. This is because capital letters never join to the lower case letters in a word. However, for these children correct capital letter formation needs to be taught alongside the introduction of letter joins.

The ultimate aim is for a child to develop a good handwriting style; which means;

  • They can produce and maintain a good speed
  • Have a fluid hand movement that is comfortable
  • Letters are of a consistent and appropriate size, positioned correctly
  • Handwriting is legible (so others can read it easily).

For some children (mainly SEND pupils) this may mean that they will always print or use a single letter form of writing as learning to join is just not appropriate. But that does not mean they will not comply with the bullet points above.

Which to Teach First: Capital or Lower-Case Letters?

Once a child has mastered pre-handwriting patterns they are ready to start learning how to form letters, numbers and symbols.

But where do you start?

Our personal view would be to focus on lower-case letters.

Why?

  • One reason is that about 95% of what children write, and are exposed to, is in a lower-case form and only 5% in capital.
  • Lower-case letters are far less complicated, requiring fewer pencil lifts to complete the letters.
  • As both lower-case and capital letters require a child to form curved lines, a skill which most children have to practise, writing lower-case letters is no more difficult than writing capitals.
  • In a young child’s writing all the letters are initially the same size, whether they are capitals or lower case; it is part of the normal developmental path of handwriting. So the view that teaching capitals letters is easier because they are bigger is not true.
  • Young children who have learnt mostly capital letters first find it difficult to stop, as it is so ingrained into the memory, often using them half way through words and sentences. Even when they are older this inappropriate use of capitals creeps back into their work especially if they are tired or concentrating hard on composing their work.

A child’s first major achievement, in their eyes, is to write their name. So, although concentrating on lower-case letters, teach them how to form the capital letter of their name to get them excited about handwriting.

As they master the lower-case letters introduce the remainder of the capital letters. It is important that both are taught so that a child can develop a speedy, fluid and legible handwriting style.

Free Letter Formation Animations & Worksheets: http://bit.ly/1dqBYFm

Back to School – What Letter Font is Your Child’s School Teaching?

There is no standardized font style or teaching route stipulated in the National Curriculums for schools in the UK, only that it needs to be a consistent approach throughout the school.  So it is really important that you know which font and teaching route your child’s school is using.

There are a 4 teaching routes a school can choose from when teaching lower-case letters:

  1. Print, then Cursive; finally introduce Continuous Cursive to join the cursive letters.
  2. Print, then Continuous Cursive.
  3. Cursive and then Continuous Cursive for join the cursive letters.
  4. Continuous Cursive.

All the above are good teaching routes, the only difference is how many font styles a child has to learn and how long it takes before they learn how to join their letters.

The Difference between Print, Cursive and Continuous Cursive Handwriting Fonts

Print Font

  • The letters have different start points.
  • There are a number of different letter finish points.

Cursive or Continuous Cursive?

Be aware, some schools will say they are teaching Cursive when in fact they are teaching Continuous Cursive.

They are in fact 2 different handwriting fonts.

Cursive:

  • The letters start at different points (the same as print).
  • The finishing points for all the letters is the writing line; except for, o, r, v and w, which have a top exit stroke.
  • The single letter formations are taught with just the exit strokes.

Continuous Cursive:

The starting point for all the letters is the same; on the writing line.

  • The finishing points for all the letters is also at the writing line; except for, o, r, v and w, which have a top exit stroke.
  • The single letter formations are taught with the entry and exit strokes, this makes the transition from single letter formation to joined handwriting very straightforward and allows it to occur sooner.

Check out our Letter Formation section of the website for more information, free animations and worksheets: http://bit.ly/1dqBYFm

Teaching Letter Joins – A Systematic Approach

Cursive oh join tall   cc oh join tall

We would recommend the same approach to joining letters whether your child has learnt cursive or continuous cursive single letter fonts; teaching the joins in join type groups.

Teaching the join types in their groups helps a child to understand the directional push and pulls required to successfully join the different letter combinations.

There are 4 main groups of letter joins; bottom joins, bottom to “c” shape joins, “e” joins (top and bottom join strokes) and top joins.

Moving from Cursive Single Letters to Joining

There are seven join strokes to be taught Most children will find the bottom joins the easiest to achieve, as it only requires the extension of the exit stroke they already put on the letters. The bottom to “c” shape joins can be tricky at first but soon mastered. The joins that tend to cause the most confusion and difficulty are the “e” joiners and top exit joiners.

I would recommend teaching the bottom joins first, then the ‘e’ joins and finally the top exit letter joins.

Moving from Continuous Cursive Single Letters to Joining

There are three join strokes to be taught. The easiest is the bottom exit letters (the majority of the letters), all a child has to do is write the letters closer together without lifting their pencil off the paper. Only the top to “e” and top joiners need to be taught for continuous cursive, as the nature of the font style means that the lead-in and exit strokes needed to join the majority of letter combinations have already been taught.

I would recommend teaching the bottom joins first, then the top exit to ‘e’ join and finally the top exit letter joins.

For more information about the letter join type groups and links to supporting animations check out our ‘How to Join Letters of the Alphabet’: http://bit.ly/1y0Haf7

and ‘Tips For Teaching How to Join Letters When Handwriting’: http://bit.ly/1Iv1g5Q

When to Introduce Joined Handwriting

Cursive igh join tall  CC sat join tall

Here at Teach Handwriting we believe that a child is only ready to start learning to join their handwriting when:

  • They have learnt to form all 26 lower case letters correctly
  • Letters are of a consistent and suitable size (not necessarily the perfect size, remember big is beautiful)
  • Letters are positioned appropriately on the writing line as well as in relation to one another.

Children generally begin to join letters between the ages of 6 to 7 years old, depending on the handwriting font style being taught. Those taught a continuous cursive font style from the beginning tend to join much earlier due to the nature of this font (for some by the end of their Reception Year).

Children do not need to be able to remember how to correctly form all their capital letters before they are taught how to join their letters. This is because capital letters never join to the lower case letters in a word. However, for these children correct capital letter formation needs to be taught alongside the introduction of letter joins.

The ultimate aim is for a child to develop a good handwriting style; which means;

  • They can produce and maintain a good speed
  • Have a fluid hand movement that is comfortable
  • Letters are of a consistent and appropriate size, positioned correctly
  • Handwriting is legible (so others can read it easily).

For some children (mainly SEND pupils) this may mean that they will always print or use a single letter form of writing as learning to join is just not appropriate. But that does not mean they will not comply with the bullet points above.

Which to Teach First: Capital or Lower Case Letters?

Phonics Assessment Pages

Dated 28/09/17

Once your child has mastered pre-handwriting patterns they are ready to start learning how to form letters, numbers and symbols.

But where do you start?

Our personal view would be to focus on Lower Case letters.

Why?

  • One reason being that about 95% of what children write, and are exposed to, is in a Lower Case form and only 5% in Capital.
  • Lower Case letters are far less complicated, requiring fewer pencil lifts to complete the letters.
  • As both Lower Case and Capital letters require a child to form curved lines, a skill which most children have to practise, writing lower case letters is no more difficult than writing capitals.
  • In a young child’s writing all the letters are initially the same size, whether they are Capitals or Lower Case; it is part of the normal developmental path of handwriting. So the view that teaching Capitals letters is easier because they are bigger is not true.
  • Young children who have learnt mostly Capital letters first find it difficult to stop, as it is so ingrained into the memory, often using them half way through words and sentences. Even when they are older this inappropriate use of Capitals creeps back into their work especially if they are tired or concentrating hard on composing their work.

Your child’s first major achievement, in their eyes, is to write their name. So, although concentrating on Lower Case letters, teach them how to form the Capital letter of their name to get them excited about handwriting.

As they master the Lower Case letters introduce the remainder of the Capital letters. It is important that both are taught so that your child can develop a speedy, fluid and legible handwriting style.

Free Letter Formation Animations & Worksheets: http://bit.ly/1dqBYFm