Transferring handwriting skills from worksheets to paper 

At Teach Children our aim is to move children off of worksheets as soon as possible. To achieve this, it is important to encourage them to transfer their skills to plain or lined paper whichever is most appropriate to their ability level. We realise that it is not always possible to buy paper with the appropriate line height in all cases, so would recommend creating your own on the computer.

  • Use a combination of worksheets and lined paper in each handwriting session with your child:
  • Use the colour worksheet, or a grey scale version, and complete one or two rows.
  • Then encourage the child to try the same patterns or letters on appropriately lined paper, again try one or two rows only.

Hopefully the worksheet will last over a couple of handwriting sessions and you and the child will see an improvement over the time. The sooner they learn to transfer their skills to paper the better.

We realise that printing off our worksheets and coloured lined paper can become costly so, to help reduce the costs:

  • Use a colour version of the appropriate worksheet initially and then try printing in grey scale. Children usually make the adjustment to grey scale well once they are used to how the picture clues and colours work.
  • You could also use the grey scale worksheets and colour the start of each row with the appropriate colour.

How Poor Eye Tracking and Spatial Awareness Skills Impact on #Handwriting!

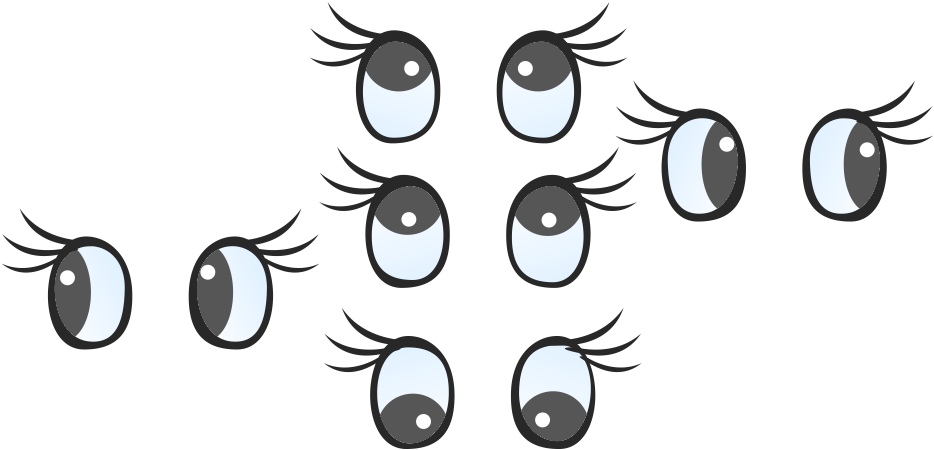
Eye tracking and/or spatial awareness difficulties can have a dramatic effect on a child’s handwriting ability.  Weak skills in these key areas make it difficult for children to form letters correctly (curves and lines often not joining to complete the letter shape), as well as being unable to appropriately space letters in words and words in sentences. Other poor presentation skills include being unable to write on lines and often missing lines out when following on with a sentence.

It is also worth pointing out that a child with poor eye tracking and/or spatial awareness skills will also find reading difficult.

Eye tracking is the ability to control and coordinate the fine eye movements needed:

  • For left to right eye movements, without moving the head, needed to follow a line of writing as the letters are formed or for reading a line of print.
  • To focus and move the eyes to follow an object without moving the head, in all directions.
  • To track/follow objects near and far.
  • To focus on one object without moving the eyes.

Poor eye tracking skills can make handwriting very difficult, causing letter formation, spacing and positioning problems, leading to poor presentation. Often words are missed out or repeated, causing composition and legibility issues.

Activities that help to build these strengths and skills are: Swing Ball, target games and catching games.

Game idea: Goal post skittles

You need: Posts/marker, large plastic drink bottles/skittles and a range of ball sizes.

How to do it:

Place the posts about 2 metres away from the start position and about half a metre apart. Place the skittles about half a metre behind the posts but directly between them. The child starts by rolling a large ball through the posts to knock the skittles over. Before they roll the ball explain to get a maximum score, they need to knock all the skittles over in one roll and that the best way to do this is to look directly ahead through the posts at the skittles, NOT at the ball or their hand.

It may take a little practise, as they improve, they can use a different size ball or move the skittles so that they form different patterns which means they have to be more accurate with the roll.

This game can also be used as a foot and eye activity, the same rules apply, they must look to where they want the ball to end up not at their feet or the ball, tricky!

Spatial awareness is the ability to be aware of:

  • The space around you and your position in that space.
  • The position and relationship of other objects in relation to one another and yourself.

Poor spatial awareness skills make handwriting difficult as it affects the ability to understand and produce the directional pushes and pulls required to form letters; as well as difficulties with spacing and positioning. Combined, these difficulties can cause poor presentation and possible legibility issues.

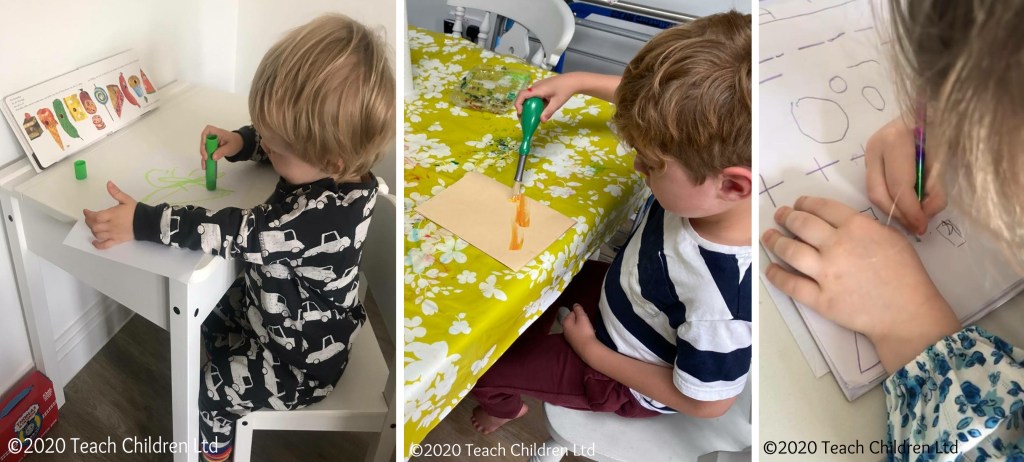
Activities that help to build these strengths and skills are: games such as ‘Twister’ or ‘Simon Says’ and jigsaws and pattern making.

Games idea: Pattern making

You need: Beads, building blocks, Lego or shapes.

How to do it:

Talk through the process of making the same pattern as shown on a card or already produced; for instance, the red square goes on the right of the blue square and the yellow square is below the blue square. Ask the child to verbalise what they see and are doing to recreate the pattern.

Patterns can be created and copied with all sorts of items – beads, building blocks, Lego and shapes.

As skill levels improve tessellation (a pattern of shapes that fit perfectly together) activities and square or patterned paper for colouring and creating their own pattern designs are enjoyable.

What is an efficient pencil grip?

“A pencil hold that provides speed, legibility is comfortable and will not cause harm to the joints of the hand over time. If a hold satisfies these criteria there is no need to change it”

(Benrow 2002, cited: Foundation of Paediatric Practice for the Occupational Therapy Assistant, 2005)

The above publication, and those listed at the end of the articles, explain that there are three efficient pencil grips for handwriting:

1. The Dynamic Tripod Grip is still the most appropriate grip for handwriting (we looked at this last week using our ‘Drawbridge Flip’ method), for those with good fine motor skills, as it allows the fingers to move freely; so, the writer can form the letters more smoothly.

2. The Quadrupod Grip, this grip is a little more restrictive because the fingers cannot move as freely as they would if using the Tripod grip.

3. The Adaptive Tripod Grip, developed by the Belgian Neurologist Callewaert in 1963 (cited, Ann-Sofie Selin 2003) is a functional though not conventional grip for handwriting. This grip is often more appropriate to use with children who have low muscle tone or hyper mobility of the finger joints. It can also benefit older children who continue to hold a pencil too tightly, or who hold the pencil lightly using just their fingertips (often writing using whole arm movements), as well as those children who hold a pencil with their thumb wrapped around and across the pencil and index finger.

Bibliography

Ann-Sofie Selin, 2003: Pencil Grip A Descriptive Model and Four Empirical Studies; Abo Akademi University Press

A Wagenteld, J Kaldenberg (co-editors), 2005: Foundation of Paediatric Practice for the Occupational Therapy Assistant; Pub: Slack Incorporated, ISBN-10:1-55642-629-1

Web-sites:

https://www.ot-mom-learning-activities.com/correct-pencil-grasp.html

https://www.otplan.com/articles/pencil-grasp-patterns.aspx

https://www.pediastaff.com/resources-pencil-grasp-patterns–may-2009

The Five Stages of Pencil Grip Development

The Five Stages of Pencil Grip Development

There are 5 developmental stages, that a child needs to go through, before they can successfully use a mature tripod grip. They need to work through each stage and as their hand, shoulder and arm strength and mobility increases so does their ability to move to the next developmental stage of the grip. Children develop through these grip stages over time with new experiences using different tools and drawing/writing mediums especially in the early years (0 to 4 years old).

You will find that young children will move between, or have slightly different versions of, the grips depending on the task or the effect they are trying to achieve. This is exactly what we want to happen.

Stage 1. Palmer-supinate grasp

Holds the crayon/pencil in fist (whole hand) like a dagger. They use whole arm movements from the shoulder to mark-make. Due to this whole arm movement they prefer to work on a vertical surface.

Stage 2. Palmer or digital-pronate grasp

Holds a crayon/pencil with the palm of the hand facing down towards the paper. The crayon/pencil is held by all finger and the thumb. The movement comes from the shoulder and elbow. Again, due to the way the arm moves a vertical surface is preferred.

Stage 3. Four finger and thumb grip

Holds the crayon/pencil between the thumb and four fingers with the crayon/pencil nearly vertical up right position. Movement comes from the elbow and wrist.

Stage 4. Static Quadruped or tripod grip

Holds the pencil in very nearly in the correct position however the web space is narrower than it would be if held in a mature tripod grip. This means that the movement is coming from the wrist and large finger movements.

Stage 5. Mature/Dynamic tripod grip

This is traditionally considered the most appropriate pencil grip for handwriting. Holding the pencil between the thumb and index finger with pencil supported on the middle finger. The ring and little fingers are gently curled inwards. This give an open wide web space which means the movement comes from the fingers. For more information on the five stages of pencil grip development click on the following link: https://teachhandwriting.co.uk/pencil-grip-development-foundation-stage.html

Case Studies

For example, young Billy here is using a variation of a stage 1 – 3 throughout these colouring activities:

In this example it might look as if Billy has gone backwards in his grip development but he has not, he has learnt that the grip he is using offers him greater control:

Young William here is using different variations of stages 2 and 3 for gluing and painting activities:

Esme and Issy have both moved to stage 4 although for some activities such as drawing/painting they may use a different grip, but that is what we would expect to see.

Treasure or Easter Egg Hunts Develop both Handwriting & Language Skills

The Easter Holidays have started, so here are some fun activities to keep children of all ages entertained whether we have rain or sunshine.

An Easter egg, or treasure, hunt is a great way to teach children directional language. Being able to understand directional and placement (prepositions) vocabulary is important for understanding everyday instructions such as ‘put your cup on the table’; ‘go along the hall and stop at the door in front of you’.

We also use this directional language to explain how to draw patterns and write letters, which is another reason why it is important for young children to be introduced to, and have a good understanding of, this kind of vocabulary.

Through Easter egg, or treasure, hunts you can introduce new directional and placement language in a fun and exciting way. There are a number of different ways to approach this:

  • You can give verbal instructions to the hidden egg/treasure.
  • You could create a map for them to follow and ask them to talk you through the map, supporting them with new language as necessary.
  • You could use a mixture of verbal and map clues.
  • For older children get them to hide the egg/treasure and give you instructions, or draw a map.
  • If you have more than one egg/treasure and they are of different sizes make the larger ones more difficult to find.

The important thing is the language shared. Words and phrases to use are: left, right, straight on, forward, backwards, about turn, turn around, up, down, higher, lower, stop, next to, in front, beside, underneath, on top of, behind, on the left of, on the right of, outside, and inside.

Easter egg, or treasure, hunts are a great whole family activity and you are never too young or too old to join in!

Spring/Easter Drawing Activity Ideas – Supporting Language & Pre-handwriting Pattern Development

Easter holiday break starts next week!

So, we have put together some quick step by step Easter drawing ideas for you to try, using basic shapes such as circles, rectangles and triangles. It is amazing how, by using these simple shapes, you and your child can create fantastic Spring/Easter: cards, pictures mobiles or bunting: https://teachhandwriting.co.uk/more-activities.html

Drawing pictures is a great way to help your child develop their pre-handwriting strokes and shape forming skills. As well as supporting language development by sharing and using words and phrases as you draw, colour, paint or stick with your child. Here are some suggestions for you: next to, above, underneath, on top of, on the left of, on the right of, different colour names, different shape names and line style such as straight, curved, wiggly, thick, thin, short or long.

Have fun!

Improve Handwriting Skills with Pancake Making

Pancake Day (Tuesday 21st February 2023) will soon be upon on us, so why not use it as a great fun handwriting home exercise. Not only will you be helping your child to develop coordination, hand and finger strength and dexterity skills; you will also be sneaking a bit of reading and maths; three homework practises in one. Result!

A Traditional English Pancake Batter Mix

For a thin pancake batter mix:

  • 100g plain flour
  • Pinch of salt
  • 1 egg
  • 270ml of milk or milk and water

Method:

  1. Sift the flour and salt together.
  2. Make a well in the flour and add the egg and enough milk (milk/water) to make a sticky mixture.
  3. Beat well, then gradually whisk in the remaining milk (milk/water).
  4. Keep in a cool place until ready to use, always whisk the batter before using.

An American Style Pancake Batter Mix

For a thick, sweet pancake batter mix:

  • 150g plain flour
  • 1 tea spoon baking powder
  • 3 pinches of salt
  • 1 egg
  • 150ml of milk
  • 30g caster sugar

Method:

  1. Sift the flour, baking powder and salt together.
  2. Stir in the caster sugar
  3. In another bowl, whisk the egg and milk together.
  4. Pour the egg and milk mixture into the flour and beat with a wooden spoon.
  5. If the mixture is left to stand for about half an hour the pancakes tend to have a lighter texture.

Why Placement (Preposition) and Directional Vocabulary is Important!

Teaching your child the vocabulary related to placement (preposition) and direction is import in supporting them to understand and follow instructions, as well as sharing information themselves, such as; ‘put your cup on the table’ or to say ‘teddy in car’.

We also use this placement (preposition) and directional language to explain how to draw shapes, patterns and write letters and numbers.

We have created 3 sets of picture cards and games to help you support your child in developing and using positional (preposition) and directional vocabulary.

You can find these free preposition flash card resources in Parent section of the Teach Handwriting website by following this link: https://teachhandwriting.co.uk/more-activities.html

What are prepositions?

A word used with a noun or pronoun to show place, position, time or means, e.g. at home, in the hall, on Sunday, by train.” Definition from Oxford School Dictionary, third edition 2002.

Here are just some preposition and directional phrases you might like to use:

On the … On top of the … Above the … Over the…

Under the… Below the … Beneath … Underneath …

Behind the …

In front of the…

Next to …Beside the … On the right of … To the right of … On the right-hand side … On the left of … To the left of … On the left-hand side… Before the … After the …

In the…  Inside the …

Out of the … Outside of the …

Between the … In between the … In the middle … In the center …

Going up the ….  Going down the … Going towards the… Going away from …

Christmas Fun That Develops Handwriting Skills and No Pencil!

Handwriting skills don’t start with pencil and paper they begin with earlier play opportunities. Using play-dough type modelling materials is great for developing hand and finger strength, bilateral coordination, sensory perception and for learning and perfecting different grips for using tools.

Salt Dough

So, why not make some great salt dough Christmas gifts and tree decorations with your child. Not only will they melt the hearts of those who receive them but you will be developing your child’s fine motor skills (needed for good handwriting) while having fun, can’t be bad!

Go to our ‘More fun handwriting activities’ page https://teachhandwriting.co.uk/more-activities.html for a salt dough recipe, that I have found good to use with children, and just download the ‘Salt Dough Modelling’ pdf (https://teachhandwriting.co.uk/assets/pdfs/Salt%20Dough%20Modelling.pdf )

When to Introduce Joined Handwriting

Here at Teach Children we believe that a child is only ready to start learning to join their handwriting when:

  • They have learnt to form all 26 lower-case letters correctly
  • Letters are of a consistent and suitable size (not necessarily the perfect size, remember big is beautiful)
  • Letters are positioned appropriately on the writing line as well as in relation to one another.

Children generally begin to join letters between the ages of 6 to 7 years old, depending on the handwriting font style being taught. Those taught a continuous cursive font style from the beginning tend to join much earlier due to the nature of this font (for some by the end of their Reception Year).

Children do not need to be able to remember how to correctly form all their capital letters before they are taught how to join their letters. This is because capital letters never join to the lower-case letters in a word (UK). However, for these children correct capital letter formation needs to be taught alongside the introduction of letter joins.

The ultimate aim is for a child to develop a good handwriting style; which means;

  • They can produce and maintain a good speed
  • Have a fluid hand movement that is comfortable
  • Letters are of a consistent and appropriate size, positioned correctly
  • Handwriting is legible (so others can read it easily).

For some children (mainly SEND pupils) this may mean that they will always print or use a single letter form of writing as learning to join is just not appropriate. But that does not mean they will not comply with the bullet points above.