Teaching Letter Joins – A Systematic Approach

We would recommend teaching joins in join type groups, whether your child has learnt cursive or continuous cursive single letter fonts.

Teaching the join types in their groups helps a child to understand the directional pushes and pulls required to successfully join the different letter combinations.

There are 4 main groups of letter joins; bottom joins, bottom to “c” shape joins, “e” joins (top and bottom join strokes) and top joins.

Moving from Cursive Single Letters to Joining

There are seven join strokes to be taught. Most children will find the bottom joins the easiest to achieve, as it only requires the extension of the exit stroke they already put on the letters. The bottom to “c” shape joins can be tricky at first but soon mastered. The joins that tend to cause the most confusion and difficulty are the “e” joiners and top exit joiners.

I would recommend teaching the bottom joins first, then the ‘e’ joins and finally the top exit letter joins.

Moving from Continuous Cursive Single Letters to Joining

There are three join strokes to be taught. The easiest is the bottom exit letters (the majority of the letters), all a child has to do is write the letters closer together without lifting their pencil off the paper. Only the top to “e” and top joiners need to be taught for continuous cursive, as the nature of the font style means that the lead-in and exit strokes needed to join the majority of letter combinations have already been taught.

I would recommend teaching the bottom joins first, then the top exit to ‘e’ join and finally the top exit letter joins.

The ultimate aim is for a child to develop a good handwriting style; which means;

  • They can produce and maintain a good speed
  • Have a fluid hand movement that is comfortable
  • Letters are of a consistent and appropriate size, positioned correctly
  • Handwriting is legible (so others can read it easily).

It is important to remember that for some children (mainly SEND pupils) this may mean that they will always print or use a single letter form of writing as learning to join is just not appropriate. But that does not mean they will not comply with the bullet points above.

Have you got your Free Join Animations & Worksheets?

For Teachers: https://teachhandwriting.co.uk/key-stage-2-handwriting-routes.html

For Parents: https://teachhandwriting.co.uk/parents.html

Be School Ready – What Letter Font is Your Child’s School Teaching?

CC & Cursive 1

There is no standardized font style or teaching route stipulated in the National Curriculums for schools in the UK, only that it needs to be a consistent approach throughout the school.  So it is really important that you know which font and teaching route your child’s school is using.

There are a 4 teaching routes a school can choose from when teaching lower-case letters:

  1. Print, then Cursive; finally introduce Continuous Cursive to join the cursive letters.
  2. Print, then Continuous Cursive.
  3. Cursive and then Continuous Cursive to join the cursive letters.
  4. Continuous Cursive.

All the above are good teaching routes, the only difference is how many font styles a child has to learn and how long it takes before they learn how to join their letters.

The Difference between Print, Cursive and Continuous Cursive Handwriting Fonts

Print Font

  • The letters have different start points.
  • There are a number of different letter finish points.

Cursive or Continuous Cursive?

Be aware, some schools will say they are teaching Cursive when in fact they are teaching Continuous Cursive.

They are in fact 2 different handwriting fonts.

Cursive:

  • The letters start at different points (the same as print).
  • The finishing points for all the letters is the writing line; except for, o, r, v and w, which have a top exit stroke.
  • The single letter formations are taught with just the exit strokes.

 Continuous Cursive:

  • The starting point for all the letters is the same; on the writing line.
  • The finishing points for all the letters is also at the writing line; except for, o, r, v and w, which have a top exit stroke.
  • The single letter formations are taught with the entry and exit strokes, this makes the transition from single letter formation to joined handwriting very straightforward and allows it to occur sooner.

Check out our Letter Formation section of the website for more information, free animations and worksheets: http://bit.ly/2F9P7cI

Handwriting Teaching Routes and Letter fonts

Handwriting animation page

The website design has been up for two weeks now and we hope that you are finding your way around OK.

Over the next few weeks we will be guiding you through some of the new changes. All the animations, worksheets, games, activities and support information that was on the old website design is still in the new one with some new elements and most importantly is still FREE for all to use on a non-commercial basis.

Teaching Routes

To support schools and the parents of children whose school use the website to teach their children, we have organised the animations and worksheets into our 4 main Teaching Routes. These are based on the most common teaching routes (approaches) used in schools to teach handwriting.

We refer to these as Teaching Routes A, B, C and D. The teaching route used by a school will depend on which letter font they will introduce in Foundation Stage (4 – 5 year olds) and then teach in Key Stage 1 (5 – 7 year olds).

More information on the Teaching Routes for handwriting can be found in our Handwriting Letters Fonts section: http://bit.ly/2RFlHEN

Letter Fonts

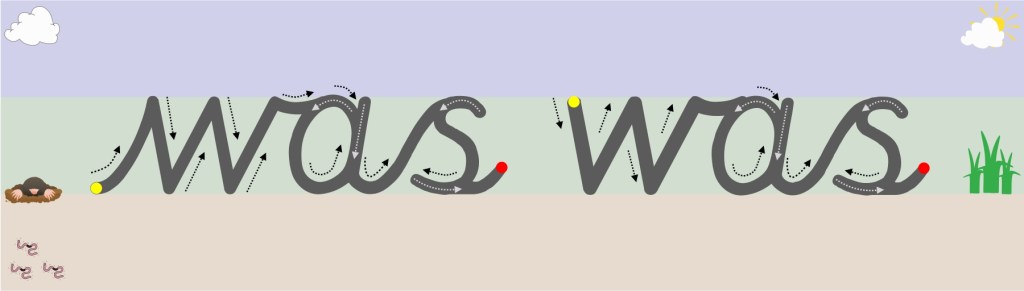
There are four main font styles taught in UK schools; manuscript capital letters, manuscript print (sometimes referred to as the ball and stick method), cursive and continuous cursive.

The capital letter and print letters in the UK have a standard letter shape and formation for each of the 26 letters of the alphabet. However, this is not the case for cursive and continuous cursive letter fonts.

For the Teach Handwriting Website and The Teaching Handwriting Scheme for schools (if purchased) we have standardized 23 of the letters in the cursive and continuous cursive fonts and offer different versions for the letters w, x and z.

The letter version chosen dictates which letter family (teaching groups) they belong in. This is why we have the Letter Versions 1, 2, 3 and 4. In each letter version all the letters and worksheets are in the appropriate letter families.

More information on the Letter Versions for handwriting can be found in our Handwriting Letters Fonts section: http://bit.ly/2RFlHEN

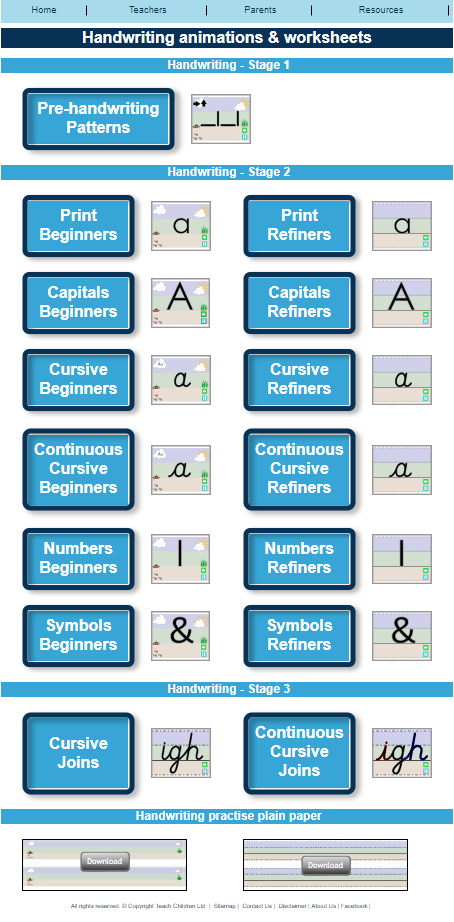
Get your free animations and worksheets for all our fonts letters and numbers by clicking through to the Handwriting animations and worksheets page on our website: http://bit.ly/2F9P7cI

Back to School – What Letter Font is Your Child’s School Teaching?

There is no standardized font style or teaching route stipulated in the National Curriculums for schools in the UK, only that it needs to be a consistent approach throughout the school.  So it is really important that you know which font and teaching route your child’s school is using.

There are a 4 teaching routes a school can choose from when teaching lower-case letters:

  1. Print, then Cursive; finally introduce Continuous Cursive to join the cursive letters.
  2. Print, then Continuous Cursive.
  3. Cursive and then Continuous Cursive for join the cursive letters.
  4. Continuous Cursive.

All the above are good teaching routes, the only difference is how many font styles a child has to learn and how long it takes before they learn how to join their letters.

The Difference between Print, Cursive and Continuous Cursive Handwriting Fonts

Print Font

  • The letters have different start points.
  • There are a number of different letter finish points.

Cursive or Continuous Cursive?

Be aware, some schools will say they are teaching Cursive when in fact they are teaching Continuous Cursive.

They are in fact 2 different handwriting fonts.

Cursive:

  • The letters start at different points (the same as print).
  • The finishing points for all the letters is the writing line; except for, o, r, v and w, which have a top exit stroke.
  • The single letter formations are taught with just the exit strokes.

Continuous Cursive:

The starting point for all the letters is the same; on the writing line.

  • The finishing points for all the letters is also at the writing line; except for, o, r, v and w, which have a top exit stroke.
  • The single letter formations are taught with the entry and exit strokes, this makes the transition from single letter formation to joined handwriting very straightforward and allows it to occur sooner.

Check out our Letter Formation section of the website for more information, free animations and worksheets: http://bit.ly/1dqBYFm