The Third Stage to Handwriting Success – Joining

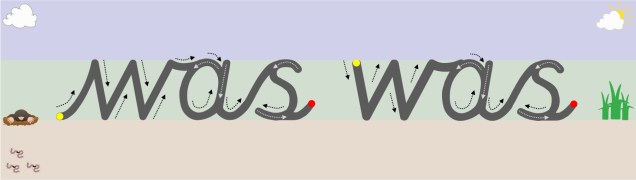
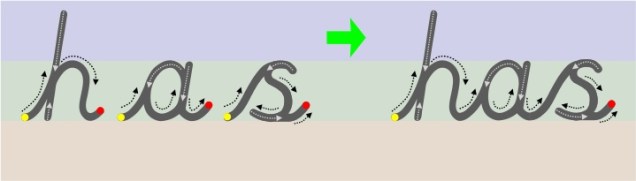
Joins A & W 2

Here at Teach Handwriting we believe that a child is only ready to start learning to join their handwriting when:

  • They have learnt to form all 26 lower case letters correctly
  • Letters are of a consistent and suitable size (not necessarily the perfect size, remember big is beautiful)
  • Letters are positioned appropriately on the writing line as well as in relation to one another.

Children generally begin to join letters between the ages of 6 to 7 years old, depending on the handwriting font style being taught. Those taught a continuous cursive font style from the beginning tend to join much earlier due to the nature of this font (for some by the end of their Reception Year).

Children do not need to be able to remember how to correctly form all their capital letters before they are taught how to join their letters. This is because capital letters never join to the lower case letters in a word. However, for these children correct capital letter formation needs to be taught alongside the introduction of letter joins.

We would recommend teaching joins in join type groups, whether your child has learnt cursive or continuous cursive single letter fonts.

Teaching the join types in their groups helps a child to understand the directional pushes and pulls required to successfully join the different letter combinations.

We would recommend teaching the bottom joins first, then the top exit to ‘e’ join and finally the top exit letter joins.

For our free join animations and worksheets: http://bit.ly/2F9P7cI

For tips to support the teaching of joins check out our Teaching Tips section:  http://bit.ly/2AaX8sk
The Second Stage to Handwriting Success – Single Letter Formation

Letter Formation 2

Last week we explained that pre-handwriting patterns are the first stage of learning to handwrite. Once a child has mastered theses, they are ready to start learning how to form letters.

But where do you start?

Our view is to focus on lower-case letters first and only the capital letters for the first letter in a child’s, examples: Peter Rabbit, Sally Green, George Blue or Mary Shell.

Why?

  • One reason is that about 95% of what children write, and are exposed to, is in a lower-case form and only 5% in capital.
  • Lower-case letters are far less complicated, requiring fewer pencil lifts to complete the letters.
  • As both lower-case and capital letters require a child to form curved lines, a skill which most children have to practise, writing lower-case letters is no more difficult than writing capitals.
  • In a young child’s writing all the letters are initially the same size, whether they are capitals or lower case; it is part of the normal developmental path of handwriting. So, the view that teaching capitals letters is easier because they are bigger is not true.
  • Young children who have learnt mostly capital letters first find it difficult to stop, as it is so ingrained into the memory, often using them half way through words and sentences. Even when they are older this inappropriate use of capitals creeps back into their work especially if they are tired or concentrating hard on composing their work.

A child’s first major achievement, in their eyes, is to write their name. So, although concentrating on lower-case letters, teach them how to form the capital letter for the first letters of their name to get them excited about handwriting.

As they master the lower-case letters introduce the remainder of the capital letters. It is important that both are taught so that a child can develop a speedy, fluid and legible handwriting style.

Free Letter Formation Animations & Worksheets: http://bit.ly/2F9P7cI

The First Stage to Handwriting Success – Pre-handwriting Patterns

Pre-handwriting Patterns 1

Pre-handwriting patterns are the first stage in supporting a child to handwriting success. They help the child to learn the shapes and directional pushes and pulls required to form letters. All letters are a combination of these shapes and lines.

Young children can start to learn these patterns through their play, long before they are ready to pick up a pencil, moving toys back and forth across the floor or whirling them around in the air. To a child it is just play and fun, but you are doing something far more powerful and constructive by helping them to develop the motor memory patterns and directional movement skills they will need for handwriting.

Later, as their coordination and gross motor skills develop, they make more controlled and varied movement patterns in their play. Changing directions, speed and size are all prerequisite skills needed for learning pre-handwriting patterns.

These handwriting patterns do not need to be taught as worksheet activities (though they do help to perfect shape and pattern formation), drawing pictures and patterns in sand, paint and with other writing tools are all fun ways to practise.

Teaching the handwriting patterns in groups helps to further develop the specific movements (pushes and pulls) required to form them and help commit them to the motor memory. A child can then recall these motor memories to support them as they begin to form letters.

Pre-handwriting patterns that encourage a child to move their pencil from left to right are very important for left-handed writers. They need to be taught this so that they can make the cross motion in the H, T, J, G and I from left to right, as their natural instinct is to go from right to left. If this is not corrected when writing E and F the cross lines will not be “anchored” to the letter.

Once the handwriting patterns have been mastered a child will have the confidence and skills base necessary to start forming letters, numbers and symbols.

Have you got your Free Pre- handwriting Pattern Animations & Worksheets? http://bit.ly/1yibFhm

The Importance of Using Letter Names

Letter 1

On our Teach Handwriting website and Scheme, as well as on our Teach Phonics website, children are taught the letter names to begin with. Some schools, teacher and parents still seem to be concerned that this is not consistent with the teaching of phonics.

A myth which seems to have become popular, since the introduction of phonics into schools, is that children should not be taught the alphabet letter names as they find it too confusing. However, there is no evidence to suggest this is true. The Independent review of the teaching of early reading, final report, Jim Rose March 2006 states:

“The teaching of letter names is often left until after the sounds of the letters have been learned, in the belief that it can be confusing for children to have to learn both together. However, research indicates that children often learn letter names earlier than they learn letter sounds and that five year olds who know more letter names also know more letter sounds. The reasons for this are not fully understood by researchers’.

Given that children will meet many instances outside, as well as within, their settings and schools where letter names are used, it makes sense to teach them within the programme of early phonic work.

It appears that the distinction between a letter name and a letter sound is easily understood by the majority of children.” (Page 26)

Rose, cites Professor Morag Stuart who suggests that:

‘…children expect things to have names and are accustomed to rapidly acquiring the names of things.’ (Independent review of the teaching of early reading’ final report, Jim Rose March 2006, page 27.)

Learning the unique letter names of the alphabet is a pre-phonics skill; as well as an early learning goal. It has to be remembered that a letter is a shape which only represents a sound when it is placed within a word or sentence. Also a letter or combination of letters can represent more than one sound and so the only unique way of identifying alphabet letters when we talk about them is to use their names.

Learning the correct letter names helps to reinforce that when talking about the letter ‘a’ (ay) for example it has a set shape regardless of the sound that it will be representing in the word. This further supports children’s handwriting development as the communication of your requirements is unambiguous.

One of the first things we like a child to be able to write correctly is their name, however most names are impossible to spell using the simple phonics code taught to young children. A name does not have to be long in length to be phonetically difficult to spell such as Christopher or Charlotte. Shorter names such as Lucy or Liam also cause a problem.

The only logical answer I suggest is to use the letter names until a child has been introduced to the more complex phonics coding system.

Be School Ready – What Letter Font is Your Child’s School Teaching?

CC & Cursive 1

There is no standardized font style or teaching route stipulated in the National Curriculums for schools in the UK, only that it needs to be a consistent approach throughout the school.  So it is really important that you know which font and teaching route your child’s school is using.

There are a 4 teaching routes a school can choose from when teaching lower-case letters:

  1. Print, then Cursive; finally introduce Continuous Cursive to join the cursive letters.
  2. Print, then Continuous Cursive.
  3. Cursive and then Continuous Cursive to join the cursive letters.
  4. Continuous Cursive.

All the above are good teaching routes, the only difference is how many font styles a child has to learn and how long it takes before they learn how to join their letters.

The Difference between Print, Cursive and Continuous Cursive Handwriting Fonts

Print Font

  • The letters have different start points.
  • There are a number of different letter finish points.

Cursive or Continuous Cursive?

Be aware, some schools will say they are teaching Cursive when in fact they are teaching Continuous Cursive.

They are in fact 2 different handwriting fonts.

Cursive:

  • The letters start at different points (the same as print).
  • The finishing points for all the letters is the writing line; except for, o, r, v and w, which have a top exit stroke.
  • The single letter formations are taught with just the exit strokes.

 Continuous Cursive:

  • The starting point for all the letters is the same; on the writing line.
  • The finishing points for all the letters is also at the writing line; except for, o, r, v and w, which have a top exit stroke.
  • The single letter formations are taught with the entry and exit strokes, this makes the transition from single letter formation to joined handwriting very straightforward and allows it to occur sooner.

Check out our Letter Formation section of the website for more information, free animations and worksheets: http://bit.ly/2F9P7cI

To Trace or Not to Trace, that is the Question?


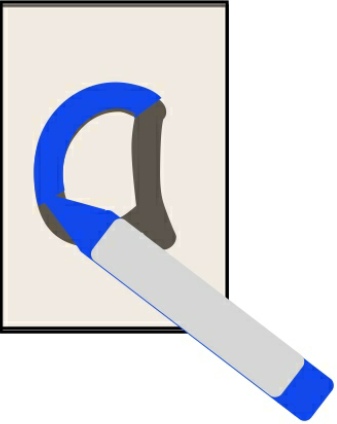
Trace 1Tracing has been an activity frequently presented to encourage young children to learn how to form letter shapes, especially in early years teaching.

However, current research suggests that encouraging young children to free write is a more powerful way of engaging the brain to learn how to form letters when compared to tracing them.

Learning to handwrite requires a child to remember which shape they want to make (visual memory) and how to make it (motor memory).

Here at Teach Handwriting we feel that traditional pencil tracing activities are not a particularly effective way to teach children pre-handwriting patterns and letter formations. This is because children are often so focused on controlling the writing tool around the shape that they do not fully engage their motor memory storage and visual memory skills.

We believe that finger tracing a pre-handwriting pattern or letter shape is more effective than pencil tracing. The greater resistance provided by finger tracing stimulates a child’s nervous system, instantly making them aware of their actions and helping them to focus on the movement by engaging both the motor memory and visual memory. This information is initially stored in their short-term memory but, with continued practise, moves to their long-term memory. Having to think less about how to form the shape, because they can subconsciously recall how to make it, allows a child to then concentrate on controlling the pencil.

Is it a cursive or continuous cursive handwriting font?

CC & Cursive 1

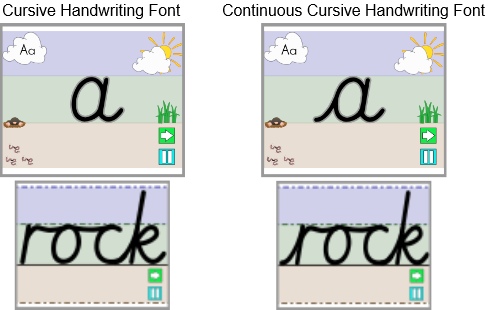
Looking at a few different school websites and queries from parents this week we found that some think that Cursive is just short for Continuous Cursive. In fact, they are two different handwriting font styles:

Cursive:

Cursive a Cloud

https://www.teachhandwriting.co.uk/cursive-beginners-letter-choices.html   


  • The letters start at different points (the same as print letters).
  • The finishing points for all the letters is at the writing line (with a small exit stroke); except for, o, r, v and w, which have a top exit stroke.
  • The single letter formations are taught with just the exit strokes.
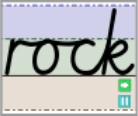
  • When cursive is joined the first letter in the word does not have an entry stroke for example:

Curive Rock

https://www.teachhandwriting.co.uk/cursive-joins-letter-choices.html


Continuous Cursive

httpsCC a Cloud://www.teachhandwriting.co.uk/continuous-cursive-beginners-letter-choices.html                                            


  • The starting point for all the letters is the same; on the writing line.
  • The finishing points for all the letters is also at the writing line; except for, o, r, v and w, which have a top exit stroke.
  • The single letter formations are taught with the entry and exit strokes, this makes the transition from single letter formation to joined handwriting very straightforward and allows it to occur sooner.
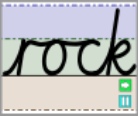
  • When continuous cursive is joined the first letter in the word has an entry stroke for example:

CC Rock

https://www.teachhandwriting.co.uk/continuous-cursive-joins-letter-choices.html


 Be aware, some schools will say they are teaching a Cursive font when in fact they are teaching a Continuous Cursive font.

Teaching Letter Joins – A Systematic Approach

Joins twitter

We would recommend teaching joins in join type groups, whether your child has learnt cursive or continuous cursive single letter fonts.

Teaching the join types in their groups helps a child to understand the directional pushes and pulls required to successfully join the different letter combinations.

There are 4 main groups of letter joins; bottom joins, bottom to “c” shape joins, “e” joins (top and bottom join strokes) and top joins.

Moving from Cursive Single Letters to Joining

There are seven join strokes to be taught. Most children will find the bottom joins the easiest to achieve, as it only requires the extension of the exit stroke they already put on the letters. The bottom to “c” shape joins can be tricky at first but soon mastered. The joins that tend to cause the most confusion and difficulty are the “e” joiners and top exit joiners.

I would recommend teaching the bottom joins first, then the ‘e’ joins and finally the top exit letter joins.

Moving from Continuous Cursive Single Letters to Joining

There are three join strokes to be taught. The easiest is the bottom exit letters (the majority of the letters), all a child has to do is write the letters closer together without lifting their pencil off the paper. Only the top to “e” and top joiners need to be taught for continuous cursive, as the nature of the font style means that the lead-in and exit strokes needed to join the majority of letter combinations have already been taught.

I would recommend teaching the bottom joins first, then the top exit to ‘e’ join and finally the top exit letter joins.

For our free join animations and worksheets: http://bit.ly/2F9P7cI

For tips to support the teaching of joins check out our Teaching Tips section:  http://bit.ly/2AaX8sk 
When to Introduce Joined Handwriting

single to joined

Here at Teach Handwriting we believe that a child is only ready to start learning to join their handwriting when:

  • They have learnt to form all 26 lower case letters correctly
  • Letters are of a consistent and suitable size (not necessarily the perfect size, remember big is beautiful)
  • Letters are positioned appropriately on the writing line as well as in relation to one another.

Children generally begin to join letters between the ages of 6 to 7 years old, depending on the handwriting font style being taught. Those taught a continuous cursive font style from the beginning tend to join much earlier due to the nature of this font (for some by the end of their Reception Year).

Children do not need to be able to remember how to correctly form all their capital letters before they are taught how to join their letters. This is because capital letters never join to the lower case letters in a word. However, for these children correct capital letter formation needs to be taught alongside the introduction of letter joins.

The ultimate aim is for a child to develop a good handwriting style; which means;

  • They can produce and maintain a good speed
  • Have a fluid hand movement that is comfortable
  • Letters are of a consistent and appropriate size, positioned correctly
  • Handwriting is legible (so others can read it easily).

For some children (mainly SEND pupils) this may mean that they will always print or use a single letter form of writing as learning to join is just not appropriate. But that does not mean they will not comply with the bullet points above.

Why it is Important to Teach Correct Letter Formation

Beginner and sign

It can often be assumed children will pick up how to write letters if they see them often enough (by osmosis). This is just not the case.  Correct letter formation has to be taught. Seeing a completed letter or word or watching it be typed up and appear on a screen does not show children how to form the letters.

For children to develop a good handwriting style it is important to learn how to form letters correctly to begin with as this makes the transition from single letter formation to joined letter handwriting much easier. This enables them to develop a speedy, fluid and legible handwriting style.

Letters are created through joining lines and curve shapes in a particular way. They have a designated start point and set directional pushes and pulls of the pencil to reach the designated finish point. This is why at Teach Handwriting we teach letter formation in groups/families rather than in alphabetical order. Certain groups use the same, or similar, shape and directional push and pulls of the pencil to form the letter, for instance the letter c has the same start point and anti-clockwise directional movement shape that is needed to create the letters a, d, g, o and, though a little more complicated, the letters s and e. Teaching letters in groups and families can also help to limit letter reversals such as b and d.

Due to how handwriting has or hasn’t been taught over the generations we all have our own way of handwriting. When supporting and teaching young children we need to develop a consistent approach so that they do not get confused or frustrated by adults giving them conflicting information.

For parents this means finding out from your child’s school which letter font they are teaching so that you can support them more effectively at home. This may mean that you have to learn a new way of writing some letters. This also applies to teachers and teaching assistants. As the adults in the situation we have to accept that it is for us to make the changes. Just because something is different from the way we were taught, or do it, doesn’t mean it is wrong it is just different!

Our free letter animations are not just to support children with their learning but also to provide parents and teachers (all adults really) with the knowledge and support to help children develop a consistent handwriting style.