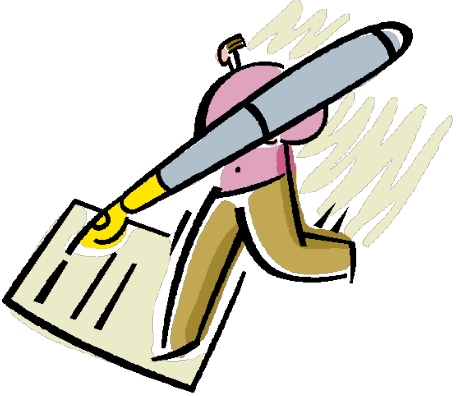
Treasure Hunts Develop both Handwriting & Language Skills

The Easter Holidays are here, so here are some fun activities to keep children of all ages entertained whether we have rain or sunshine.

A treasure hunt is a great way to teach children directional language. Being able to understand directional and placement (prepositions) vocabulary is important for understanding everyday instructions such as ‘put your cup on the table’; ‘go along the hall and stop at the door in front of you’.

We also use this directional language to explain how to draw patterns and write letters, which is another reason why it is important for young children to be introduced to, and have a good understanding of, this kind of vocabulary.

Through treasure hunts you can introduce new directional and placement language in a fun and exciting way. There are a number of different ways to approach this:

  • You can give verbal instructions to the hidden treasure.
  • You could create a map for them to follow and ask them to talk you through the map, supporting them with new language as necessary.
  • You could use a mixture of verbal and map clues.
  • For older children get them to hide the treasure and give you instructions, or draw a map.
  • If you have more than one treasure and they are of different sizes make the larger ones more difficult to find.

The important thing is the language shared. Words and phrases to use are: left, right, straight on, forward, backwards, about turn, turn around, up, down, higher, lower, stop, next to, in front, beside, underneath, on top of, behind, on the left of, on the right of, outside, and inside.

Treasure hunts are a great whole family activity and you are never too young or too old to join in!

Spring/Easter Drawing Activity Ideas – Supporting Language & Pre-handwriting Pattern Development

The Easter holiday break is here!

We have put together some quick step by step Easter and farm drawing ideas for you to try, using basic shapes such as circles, rectangles and triangles. It is amazing how, by using these simple shapes, you and your child can create fantastic Spring/Easter: cards, pictures mobiles or bunting. Just follow this link and scroll down the page: https://teachhandwriting.co.uk/more-activities.html

Drawing pictures is a great way to help your child develop their pre-handwriting strokes and shape forming skills. As well as supporting shape, colour, pattern and language development.

Other Skills Areas that Affect #Handwriting Development – Motor and Visual Memory

Back in January we explained how handwriting is a complex skill that requires good:

  • Gross and fine motor skills,
  • Motor memory skills,
  • Visual memory skills,
  • Spatial awareness skills,
  • Eye tracking skills.

Since then, we have looked at the importance of good gross and fine motor skills in regards to handwriting. So, over the coming weeks we will look at the other areas that are import on the journey to developing a good handwriting style.

Poor Motor Memory and Visual Memory Skills and #Handwriting

Motor memory and visual memory difficulties can have a dramatic effect on a child’s handwriting ability. Possible signs of poor motor memory or visual memory skills can be that their handwriting is slow and deliberate or fast and messy (as they try to hide their letter formation issues), making it difficult to read. They can spend so much time on trying to remember how to form the letters, they have no working memory space left for the important tasks of composing their writing and spelling.

Poor motor memory skills can make handwriting difficult as shapes and letter formation movements are often forgotten, causing letter reversals and incorrectly formed letter shapes, which can make joining a very slow process to learn. A poor and often slow handwriting style can develop as font styles are mixed and capital letters are used inappropriately. Combined, these difficulties can cause poor presentation, spelling and legibility issues.

Poor visual memory skills make handwriting difficult as the ability to recall how letters look and reproduce them with appropriate spacing and positioning is partially or completely lost. This leads to poor letter formation skills, letter reversal along with spelling and presentation difficulties.

Visual memory and motor memory skills are linked and so a game or activity that supports one is likely to support the other.

For games and activities ideas to support and develop these skills use this links: https://teachhandwriting.co.uk/handwriting-motor-skills.html

Too much Pressure or not Enough – #Handwriting?

Some children may hold a pencil correctly but struggle to maintain and control the pressure required to handwrite.

Here are some additional tips to help support a child who is pressing down too hard with their pencil:

Focused games and activities can help develop both the physical strength and sensory perception areas.

  • Make sure that the pencil isn’t gripped too close to the tip of the pencil (check out the how to teach section for more information).
  • Play dough writing – flatten a large piece of play dough/clay on to a desk and using a pencil write or draw onto it. The idea is to create smooth lines, not torn ones, which pressing too hard will create. The advantage of this activity is it gives a child instant feedback about whether they are pressing too hard or not. When a good pressure has been found ask the child to try doing it with their eyes closed and talk through how their body feels when they are using the right amount of pressure.
  • Corrugated card – place some corrugated card under the writing paper – the aim is to try not to flatten the bumps in the card.
  • Tin foil writing board – wrap a piece of card in tin foil and place the paper on top, the aim is to not rip the foil when writing.
  • Carbon copies – use carbon paper to create an extra copy, start with two or three sheets of paper on top of the carbon paper then move to two and then one, so that your child starts developing an understanding of how much pressure is needed for a task and how that feels. Talk through with them how it feels as they need less pressure to create a copy.
  • Pattern work – look at and discuss light and dark line patterns and how to create them. Then using different writing tools ask the child to try and create their own. Talk through how it feels when they are making dark lines compared to faint/pale colour lines using the same pencil or crayon.

Here are some additional tips to help support a child who is Not pressing down hard enough with their pencil:

Focused games and activities can help develop the physical strength and sensory perception areas.

  • Crayon rubbings – when a good pressure has been found ask the child to try doing it with their eyes closed and talk through how their body feels when they are using the right amount of pressure.
  • Wax drawings – rub a wax crayon all over a piece of paper then turn it over on to a plain piece of paper. Draw on the back of the wax crayoned paper and when finished lift and see another copy of the picture. The greater the pressure the more complete the hidden picture will appear.
  • Carbon copies – use carbon paper to create an extra copy, start with one sheet of paper on top of the carbon paper then move to two so that the child starts to develop an understanding of how much pressure is needed for a task and how that feels.
  • Use a softer pencil such as a B6 or B4 and slowly change the pencils so that they work up to a HB. Each pencil change will mean they have to exert a little more pressure to create the same line mark. B marked pencils are softer than H.
  • Pattern work – look at and discuss light and dark line patterns and how to create them. Then using different writing tools ask the child to try and create their own. Talk through how it feels when they are making dark lines compared to faint/pale colour lines using the same pencil or crayon.

#Handwriting Letter & Word Spacing Issues

Some children find it difficult to space their letters in words correctly and to show spacing between words. There can be a number of reasons for this:

  1. They may not understand the concept or conventions of spacing words and letters and this needs to be explained.
  2. Other Physical Skills such as poor spatial awareness skills, eye tracking or general eyesight.
  3. Poor Key Strengths and/or Key Abilities elements, required for handwriting, such as sitting position, paper position, pencil grip, hand position and letter formation knowledge may also be hindering them.

 ‘Tips to support letter and word spacing’ will help you to identify if your child is having difficulty in understanding the spacing conventions and how to support them: https://teachhandwriting.co.uk/spacing-difficulties.html

Games and activity ideas to develop a child’s physical skills for handwriting: https://teachhandwriting.co.uk/handwriting-motor-skills.html

Letter and Join Formation Issues

Single Letter Formation

Some children will have poor letter formation skills because they have missed or just have not been taught how to form their letter correctly.

If your child is struggling with correctly forming their single letters, it can be a good idea to take a step back and check that they can form the pre-handwriting patterns. You might find that they are struggling with some of the line directional pushes and pulls that the patterns support in developing and are needed for forming letters – Parents: https://teachhandwriting.co.uk/parents.html Teachers: https://teachhandwriting.co.uk/pre-handwriting-patterns.html

It is surprising how often the pre-handwriting patterns stage in developing handwriting is skimmed over or just missed out completely.

Unfortunately, the pressure on school to focus on phonics and introducing handwriting as part of the scheme means that children who cannot draw or have experienced pre-handwriting patterns are being asked to form letters. I can’t work out the logic of this approach.

If you take a close look at your child’s lower-case single letter formation you may find that it particular letters that they struggle with.  What you may find is that these letters fall into certain letter family group. So, I would recommend working on the letter family in which the child has the most letter formation difficulties first.

If it is all the letter of the alphabet then I suggest teaching the letter families in the order shown on the website – Parents: https://teachhandwriting.co.uk/parents.html Teachers: https://teachhandwriting.co.uk/key-stage-1-handwriting-routes.html

We recommend focusing on developing a child’s lower-case single letter formation skills first as this about 95% of letter usage they need for writing and reading. Then introduce capital formation.

Why do some children struggle with letter reversal issues?

It is normal for young children to reverse letters and numbers when writing. This should stop by the time they are 6 /7 years old.

Older children can reverse their letters and numbers, when writing, for the following reasons:

  • They have poor visual and motor memory skills and so can’t remember how to form the letters correctly.
  • They have poor bilateral coordination skills.

Games and activities can help them overcome these issues: https://teachhandwriting.co.uk/games.html and https://teachhandwriting.co.uk/warm-ups.html

Teaching the letters in letter families can reduce letter reversal as the reinforcement of the pencil movements helps cement the letter shapes in the visual and motor memory.

We have grouped the letters together in families based on their shape and the directional pushes and pulls of the pencil needed to form them.

By teaching the letters in these families the letters that are most commonly reversed such as ‘b’ and ‘d’ are in different letter families as their start points and initial pushes or pulls of the pencil for them is different, so are reinforced, making it easier for your child to remember them.

Joining Issues

Some children struggle with learning to join because:

  • They may not be forming the single letters correctly. It is best to correct their single letter formation first before moving on to tackle any joining issues. You may find once they have corrected their single letter formation, many of the joining issues have rectified themselves.
  • Some children will find the join strokes a little tricky to start with, so try using the joins section in pre-handwriting patterns to help them learn the additional pencil strokes needed.
  • Some children may not remember which join strokes to use. So, teach the joins in groups, and build up their confidence by starting with the easiest joins – Parents: https://teachhandwriting.co.uk/parents.html Teachers: https://teachhandwriting.co.uk/key-stage-1-handwriting-routes.html
  • Begin by joining 2 or 3 letters together at a time rather than long lines of joins that go across the page. It is best to match the number of letters joining to a sensible word length.
  • Remind your child that the aim is not to take their pencil off the paper until the number of letters in a word has been completed, then they dot the i’s and j’s and cross the t’s and x’s.

Hand Swapping Issues?

Hand Swapping is a normal developmental stage in infants and young children and therefore, at this stage, not a sign that a child is uncertain of their dominant hand. However, this is not ideal for a child who has started school.

Hand swapping throughout a task is not necessarily a sign that a child is uncertain of their dominant hand.

There are two routes to tackling the hand swapping issue, the one to use depends on your answers to the following questions.

1. Does the child usually start with the one hand and then swap when that hand gets tired?

You can usually tell if this is the case because they may shake out or rub the tired hand and once it is rested go back to using it again. This is probably because their fine motor skills are weak. Through focused games and activities (https://teachhandwriting.co.uk/handwriting-muscles.html#hand and https://teachhandwriting.co.uk/warm-ups.html ), the muscle strength and dexterity can be gradually built up in the dominant hand, which in turn will build their stamina so that the hand swapping will reduce until they stop it altogether.

Once you are sure of dominance gently discourage swapping hands by taking a break from the activity and coming back to it a couple of minutes later using the preferred hand.

2. Does the child use their left hand if items are presented on their left-hand side and their right hand if they are presented on the right-hand side?

In toddlers and young children this is expected. In older children however it could mean that they have developed a delay in their skill to cross the mid-line point. This developmental bilateral coordination skill is vital to develop and can be addresses through a range of simple games and activities (https://teachhandwriting.co.uk/handwriting-muscles.html#bilat and https://teachhandwriting.co.uk/warm-ups.html ).

Does Your Child Have Weak Hands?

There have been many articles over the last few years reporting the fact that children are struggling to hold pencils correctly for handwriting and drawing. The reasoning for this is more often than not based on our children’s use of technology and the effect this has on their hand strength and finger dexterity (Fine Motor Skills).

Poor fine motor skills and hand strength not only affects a child’s ability to learn and develop a good handwriting style it can make other grip patterns difficult to master as well. Power, precision, stability or a combination of all three are needed by children to compete everyday tasks such as dressing, picking up and carrying objects (especially small items), using a knife & fork, other tools and scissor skills.

To help improve their overall hand and finger strength check out our games page for ideas:  https://teachhandwriting.co.uk/games.html

Learning to hold a pencil in an appropriate grip is not the only grip style your child needs to develop, especially once they have started school. They will need to develop those which enable them to effectively use scissors as well as a knife and fork. If your child struggles with these activities it may be that they need to be taught how to form the grips correctly (as bad habits develop quickly and are difficult to change) or develop the appropriate hand and finger skills.

How to Hold Scissors

The tip of the thumb is in the top hole of the scissor handle while the tip of the middle finger is in the bottom hole. The index finger is on the bottom edge of the lower handle supporting and stabilising the scissors. The ring and little finger are curled into the palm (except if you are using large scissors as then they will fit in the bottom hole of the handle with the middle finger, to help create the cutting action).

The non-cutting hand should support the paper or item being cut; the thumb is on top of the paper and the fingers underneath, steadying and moving the paper.

How to Hold a Knife & Fork

The handle of the knife or fork lies diagonally across the top section of the palm. The ring and little finger wrap around the handle, the thumb sits on the side of the handle, while the index finger sits flat and straight on the back of the handle. The middle finger curls slightly around the handle so that when the wrist twists round, so that the knife blade edge or prongs of the fork are facing down towards the plate, the handle rests on the top middle finger joint area.

Half-term Fun – Clothes Peg Games

Some fun indoor activities may be the order of the day for this half term as the weather is not so hot.

This is a very simple idea which children love because they can take greater ownership of it. The aim of the activity is to help build up hand and finger strength through using the pegs; however, it can have a dual purpose, helping to keep track of the week by using it as a timetable or for learning spellings or maths activities, as well as supporting the development of language skills.

You do not need anything fancy, just some string (for the washing line), clothes pegs and pieces of paper or card to peg onto the washing line. The washing line can be a permanent fixture or you can just pop it up when you need to use it.

The clothes line needs to be at a height suitable for your child to peg things on to (placed against a wall is a safe option so that no-one can walk into it by accident and hurt themselves).

There are a whole range of games that can be played using this simple washing line and pegs concept:

Memory games – Get your child to peg up 5 to 10 different pictures or items on the line. Then give them 1 minute to remember the items. Once the time is up ask them to look away, or close their eyes, and then you remove one or more of the items. Get them to look back at the line. Can they work out what is missing?

  • You could try just moving one or two of the items around. Can they figure out which ones are in the wrong place and put them back in their correct place?
  • Try swapping an item for something new, which your child did not hang up on the line. Can they work out which is the new item on the line?

Odd One Out – Hang pictures on the line that belong together. Can they pick out the odd item on the line and explain why it is the odd one out.

  • They could all be pictures of fruit with a picture of some clothing
  • They could be shapes with straight sides and one with curves
  • They could all be animals but all are wild with only one being domestic

Sorting – Ask your child to sort all the pictures or items from a selection and to hang all the identical things on the washing line. They could all be the same;

  • Colour
  • Shape
  • Type

Pattern Work – Using pictures, different colour and shaped paper or items create different patterns. The patterns can be based on colour, size or type of object. You can create a pattern sequence on the washing line and then ask your child to try and copy the sequence. Can they explain the pattern and create their own for you to copy and explain?

Pairing or What is the Same? – Hang a range of pictures or items on the line, making sure that some of the items can be paired together because they are exactly the same. They could match because;

  • They are exactly the same e.g., a pair of socks
  • Match numbers to a picture with the same number of items on
  • Match capital to lower-case letters
  • Or have items that can be put together because they are both from the same set, for example they are types of fruit or are the same colour.

Alternative Efficient Pencil Grips for Handwriting

Here at Teach Children Ltd we feel this a good definition of an efficient pencil grip for handwriting:

“A pencil hold that provides speed, legibility is comfortable and will not cause harm to the joints of the hand over time. If a hold satisfies these criteria there is no need to change it”

(Benrow 2002, cited: Foundation of Paediatric Practice for the Occupational Therapy Assistant, 2005)

The above publication, and those listed at the end of the articles, explain that there are three efficient pencil grips for handwriting:

1. The Dynamic Tripod Grip (https://teachhandwriting.co.uk/teaching-tripod-pencil-grip.html), is still the most appropriate grip for handwriting (‘Drawbridge Flip’ method), for those with good fine motor skills, as it allows the fingers to move freely; so, the writer can form the letters more smoothly.

2. The Quadrupod Grip (stage 4 of pencil grip development – https://teachhandwriting.co.uk/pencil-grip-development-foundation-stage.html), this grip is a little more restrictive because the fingers cannot move as freely as they would if using the Tripod grip.

However, if the child is complaining that their hand or fingers hurt or ache when they use the Quadrupod Grip, or that it is hindering their handwriting fluidity and speed, then we do need to support them in changing their grip. For some it may be more appropriate to introduce them to the Adaptive Tripod Grip rather than trying to force them to use the Dynamic Tripod Grip.

3. The Adaptive Tripod Grip (https://teachhandwriting.co.uk/adaptive-tripod-grip.html) , developed by the Belgian Neurologist Callewaert in 1963 (cited, Ann-Sofie Selin 2003) is a functional though not conventional grip for handwriting. This grip is often more appropriate to use with children who have low muscle tone or hyper mobility of the finger joints. It can also benefit older children who continue to hold a pencil too tightly, or who hold the pencil lightly using just their fingertips (often writing using whole arm movements), as well as those children who hold a pencil with their thumb wrapped around and across the pencil and index finger.

Changing to the Adaptive Tripod grip is not a quick fix for children who have poor hand and finger strength. These strengths still need to be developed to make handwriting more comfortable.

Bibliography

Ann-Sofie Selin, 2003: Pencil Grip A Descriptive Model and Four Empirical Studies; Abo Akademi University Press

A Wagenteld, J Kaldenberg (co-editors), 2005: Foundation of Paediatric Practice for the Occupational Therapy Assistant; Pub: Slack Incorporated, ISBN-10:1-55642-629-1

Web-sites:

https://www.ot-mom-learning-activities.com/correct-pencil-grasp.html

https://www.otplan.com/articles/pencil-grasp-patterns.aspx