The Move from Pencil to Pen

Last week we looked at why pencils, rather than pens, are a good first tool for learning to handwrite.

Children can’t wait however for that magic day when the teacher moves them from pencil to pen. It really is a big moment and means more than just “I can write neatly”, for them it is an acknowledgement of their maturity (growing up) and a status symbol of intellect and ability in their eyes and those of their peers.

Moving from pencil to pen can have a dramatic effect on a child’s confidence and self-esteem.  I have seen how moving a child from pencil to pen can give them a new found confidence and self-belief in their own ability, because I showed my belief in them by making that gesture. They may not have had the perfect font style in pencil but moving to pen did improve their ability to form letters more freely and become more consistent in their formation.

It is difficult to put an age on when a child should move from pencil to pen because every child is different. Schools have different policies on when this should happen, with most tending to make the move at around the age of 8/9 years old. It should really depend on the child’s ability rather than their age, as well as the potential benefits the move may have to confidence and self-esteem.

It does not make sense to keep a child working with pencil until they have a perfect handwriting style because that may never happen. For many a neat, beautiful handwriting style may never be a reality.

Advantages of pens:

  • A good quality pen will give an even ink flow.
  • A more consistent hand pressure is required, helping to develop and maintain a fluid handwriting style (reducing hand strain).
  • Fibre tip and roller pens can give the same look and writing experience as a good quality fountain pen, but are far less messy (especially for left-handed people).
  • With the right pen everyone’s handwriting can look good, (I love my fountain pen for that reason).

Limitations:

  • Cheap biro pens require a lot of hand pressure and give an inconsistent ink flow (so not very different from pencils).
  • Cheap fountain pens can be scratchy and messy
  • Some schools will insist on using a particular type of pen which is not always good for all.

My tip would be to test a few pen types and weights to find out which ones your child finds the most comfortable and enjoyable to use. I realise this can be an issue if your child’s school insist on one type of pen. But if you can prove your child’s handwriting ability is great with a different style, I think it is worth talking to them about it.

Moving from pencil to pen is an important point in a child’s education, affecting their confidence and self-esteem, and like any transition stage it should be approached with thought and care.

Pencil Power!

Why do we use pencils when we start to teach handwriting?

Modern classrooms use a range of technology, such as interactive white boards, so why are our children still using pencils when learning how to handwrite?

Pencils are a great first tool for learning to handwrite!

Why?

  • They come in different widths and lengths (to cater for the different gross and fine motor skills of the children).
  • Have different lead thickness and grades (soft to hard) of lead.
  • Provide varying degrees of resistance (depending on lead grade) which slows down the letter formation process enough for young children to have the control required to start to form their letters correctly. The greater the resistance the more the body can neurologically acknowledge (feel) the movement and help to send appropriate information to the brain.
  • As a child develops their handwriting skills to a more fluid handwriting style the pencil type can be easily changed.
  • Cheap and easily accessible.
  • A drawing medium which young children are already comfortable using.

Limitations:

  • Often a one size fits all approach to the pencil type, rather than tailoring to a child’s needs.
  • Difficulty in maintaining a good writing point, results in the child needing to use different levels of pressure, making handwriting hard work.
  • Over use of rubbing out mistakes (wastes time and develops a culture where making a mistake is seen as a failure). Making mistakes is how we learn; it is not failing!

 Pencils are practical in school:

  • With pencil, children find it more difficult to write on one another and their clothes.
  • You do not have a whole class of children clicking pens (Velcro is bad enough).
  • Pen lids are not constantly lost or being swallowed.
  • Pencils seem less of a problem when stuck in ears or up the nose.
  • They are cheap.
  • Pencils do not explode, leaving a mess all over the room and any child that happened to be in the room at the time.
  • Time not wasted by trying to suck the ink up out of the pen.

Handwriting is a complicated skill to learn and having the right tools for the job always helps. It is worth spending a little time with children using a range of pencil styles and lead grades to find ones that they find comfortable to use for handwriting. These will be different from those they use for drawing. As their handwriting skills develop so the type and grade of pencil they begin to favour will change.

The Right Handwriting Tool for the Job!

As with learning any new skill the right tool at the right time can make a real difference to the whole learning experience as well as the outcome. Learning to handwrite is no different.

Young children due to their gross and fine motor skills ability require chunky shafted tools so that they can grip them effectively. This means they have a greater control over the tool and can achieve a more satisfactory outcome. If they are using a tool that is too thin, they will find gripping it difficult and have to keep changing their grip. They will have less control of the tool making the experience disappointing at best and discouraging at worst.

To help young children to store patterns and letter shapes formation into their motor memory it is important that the tools used provide a resistance rather than one that flows effortlessly over the writing/drawing surface. The greater the resistance the more the body can neurologically acknowledge (feel) the movement and help to send appropriate information to the brain.

Some of the best tools for young children to begin learning to draw patterns, shapes and correctly write letters:

  • Chalk on boards, walls or paths
  • Flip chart pens or large felt tips on course paper such as sugar paper
  • Using appropriately sized paint brushes on course paper or surfaces
  • Finger painting or finger drawing in sand, paint or cornflour mix
  • Finger tracing and then trying to draw the pattern, shape or letter straight afterwards.
  • Try chalking the shape or letter onto a blackboard and have the child use a damp sponge to wipe it off again (make sure the child starts in the correct place and moves correctly around the shape or letter to the correct finish point).
  • Appropriately sized crayons and pencils on course paper or card (non-shiny side of cereal boxes and corrugated card can be good fun and different to use).

As children begin a more formal approach to learning to form their letters correctly then appropriately sized and lead grade pencils are the best tool for the job. Pencil come in all widths, lengths and shapes. The key is to find the style of pencil which best suits the child and their stage of pencil grip development. Remember one size doesn’t fit all!

When a child has learnt to join their letters and has a good and consistent letter size and places all their letters on the writing line correctly in relation to each other, then it maybe they are ready to be moved to pen. It is important before moving a child to pen that they are writing with speed (appropriate for their age) and fluidity (comfortable writing all the letters of the alphabet lower and upper-case correctly). A child whose handwriting is slow and laboured may need additional support and time before being moved on to pen.

Does Your Child Have Weak Hands?

There have been many articles over the last few years reporting the fact that children are struggling to hold pencils correctly for handwriting and drawing. The reasoning for this is more often than not based on our children’s use of technology and the effect this has on their hand strength and finger dexterity (Fine Motor Skills).

Poor fine motor skills and hand strength not only affects a child’s ability to learn and develop a good handwriting style it can make other grip patterns difficult to master as well. Power, precision, stability or a combination of all three are needed by children to compete everyday tasks such as dressing, picking up and carrying objects (especially small items), using a knife & fork, other tools and scissor skills.

To help improve their overall hand and finger strength check out our games page for ideas:  https://teachhandwriting.co.uk/games.html

Learning to hold a pencil in an appropriate grip is not the only grip style your child needs to develop, especially once they have started school. They will need to develop those which enable them to effectively use scissors as well as a knife and fork. If your child struggles with these activities it may be that they need to be taught how to form the grips correctly (as bad habits develop quickly and are difficult to change) or develop the appropriate hand and finger skills.

How to Hold Scissors

The tip of the thumb is in the top hole of the scissor handle while the tip of the middle finger is in the bottom hole. The index finger is on the bottom edge of the lower handle supporting and stabilising the scissors. The ring and little finger are curled into the palm (except if you are using large scissors as then they will fit in the bottom hole of the handle with the middle finger, to help create the cutting action).

The non-cutting hand should support the paper or item being cut; the thumb is on top of the paper and the fingers underneath, steadying and moving the paper.

How to Hold a Knife & Fork

The handle of the knife or fork lies diagonally across the top section of the palm. The ring and little finger wrap around the handle, the thumb sits on the side of the handle, while the index finger sits flat and straight on the back of the handle. The middle finger curls slightly around the handle so that when the wrist twists round, so that the knife blade edge or prongs of the fork are facing down towards the plate, the handle rests on the top middle finger joint area.

Poor hand position can cause a poor pen grip

We often talk about the most appropriate grip for handwriting being the tripod grip; but this usually only refers to finger position. It is easy to forget the importance of the actual hand position in relation to the pen and paper for handwriting.

The ideal position is for the hand, wrist and elbow to be below the tip of the pencil and under the writing line for both left and right-handed writers.

Some children will hold the pencil in a tripod grip but develop a hooked hand position or move the elbow too far up the table, causing the forearm and wrist to be nearly horizontal with the table edge, because they feel they can see what they are writing more clearly.

A hooked grip puts unnecessary strain on the hand ligaments and forces the body into a poor sitting position, again putting extra strain on the body. This in turn makes handwriting a tiring and uncomfortable task, impacting on a child’s overall learning experience.

It takes time to correct a poor hand position but it is well worth the perseverance as it will enable a child to write freely and more comfortably.

When writing normally, encourage children to angle the paper appropriately as this will also help to correct a poor hand position. With the correct paper tilt they will always be able to see what they are writing. If the paper is tilted at the correct angle for them, they will find a hooked hand position, or having their forearm further up the table, more difficult and uncomfortable to maintain.

Some children will find writing on a sloped desk helpful. Not all are comfortable writing or drawing on a flat surface and may benefit from the paper being positioned on an angled or sloped board. If you are not sure, instead of buying a specialist board, you could make one. Try using a ring binder or lever arch file stuffed with magazines and newspaper to make a sloped board. Tape the edges to stop the papers falling out or you could cover it in sticky back plastic to give a smoother finish to the board. The advantage of this is that you can make them to any angle of slope. Try a few to see which, if any, your child prefers. You may find that they only need the sloped board for a short while. It may also help to reduce the angle of the slope over time so that they gradually get used to moving from a sloped to horizontal writing plane.

Handwriting is a Physical Activity

Handwriting with fluidity, speed, accuracy and over longer periods of time requires a complex range of whole body and hand strengths and skills. So it is not surprising that many children find handwriting challenging.

For a good handwriting style children need to develop their:

  • Gross Motor Skills – so they can sit correctly for periods of time.
  • Fine Motor Skills – so that they can hold and control the pencil and move the paper up the table as they write.
  • Motor Memory Skills – so they can recall how to form the letters.
  • Visual Memory Skills – so they recall what a particular letter looks like.
  • Spatial Awareness Skills– so they can place the letters correctly on the paper and in relation to one another.
  • Eye Tracking Skills– scanning from left to right so that the letters are formed and placed correctly.

If a child is struggling with handwriting it is important to take a closer look at their physical abilities. If they do not have all the appropriate key physical strengths to support their handwriting development getting them to do more of the paper and pencil activities is not the answer.

Our assessments are simple to complete and do not need any specialist equipment. The important elements are; your knowledge of the child and your observations of them at play and while they are engaged in normal day to day task.

For information on how to assess your child at home follow this link: https://teachhandwriting.co.uk/parent-assessment.html   

For information on how to assess at child at school follow this link: https://teachhandwriting.co.uk/teacher-assessment.html

A better understanding of a child’s key skills abilities enables you to focus more effectively, through targeted physical games and activities, to help them build and develop their skills.

You will find ‘Games to build gross and fine motor skills’ here: https://teachhandwriting.co.uk/games.html

Handwriting is such an important skill as it engages the neurological pathways and working memory in a way that pressing a keyboard just doesn’t; so once mastered it helps to open up the doorways to other literacy skills such as phonics, reading, spelling and composition.

The Best Type of Paper for Teaching Handwriting

Just as the writing tool used by your child changes as they develop, so does the paper they write on.

Informal Pre-handwriting Pattern and Initial Letter Development

If your child is just starting out on the handwriting adventure then any type of plain paper (no ruled lines) is considered the best option, as many children find it less restrictive.

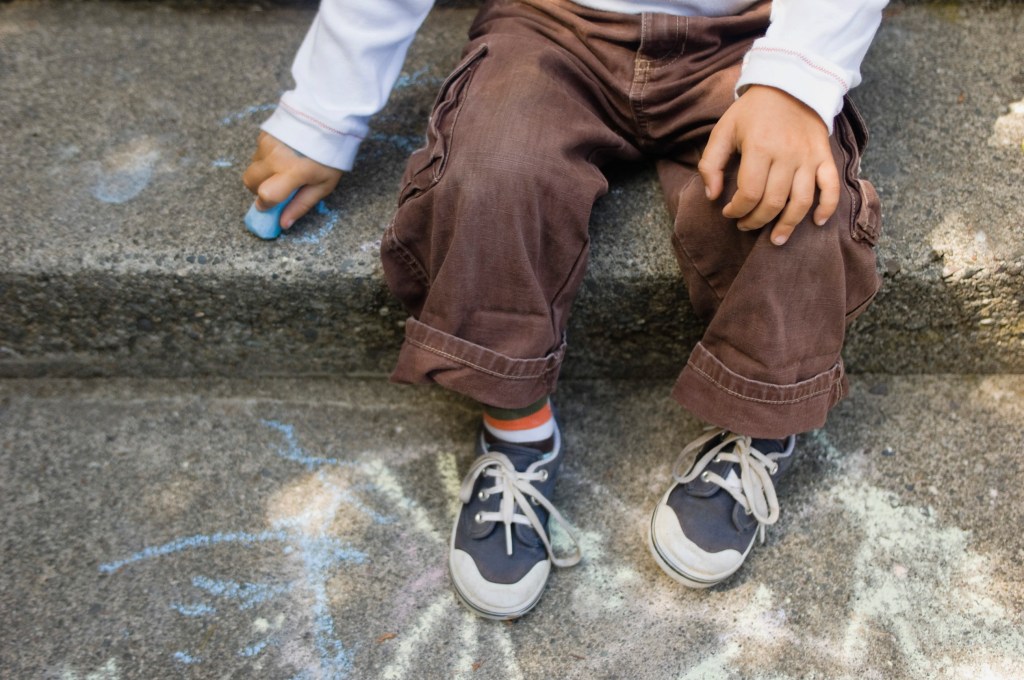
Young children, due to the stage of their physical development, use large movements to draw (from the shoulder rather than the wrist) which often creates larger shapes and lines; you don’t want to restrict this movement as it can cause handwriting difficulties later. As their gross and fine motor skills develop so does their pencil grip and ability to draw and write at a smaller scale, moving more from the shoulder to elbow and wrist.

Formal Pre-handwriting Pattern and Letter Development

When your child is ready to refine their pre-handwriting pattern skills, or move on to forming letters, it is a good idea to use plain paper. The aim at this stage is to learn how to form the letters correctly, not size or neatness as that comes later (Remember, Big is Beautiful).

Before moving to lined paper, to help your child begin to appreciate letter proportions and positioning, paper with picture clues can be used.

On our website the free writing paper and animations reinforce the idea of letter proportions and positioning by splitting the backgrounds into three colour zones to represent the sky, grass and earth. There are a number of reasons why this can be beneficial:

  • It can create a sub-conscious memory in your child’s mind of where particular letters sit in relation to others without the constraints of lines or obvious boundaries, especially as the picture can be any size. Children remember where to place the sun, grass or worms in their drawings; so why not letters?
  • It can be easier to talk through the formation of how a shape or letter is formed with pictorial and colour clues to guide and inform the direction of the movements required.     
  • As your child’s fine motor skills develop so the size of the picture/colour clues can be reduced to match their progress.

As your child’s fine motor skills develop it enables them to form smaller more refined versions of the letters and this is when it is more appropriate to use lined paper.

Tips for Supporting #Left-handed Writers

Surprisingly there are few differences when teaching left and right-handed children to handwrite. A left-handed child needs a slightly different pencil grip, and needs to hold the pencil slightly higher up the shaft, as well as a different paper position and tilt. Some left-handed children do find handwriting challenging to start with because they naturally want to draw straight lines right to left rather than left to right.

Check out our Left-handed Writers Page for more information and tips on how to support them: https://teachhandwriting.co.uk/left-handed.html

Why it is Important to Teach Correct Letter Formation!

It can often be assumed children will pick up how to write letters if they see them often enough (by osmosis). This is just not the case.  Correct letter formation has to be taught. Seeing a completed letter or word or watching it being typed up and appear on a screen does not show children how to form the letters.

For children to develop a good handwriting style it is important to learn how to form letters correctly to begin with as this makes the transition from single letter formation to joined letter handwriting much easier. This enables them to develop a speedy, fluid and legible handwriting style.

Letters are created through joining lines and curve shapes in a particular way. They have a designated start point and set directional pushes and pulls of the pencil to reach the designated finish point. This is why at Teach Handwriting we teach letter formation in groups/families rather than in alphabetical order. Certain groups use the same, or similar, shape and directional push and pulls of the pencil to form the letter, for instance the letter c has the same start point and anti-clockwise directional movement shape that is needed to create the letters a, d, g, o and, though a little more complicated, the letters s and e. Teaching letters in groups and families can also help to limit letter reversals such as b and d.

Due to how handwriting has or hasn’t been taught over the generations we all have our own way of handwriting. When supporting and teaching young children we need to develop a consistent approach so that they do not get confused or frustrated by adults giving them conflicting information.

For parents this means finding out from your child’s school which letter font they are teaching so that you can support them more effectively at home. This may mean that you have to learn a new way of writing some letters. This also applies to teachers and teaching assistants. As the adults in the situation, we have to accept that it is for us to make the changes. Just because something is different from the way we were taught, or do it, doesn’t mean it is wrong, it is just different! 

Our free letter animations are not just to support children with their learning but also to provide parents and teachers (all adults really) with the knowledge and support to help children develop a consistent handwriting style.

Parent animation link: https://teachhandwriting.co.uk/parents.html

Teacher animation link – click through on the Key Stage you are teaching: https://teachhandwriting.co.uk/teach-handwriting-teachers.html

Art Activities to support the Understanding of Pressure

Crayoning and printing activities are great ways for a child to experience and experiment with pressure and the amount needed to create different effects. These activities will also encourage and support a child in helping them to understand, and for you to model, the language associated with pressure and how the pressure used feels. By linking the words used to the feelings and the outcome of using the pressure they can start to understand what is needed when asked to press gently or to press harder. 

When supporting a child to understand what we want when we ask them to press harder, we need to model how our body reacts to make this happen. You may need to exaggerate the actions but as you do this you also need to talk about what your body is doing and how it feels. Then point out the effect that this has had on the crayoning for instance.

When we press hard, we tend to lean our body forward over the table slightly as this allows us to put more force down on to the paper through the crayon. We may feel our arm and hand tense and often the movements made are slower and in small strokes. If it is something we are not used to doing it can make our hand and fingers ache and it will feel like hard work. The crayon marks will be thick and dark.

When we want to be gentler with the crayon, so that the crayoning is lighter in texture and colour, we tend to sit back away from the table. This way the hand moves across the paper more easily and often the strokes are longer and quicker, which sometimes feels as if we have less control over the colouring. This is why young children tend to be a bit heavy handed initially with colouring because their fine motor control skills have not reached a point that enables them to have control.

There are many creative ideas to be found on the internet and in books published by companies such as Usborne.

This crayon technique can be used to create a vast range of pictures. Here are just a couple of ideas to get you started:

The same technique can also be used to create great firework pictures:

It is also worth remembering that drawing also helps to develop a range of different line formations, also needed for developing a good handwriting style.

Have FUN!