A Good Sitting Position for #Handwriting

Learning to sit correctly at a table for handwriting type activities is not just important for developing a physically comfortable and maintainable sitting position; it also allows the arms and hands to move freely and enables the paper to be tilted and positioned correctly, helping to improve the quality of the handwriting.

Learning how to sit correctly, so that it becomes second nature, needs training and takes time. Many children do not sit correctly at a desk, when they are asked to do so, because they have not been taught or do not understand what they are meant to do.

For tips and ideas on how to help a child develop a good sitting posture and position for handwriting check out our ‘Sitting’ section on the website: https://www.teachhandwriting.co.uk/handwriting-sitting-position-desk.html

Some children find sitting correctly at a desk difficult because they have not acquired all the gross motor skills needed to sit correctly for long periods of time. These children may require additional posture base and bilateral coordination games and activities to help them build the appropriate gross motor skills.

For more information on developing a child’s core strengths check out the Key Strengths section of our website: https://teachhandwriting.co.uk/handwriting-motor-skills.html

Art Activities to support the Understanding of Pressure

Crayoning and printing activities are great ways for a child to experience and experiment with pressure and the amount needed to create different effects. These activities will also encourage and support a child in helping them to understand, and for you to model, the language associated with pressure and how the pressure used feels. By linking the words used to the feelings and the outcome of using the pressure they can start to understand what is needed when asked to press gently or to press harder. 

When supporting a child to understand what we want when we ask them to press harder, we need to model how our body reacts to make this happen. You may need to exaggerate the actions but as you do this you also need to talk about what your body is doing and how it feels. Then point out the effect that this has had on the crayoning for instance.

When we press hard, we tend to lean our body forward over the table slightly as this allows us to put more force down on to the paper through the crayon. We may feel our arm and hand tense and often the movements made are slower and in small strokes. If it is something we are not used to doing it can make our hand and fingers ache and it will feel like hard work. The crayon marks will be thick and dark.

When we want to be gentler with the crayon, so that the crayoning is lighter in texture and colour, we tend to sit back away from the table. This way the hand moves across the paper more easily and often the strokes are longer and quicker, which sometimes feels as if we have less control over the colouring. This is why young children tend to be a bit heavy handed initially with colouring because their fine motor control skills have not reached a point that enables them to have control.

There are many creative ideas to be found on the internet and in books published by companies such as Usborne.

This crayon technique can be used to create a vast range of pictures. Here are just a couple of ideas to get you started:

The same technique can also be used to create great firework pictures:

It is also worth remembering that drawing also helps to develop a range of different line formations, also needed for developing a good handwriting style.

Have FUN!

Why it is important to teach correct letter formation?

It can often be assumed children will pick up how to write letters if they see them often enough (by osmosis). This is just not the case.  Correct letter formation has to be taught. Seeing a completed letter or word or watching it being typed up and appear on a screen does not show children how to form the letters.

For children to develop a good handwriting style it is important to learn how to form letters correctly to begin with as this makes the transition from single letter formation to joined letter handwriting much easier. This enables them to develop a speedy, fluid and legible handwriting style.

Letters are created through joining lines and curve shapes in a particular way. They have a designated start point and set directional pushes and pulls of the pencil to reach the designated finish point. This is why at Teach Handwriting we teach letter formation in groups/families rather than in alphabetical order. Certain groups use the same, or similar, shape and directional push and pulls of the pencil to form the letter, for instance the letter c has the same start point and anti-clockwise directional movement shape that is needed to create the letters a, d, g, o and, though a little more complicated, the letters s and e. Teaching letters in groups and families can also help to limit letter reversals such as b and d.

Due to how handwriting has or hasn’t been taught over the generations we all have our own way of handwriting. When supporting and teaching young children we need to develop a consistent approach so that they do not get confused or frustrated by adults giving them conflicting information.

For parents this means finding out from your child’s school which letter font they are teaching so that you can support them more effectively at home. This may mean that you have to learn a new way of writing some letters. This also applies to teachers and teaching assistants. As the adults in the situation, we have to accept that it is for us to make the changes. Just because something is different from the way we were taught, or do it, doesn’t mean it is wrong, it is just different! 

Our free letter animations are not just to support children with their learning but also to provide parents and teachers (all adults really) with the knowledge and support to help children develop a consistent handwriting style.

Parent animation link: https://teachhandwriting.co.uk/parents.html

Teacher animation link – click through on the Key Stage you are teaching: https://teachhandwriting.co.uk/teach-handwriting-teachers.html

Stage 2 to #Handwriting Success – Single Letter Formation

Last week we explained that pre-handwriting patterns are the first stage of learning to handwrite. Once a child has mastered theses, they are ready to start learning how to form letters.

But where do you start?

Our view is to focus on lower-case letters first and only the capital letters for the first letter in a child’s, examples: Peter Rabbit, Sally Green, George Blue or Mary Shell.

Why?

  • One reason is that about 95% of what children write, and are exposed to, is in a lower-case form and only 5% in capital.
  • Lower-case letters are far less complicated, requiring fewer pencil lifts to complete the letters.
  • As both lower-case and capital letters require a child to form curved lines, a skill which most children have to practise, writing lower-case letters is no more difficult than writing capitals.
  • In a young child’s writing all the letters are initially the same size, whether they are capitals or lower case; it is part of the normal developmental path of handwriting. So, the view that teaching capitals letters is easier because they are bigger is not true.
  • Young children who have learnt mostly capital letters first find it difficult to stop, as it is so ingrained into the memory, often using them half way through words and sentences. Even when they are older this inappropriate use of capitals creeps back into their work especially if they are tired or concentrating hard on composing their work.

Have you got your Free Letter Formation Animations & Worksheets?                                                                      For Teachers: https://teachhandwriting.co.uk/key-stage-1-handwriting-routes.html

For Parents: https://teachhandwriting.co.uk/parents.html

A child’s first major achievement, in their eyes, is to write their name. So, although concentrating on lower-case letters, teach them how to form the capital letter for the first letters of their name to get them excited about handwriting.

As they master the lower-case letters introduce the remainder of the capital letters. It is important that both are taught so that a child can develop a speedy, fluid and legible handwriting style.

Stage 1 to #Handwriting Success – Pre-handwriting Patterns

Pre-handwriting patterns are the first stage in supporting a child to handwriting success. They help the child to learn the shapes and directional pushes and pulls required to form letters. All letters are a combination of these shapes and lines.

Young children can start to learn these patterns through their play, long before they are ready to pick up a pencil, moving toys back and forth across the floor or whirling them around in the air. To a child it is just play and fun, but you are doing something far more powerful and constructive by helping them to develop the motor memory patterns and directional movement skills they will need for handwriting.

Later, as their coordination and gross motor skills develop, they make more controlled and varied movement patterns in their play. Changing directions, speed and size are all prerequisite skills needed for learning pre-handwriting patterns.

These handwriting patterns do not need to be taught as worksheet activities (though they do help to perfect shape and pattern formation), drawing pictures and patterns in sand, paint and with other writing tools are all fun ways to practise.

Teaching the handwriting patterns in groups helps to further develop the specific movements (pushes and pulls) required to form them and help commit them to the motor memory. A child can then recall these motor memories to support them as they begin to form letters.

Pre-handwriting patterns that encourage a child to move their pencil from left to right are very important for left-handed writers. They need to be taught this so that they can make the cross motion in the H, T, J, G and I from left to right, as their natural instinct is to go from right to left. If this is not corrected when writing E and F the cross lines will not be “anchored” to the letter.

Once the handwriting patterns have been mastered a child will have the confidence and skills base necessary to start forming letters, numbers and symbols.

Have you got your Free Pre-handwriting Pattern Animations & Worksheets?

For Teachers: https://teachhandwriting.co.uk/pre-handwriting-patterns.html

For Parents: https://teachhandwriting.co.uk/patterns.html

The Three Stages to Learning Handwriting

There are three distinct stages for children to progress through to develop a good handwriting style:

Stage 1 – Pre-handwriting Patterns

Pre-handwriting patterns support a child towards handwriting success. They help the them to learn the shapes and directional pushes and pulls required to form letters. All letters are a combination of these shapes and lines.

Stage 2 – Single Letter Formation

For children to develop a good handwriting style it is important to learn how to form the letters correctly.

Beginning with lower-case letters and only the capital letters for the first letter in a child’s name, examples: Peter Rabbit, Sally Green, George Blue or Mary Shell.

Learning the correct lower-case letter formation also makes the transition from single letter formation to joined letter handwriting much easier.

Stage 3 – Joined Handwriting

Learning to join letters for handwriting enables children to develop a speedy, fluid and legible handwriting style.

Why Placement (Preposition) and Directional Vocabulary is Important!

Teaching your child the vocabulary related to placement (preposition) and direction is import in supporting them to understand and follow instructions, as well as sharing information themselves, such as; ‘put your cup on the table’ or to say ‘teddy in car’.

We also use this placement (preposition) and directional language to explain how to draw shapes, patterns and write letters and numbers.

We have created three sets of picture cards and games to help you support your child in developing and using positional (preposition) and directional vocabulary.

You can find these free resources on our Phonics website by following this link: https://www.teachphonics.co.uk/phonics-resources.html

You can find these free resources in Parent section of the Teach Handwriting website by following this link: https://teachhandwriting.co.uk/more-activities.html

What are prepositions?

A word used with a noun or pronoun to show place, position, time or means, e.g. at home, in the hall, on Sunday, by train.” Definition from Oxford School Dictionary, third edition 2002.

Here are just some preposition and directional phrases you might like to use:

On the … On top of the … Above the … Over the…

Under the… Below the … Beneath … Underneath …

Behind the …

In front of the…

Next to …Beside the … On the right of … To the right of … On the right-hand side … On the left of … To the left of … On the left-hand side… Before the … After the …

In the…  Inside the …

Out of the … Outside of the …

Between the … In between the … In the middle … In the center …

Going up the ….  Going down the … Going towards the… Going away from …

How to get your child interested in drawing and colouring!

Not all children enjoy drawing and colouring and it can be difficult to encourage them. There are a number of reasons why some children seem reluctant to draw, paint or colour. For instance, some will not like the smell of the paint or crayons, while others may find the pencils, brushes or crayons too thin, long or heavy. Others may be reluctant due to past negative experiences. It can be tricky to work out exactly why a child doesn’t want to draw or write.

Here we have some tips and ideas that may help you to get started:

Paper Size– Some children like large pieces of paper to work on while others can be daunted by the prospect. Start off by having a range of paper sizes and colours for your child to choose from, this way you can find out which size of paper they prefer to work on.

Vertical surface – Having the paper pinned vertically on a drawing board or wall may also help encourage your child to have a go at drawing more than if the paper is laid flat on a table.

Drawing & Writing Tools – Have a range of pencil and crayon thicknesses, lengths and colours so that your child can choose the ones they feel most comfortable using. Try to make sure that the pencils are sharp enough to be used effectively as picking up and using a blunt pencil can be a negative experience which can turn a child off drawing or writing.

You could try using different drawing tools to start with such as chalks or special glass pens (which are great fun and designed to clean off easily).

Draw Together – Before you start drawing think about the kind of things that will interest your child, for instance drawing a train may be ideal for your little boy but not necessarily for your little girl. Use simple shapes to draw the objects so that over time your child will be able to copy so they too can draw successfully the train, cat or car. Practise by yourself so that when you are doing the drawing with your child it comes easily to you so that you can talk through what you are doing.

We have created some new drawings using simple shapes which you may find helps you to get started. Follow this link and scroll down the page a little you will find them under the ‘Activities to help hand development’:  https://teachhandwriting.co.uk/more-activities.html

Tips:

Pick a time and place where you can start to draw in the same room/area as your child is playing. Start off by just sitting and drawing without actively involving your child. It is surprising how often a child will come to checkout and ask you what you are doing. They may just stand and watch for a while and go back to playing, just carry on and complete the picture without them. Leave the picture for them to see, you could let them know you have drawn it for them and have a little chat about it.

Handwriting Begins with Mark Making & Simple Drawings

Young children’s first experience on the handwriting journey is through mark-making and simple drawings, whether it is with finger-paints, writing in sand or with pencils and crayons.

From about the age of 2, children start to move from a simple grasping (primitive) grip to one that secures the writing tool between the fingers and the thumb. In the early stages of mark-making and drawing young children will try different grips and holds, which is part of their normal development for handwriting and drawing.

As young children’s body (gross motor skills), hand strength and dexterity (fine motor skills) are developing they need a range of pencil, crayon and paint brush thicknesses. Young children need the thicker drawing tools as they can grip them more easily, helping them to mark-make. If the pencil is too thin, they find it difficult to grasp and have little control over it, making the drawing experience unsuccessful, which can lead to frustration and discourage them from trying again.

Due to the stage of their physical development young children use large movements to draw (from the shoulder rather than the wrist) which often creates larger shapes and lines.

During the early stages a vertical drawing and painting surface is important as it allows the child the freedom of movement to fully explore their mark-making potential. It also helps young children to develop the wrist strength and flexibility which they will need later to hold a pencil correctly for handwriting.

Using plain paper and surfaces is considered best for young children as they find it less restrictive.

It has been widely acknowledged that a child who is forced to hold a writing tool using the dynamic tripod grip, before they are developmentally ready, can be turned off engaging in the drawing/writing process as well as developing a poor pencil grip later on. Remember some children do not develop the ability to use the dynamic tripod grip until the age of 5/6 years old.

As a child’s gross and fine motor skills develop so does their pencil grip and ability to draw and write at a small scale moving more from the elbow and wrist and progressing through the grip stages.

For more information on pencil grip development use this link: https://teachhandwriting.co.uk/grip-development.html

The Importance of Using Letter Names for Developing Handwriting, Phonics and Reading Skills

Here at Teach Children we have always promoted the importance and power of teaching the correct letter names to begin with; through our Teach Handwriting website, Schemes and Teach Phonics website. Unfortunately, some schools, teacher and parents still seem to be concerned that this is not consistent with the teaching of phonics, which is just not correct.

Learning the unique letter names of the alphabet is a pre-phonics skill; as well as an early learning goal. It has to be remembered that a letter is a shape which only represents a sound when it is placed within a word or sentence (has a context). Also, a letter or combination of letters can represent more than one sound and so the only unique way of identifying alphabet letters when we talk about them is to use their names.

It is important to remember that just because a child can correctly recite the ‘Alphabet’ song it does not mean they know the letters of the alphabet. It is surprising how many children can do this but when shown letters from the alphabet cannot name them at all. They may be able to tell you the sound the letter makes but have no idea of the letters name.

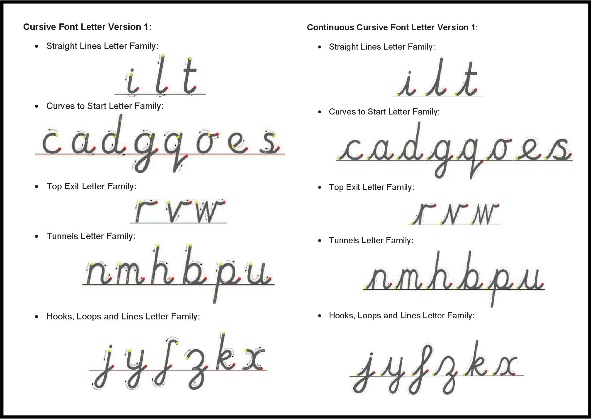
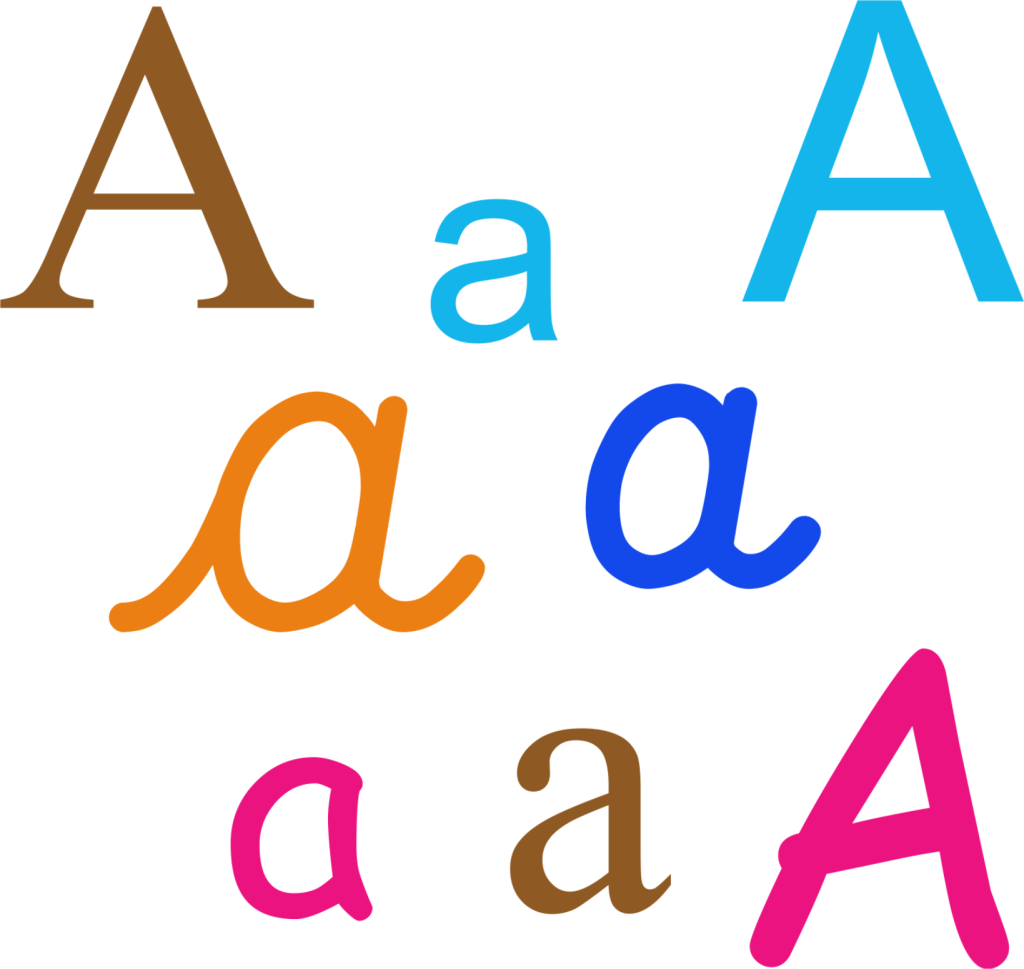
Learning the correct letter names helps to reinforce that when talking about the letter ‘a’ (ay) for example it has a set shape regardless of the sound that it will be representing in the word. This further supports children’s handwriting development as the communication of your requirements is unambiguous.

Teaching the correct letter names is important when supporting handwriting as this can in turn affect a child’s phonics understanding later on. For example, it can seem very easy when explaining to a child which letter to write when they ask which one is making a ‘kuh’ sound in a word such as cat to say a ‘curly kuh’. There is no such letter in the alphabet called ‘curly kuh’ it is the letter ‘c’ (cee). By adding the ‘kuh’ sound to the letter it reinforces incorrect phonics knowledge. The letter ‘c’ does not make a ‘kuh’ sound in words such as: city, circle, cycle and centre.

Some children will then only ever refer to the letter ‘c’ as ‘curly kuh’ and the letter ‘k’ as’ kicking kuh’. As I say these are not letter names of the alphabet and also devalue the power of phonics at the same time.

How can the education establishment get hot under the collar about not using the correct terminology in the teaching of English in schools such as: phonemes, graphemes, digraphs, modal verbs etc… yet still refer to the letter’s ‘c’ and ‘k’ as ‘curly or kicking kuh’!

Phonics is a powerful decoding and encoding tool. However, so is the alphabet letter naming system. Both need to working side by side to support our children, especially in those early years of their educational journey.

The English phonic system is very complex but this is why our language is so rich. Young children need to use letter names as an additional tool, as it takes many years for them to be introduced to the more complex phonics coding system. Alphabet Name animation (scroll to the bottom of the page): https://www.teachphonics.co.uk/phonics-graphemes.html