Is Poor Body Posture or Pencil Grip Holding your Child Back?

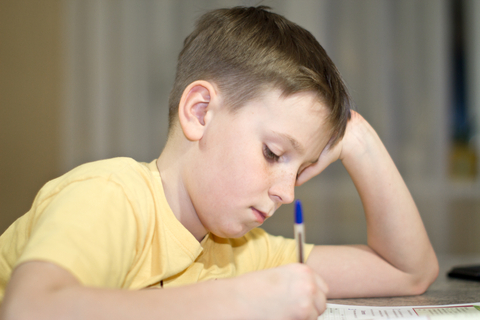
Boy writng head leaning on hand

We expect our children to sit and write at a desk for longer periods of time at school and this can become very challenging for some children.  Handwriting is a very physical task requiring good gross and fine motor skills. A weakness in either, or both, of these areas can be the reason for a child to struggle with longer handwriting tasks.

Our step by step flow chart will guide you through the possible causes. Start from the top and work through each stage, clicking on the boxes to take you to the relevant section of our website. Identify possible reasons for your child’s poor body posture or pencil grip and our suggestions on how to help them: http://bit.ly/2JJpvRq

Why it is important to correct a poor body posture and/or pencil grip?

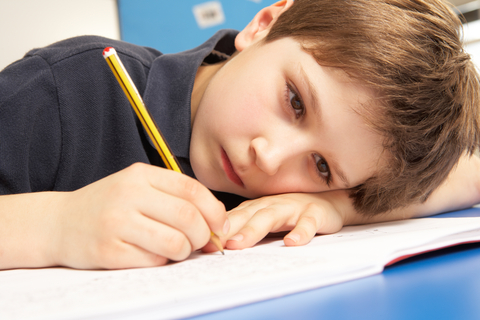
Children with a poor body posture often slouched over a desk, laying their head on the table or with their head propped up by their hand and arm, or pull their chair in so far that they can rest their tummy on the edge of the table to help them keep a more upright position. This can look as if they are bored and disinterested in what they are doing. However this is not generally the case.

A poor posture position is not always due to boredom or incorrect chair and table height. For many children it is a lack of body strength or core muscle tone (the large muscle groups that control shoulder stability and the trunk of the body that work to enable us to sit and stand upright for sustained periods of time).

This is bad for them, as it puts unnecessary strain on the body, causing neck or backache and discomfort, which in turn makes them fidget as they try to get comfortable. All this can distract them from the task in hand and limit their handwriting ability as it reduces their hand and finger movements.

Children with a poor pencil grip can find forming letters difficult and their handwriting can be slow or uncomfortable. We often talk about the most appropriate grip for handwriting being the tripod grip (if developmentally appropriate bit.ly/1s7XjNP); but this usually only refers to finger position. It is easy to forget the importance of the actual hand position in relation to the pencil and paper for handwriting.

The ideal position is for the hand, wrist and elbow to be below the tip of the pencil and under the writing line (this is roughly at 45 degrees to the table edge if the paper is tilted correctly: bit.ly/1GsZVJ6).

Some children will hold the pencil in a tripod grip but develop a hooked hand position (more commonly seen with left handed writers) or move the elbow too far up the table, causing the forearm and wrist to be nearly horizontal with the table edge, because they feel they can see what they are writing better.

A hooked grip puts unnecessary strain on the hand ligaments and forces the body into a poor sitting position, again putting extra strain on the body. This in turn makes handwriting a tiring and uncomfortable task, impacting on your child’s overall learning experience.

Handwriting Letter & Word Spacing Issues

letter spacing

Some children find it difficult to space their letters in words correctly and to show spacing between words. Our step by step flow diagram chart will guide you through. Start from the top and working through each stage, clicking on the boxes to take you to the relevant sections of our website. Identify possible reasons for your child’s letter and spacing issues and provides suggestions on how to help them: http://bit.ly/2HtASwa

General Tips on Improving Handwriting Letter & Word Spacing:

  • Using a piece of your child’s writing talk through it together, as this may help you to better understand what it is your child sees. Asking the following kind of questions and discussing the answers will help:
    • Can you read this to me?
    • Which letters do you think make the word/s?
    • Where does one-word end and another one start?
    • Can you show me the line you think the word should sit on?
    • Where would you start your next line of writing?
    • Which letters do you think are sitting on the line correctly?
    • What gap size between letters in a word looks best?
    • What gap size between words in a line of writing looks best?
  • It may help to have some other examples of writing (even some you have done yourself) so that different gap and spacing sizes can be compared. Ask your child to pick the piece of writing they think looks best and seems easier to read.
  • What they see and understand may be very different to what you are seeing and thought they understood.
  • An explanation of how letters sit, close together in a word, may need to be discussed with your child as they may not have understood this. It is often presumed they naturally pick up and understand this writing rule.
  • Once the understanding of letter spacing in words has been taught, the larger spacing between individual words is next. Often children are told to leave a finger space between each word, this is fine when a child is small and has little fingers but is not always the case. An alternative is to provide your child with an appropriate sized flat tool which they can place on the paper at the end of a word as a guide to how much space is to be left before writing the next word. Over time they will not need the tool as they have developed the spatial awareness skill for the distance needed to be left between words.
  • The ideal space size between words is the size of one of their lower case letters.
  • It is also useful to talk about the blank space between lines and on the page in general. Explain that these spaces and gaps help with presentation of the work so that it can be seen and read more easily.
  • The correct paper tilt can help a child who is finding it hard to start each line of writing at the margin.
  • Seeing the writing line properly over a whole page can be difficult for some children. Use paper with a different colour line such as red, green, blue or yellow or even black/blue lines on coloured paper.
  • Paper with raised lines may help others as they feel the slight raise in the paper as they write, guiding them as to the position of the line.
  • Coloured line grids and picture clues can help children learn to position letters correctly on the line and in relation to each other.


Helping to Overcome Handwriting Difficulties

Boy writing with head on table

It can be very difficult to understand why a child is struggling with their handwriting.

Where do you start?

We have designed four flow charts to help you. These flow charts take you logically through the key strengths and skill sets required for handwriting. This allows you to discount those areas in which the child is working well, so that you can work more specifically on the key areas in which the child really needs extra support.

By clicking on the flow chart boxes, you are taken to website pages that support that particular area so you can decide whether it is a skill set that needs to be worked on more or not.

The Handwriting Difficulties Page explains the four difficulty areas that our flow charts cover so that you can follow a chart that best suits your requirements: bit.ly/1CyFA7k