Teaching Letter Joins – A Systematic Approach

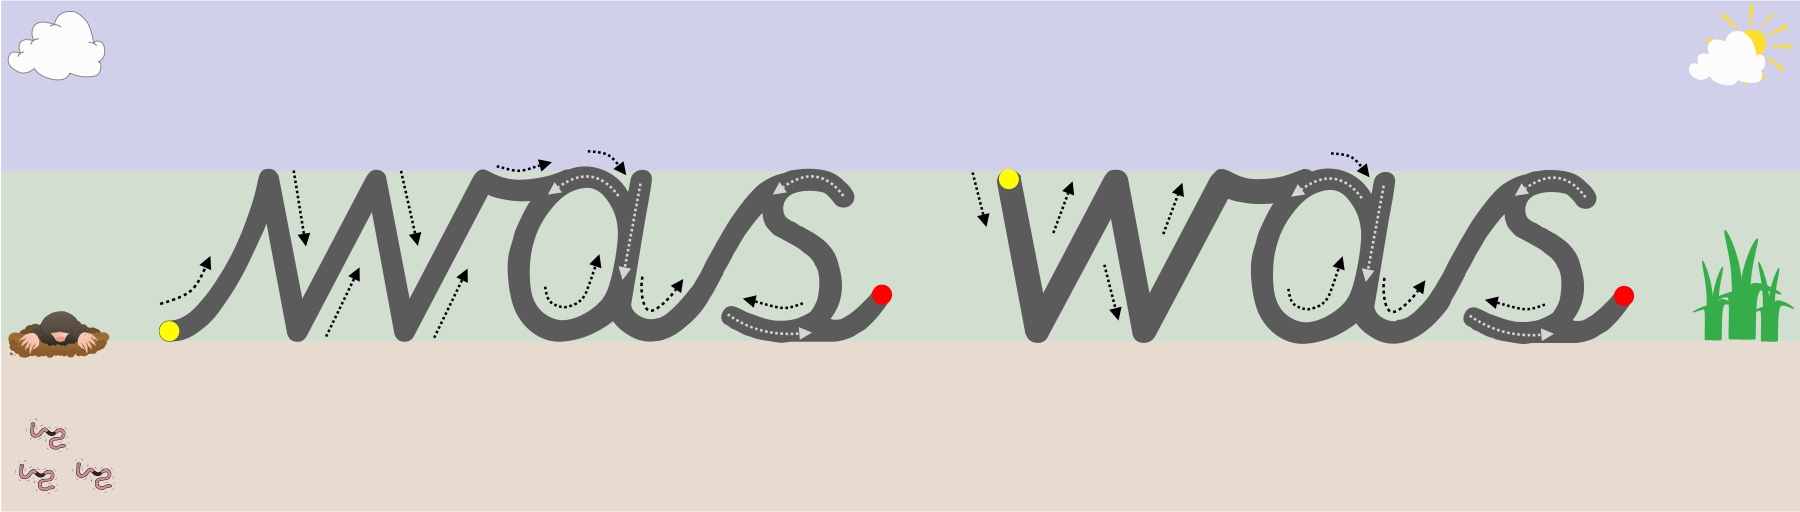
We would recommend teaching joins in join type groups, whether your child has learnt cursive or continuous cursive single letter fonts.

Teaching the join types in their groups helps a child to understand the directional pushes and pulls required to successfully join the different letter combinations.

There are 4 main groups of letter joins; bottom joins, bottom to “c” shape joins, “e” joins (top and bottom join strokes) and top joins.

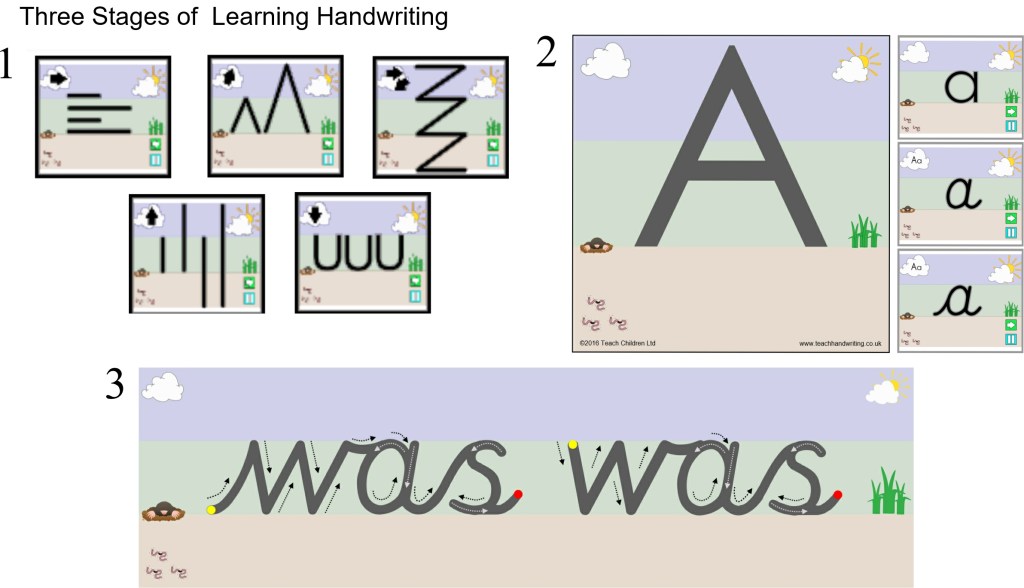
Moving from Cursive Single Letters to Joining

There are seven join strokes to be taught. Most children will find the bottom joins the easiest to achieve, as it only requires the extension of the exit stroke they already put on the letters. The bottom to “c” shape joins can be tricky at first but soon mastered. The joins that tend to cause the most confusion and difficulty are the “e” joiners and top exit joiners.

I would recommend teaching the bottom joins first, then the ‘e’ joins and finally the top exit letter joins.

Moving from Continuous Cursive Single Letters to Joining

There are three join strokes to be taught. The easiest is the bottom exit letters (the majority of the letters), all a child has to do is write the letters closer together without lifting their pencil off the paper. Only the top to “e” and top joiners need to be taught for continuous cursive, as the nature of the font style means that the lead-in and exit strokes needed to join the majority of letter combinations have already been taught.

I would recommend teaching the bottom joins first, then the top exit to ‘e’ join and finally the top exit letter joins.

The ultimate aim is for a child to develop a good handwriting style; which means;

•     They can produce and maintain a good speed

•     Have a fluid hand movement that is comfortable

•     Letters are of a consistent and appropriate size, positioned correctly

•     Handwriting is legible (so others can read it easily).

It is important to remember that for some children (mainly SEND pupils) this may mean that they will always print or use a single letter form of writing as learning to join is just not appropriate. But that does not mean they will not comply with the bullet points above.

Have you got your Free Join Animations & Worksheets?

For Teachers: https://teachhandwriting.co.uk/key-stage-2-handwriting-routes.html

For Parents: https://teachhandwriting.co.uk/parents.html

The Three Stages to Learning #Handwriting

There are three distinct stages for children to progress through to develop a good handwriting style:

Stage 1 – Pre-handwriting Patterns

Pre-handwriting patterns support a child towards handwriting success. They help the them to learn the shapes and directional pushes and pulls required to form letters. All letters are a combination of these shapes and lines.

Stage 2 – Single Letter Formation

For children to develop a good handwriting style it is important to learn how to form the letters correctly.

Beginning with lower-case letters and only the capital letters for the first letter in a child’s name, examples: Peter Rabbit, Sally Green, George Blue or Mary Shell.

Learning the correct lower-case letter formation also makes the transition from single letter formation to joined letter handwriting much easier.

Stage 3 – Joined Handwriting

Learning to join letters for handwriting enables children to develop a speedy, fluid and legible handwriting style.

Letter and Join Formation Issues

Single Letter Formation

Some children will have poor letter formation skills because they have missed or just have not been taught how to form their letter correctly.

If your child is struggling with correctly forming their single letters, it can be a good idea to take a step back and check that they can form the pre-handwriting patterns. You might find that they are struggling with some of the line directional pushes and pulls that the patterns support in developing and are needed for forming letters – Parents: https://teachhandwriting.co.uk/parents.html Teachers: https://teachhandwriting.co.uk/pre-handwriting-patterns.html

It is surprising how often the pre-handwriting patterns stage in developing handwriting is skimmed over or just missed out completely.

Unfortunately, the pressure on school to focus on phonics and introducing handwriting as part of the scheme means that children who cannot draw or have experienced pre-handwriting patterns are being asked to form letters. I can’t work out the logic of this approach.

If you take a close look at your child’s lower-case single letter formation you may find that it particular letters that they struggle with.  What you may find is that these letters fall into certain letter family group. So, I would recommend working on the letter family in which the child has the most letter formation difficulties first.

If it is all the letter of the alphabet then I suggest teaching the letter families in the order shown on the website – Parents: https://teachhandwriting.co.uk/parents.html Teachers: https://teachhandwriting.co.uk/key-stage-1-handwriting-routes.html

We recommend focusing on developing a child’s lower-case single letter formation skills first as this about 95% of letter usage they need for writing and reading. Then introduce capital formation.

Why do some children struggle with letter reversal issues?

It is normal for young children to reverse letters and numbers when writing. This should stop by the time they are 6 /7 years old.

Older children can reverse their letters and numbers, when writing, for the following reasons:

  • They have poor visual and motor memory skills and so can’t remember how to form the letters correctly.
  • They have poor bilateral coordination skills.

Games and activities can help them overcome these issues: https://teachhandwriting.co.uk/games.html and https://teachhandwriting.co.uk/warm-ups.html

Teaching the letters in letter families can reduce letter reversal as the reinforcement of the pencil movements helps cement the letter shapes in the visual and motor memory.

We have grouped the letters together in families based on their shape and the directional pushes and pulls of the pencil needed to form them.

By teaching the letters in these families the letters that are most commonly reversed such as ‘b’ and ‘d’ are in different letter families as their start points and initial pushes or pulls of the pencil for them is different, so are reinforced, making it easier for your child to remember them.

Joining Issues

Some children struggle with learning to join because:

  • They may not be forming the single letters correctly. It is best to correct their single letter formation first before moving on to tackle any joining issues. You may find once they have corrected their single letter formation, many of the joining issues have rectified themselves.
  • Some children will find the join strokes a little tricky to start with, so try using the joins section in pre-handwriting patterns to help them learn the additional pencil strokes needed.
  • Some children may not remember which join strokes to use. So, teach the joins in groups, and build up their confidence by starting with the easiest joins – Parents: https://teachhandwriting.co.uk/parents.html Teachers: https://teachhandwriting.co.uk/key-stage-1-handwriting-routes.html
  • Begin by joining 2 or 3 letters together at a time rather than long lines of joins that go across the page. It is best to match the number of letters joining to a sensible word length.
  • Remind your child that the aim is not to take their pencil off the paper until the number of letters in a word has been completed, then they dot the i’s and j’s and cross the t’s and x’s.