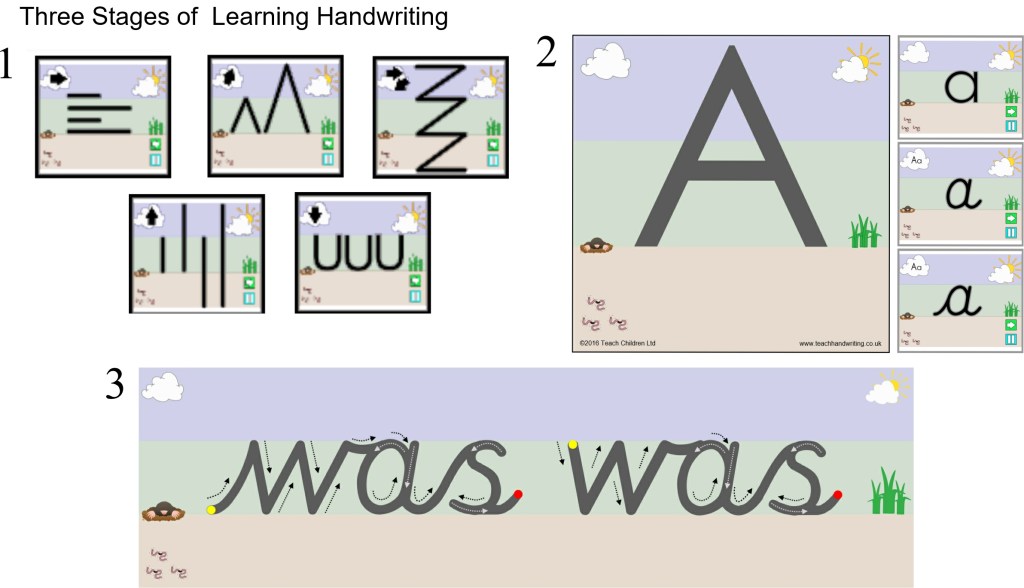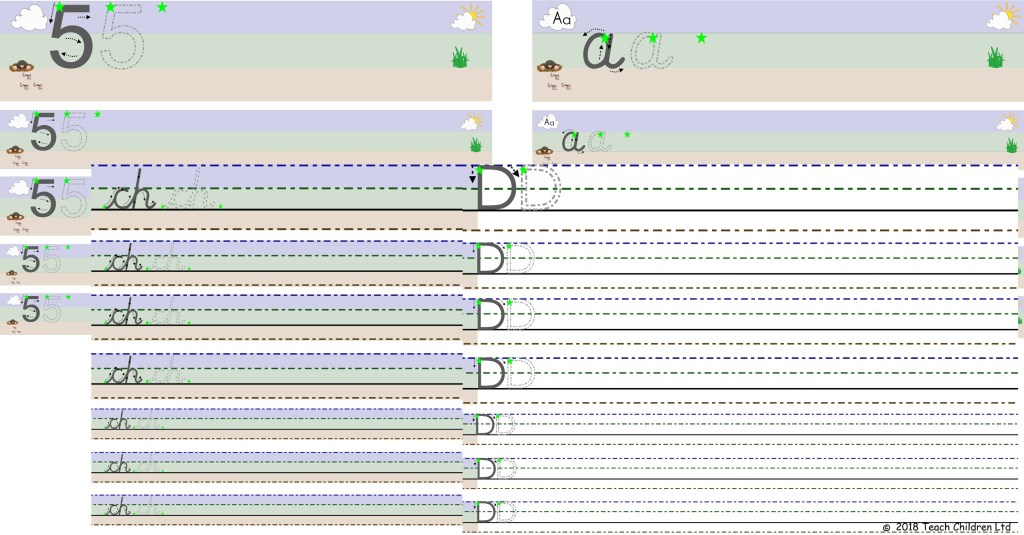

Here at Teach Children we believe that a child is only ready to start learning to join their handwriting when:
- They have learnt to form all 26 single lower-case letters correctly.
- Letters are of a consistent and suitable size (not necessarily the perfect size, remember big is beautiful).
- Letters are positioned appropriately on the writing line as well as in relation to one another.
The “Department of Education; The writing framework: July 2025; page 33; https://www.gov.uk/government/publications/the-writing-framework , for Year 2 states:
“Joined handwriting should not be taught until pupils can form these unjoined letters (print forms) correctly and consistently.”
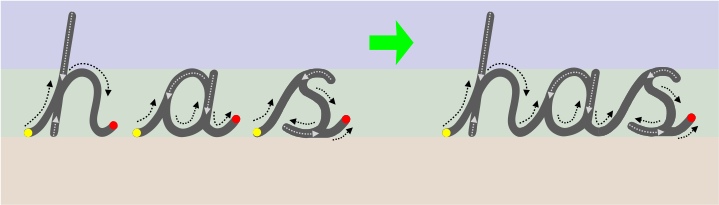
This suggests that schools need to ensure children can write all their letters in a print from before moving to a single letter cursive or continuous cursive joining form. This view is further supported on page 34 where it states:
“There is no expectation that schools teach lead-ins for joined handwriting from the start and the national curriculum does not require this, but some schools continue to do this. If they do so, they should also consider teaching unjoined handwriting for specific tasks, such as labelling a diagram or data, writing an email address, or for letters in algebra.”
I don’t believe this is something new, just a reminder of the handwritten convention for labelling and mathematical notation.
Children generally begin to learn how to join letters between the ages of 6 to 7 years old, depending on the handwriting font style being taught. Those taught a continuous cursive font style for instance will tend to join much earlier due to the nature of this font.
Children do not need to be able to remember how to correctly form all their capital letters before they are taught how to join their letters. This is because capital letters never join to the lower-case letters in a word. However, for these children correct capital letter formation needs to be taught alongside the introduction of letter joins.
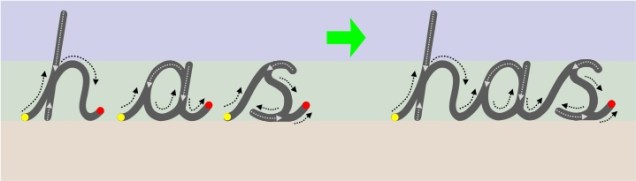
We would recommend teaching joins in join type groups, whether your child has learnt cursive or continuous cursive single letter fonts.
Teaching the join types in their groups helps a child to understand the directional pushes and pulls required to successfully join the different letter combinations.
Have you got your Free Join Animations & Worksheets?
For Teachers: https://teachhandwriting.co.uk/key-stage-2-handwriting-routes.html
For Parents: https://teachhandwriting.co.uk/parents.html